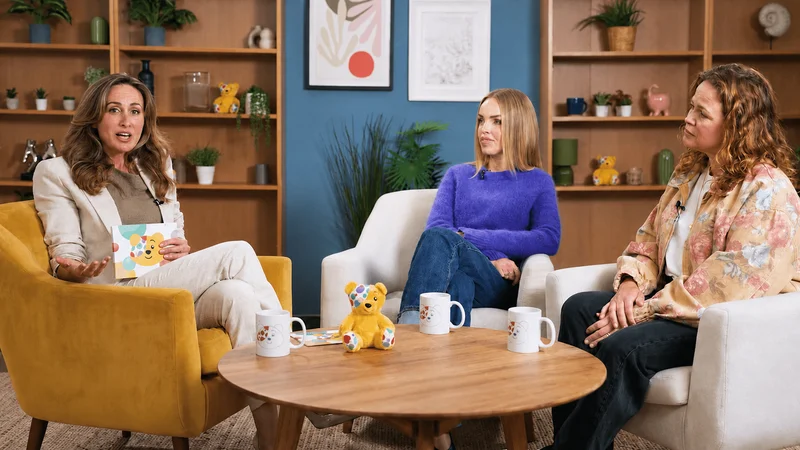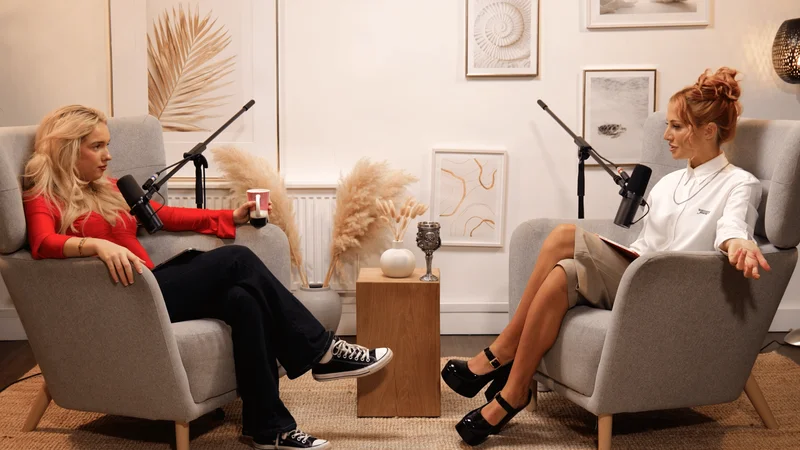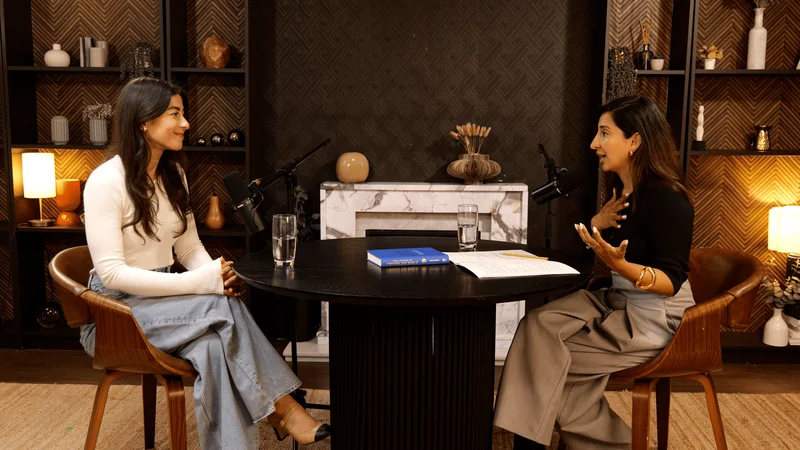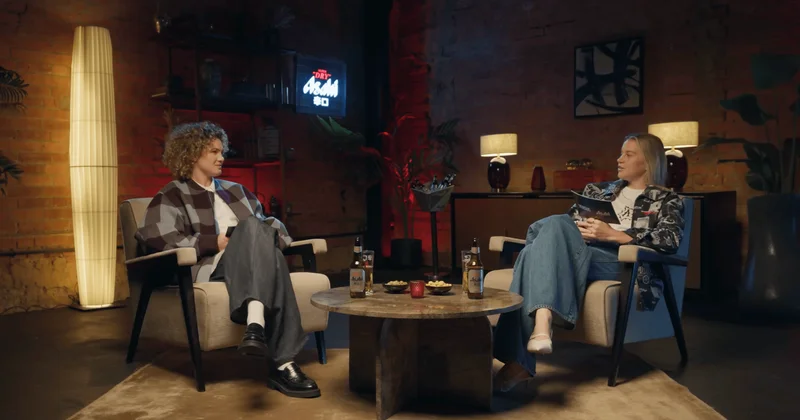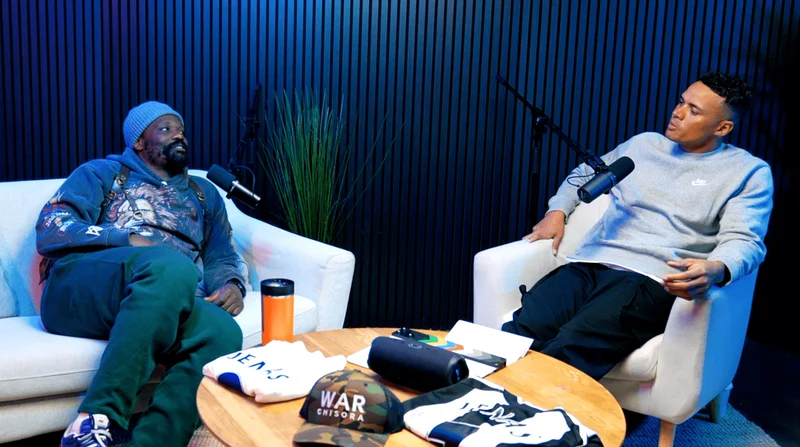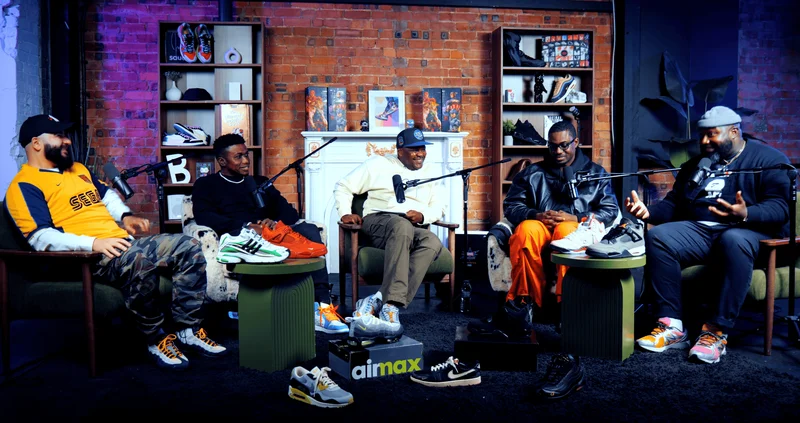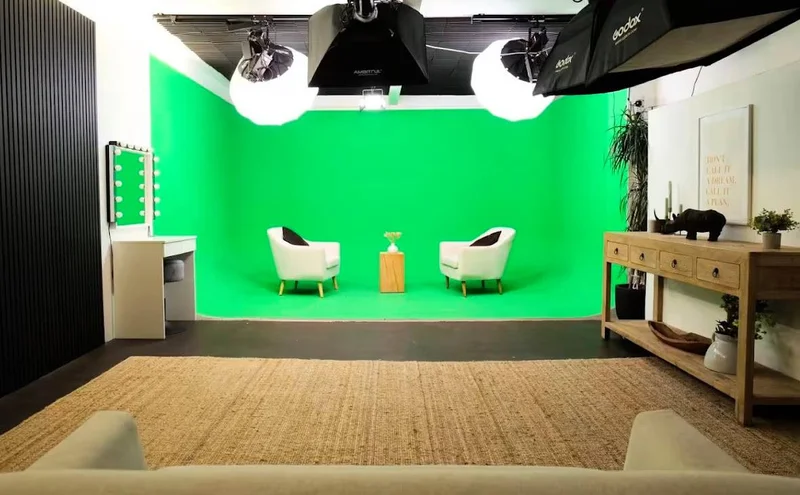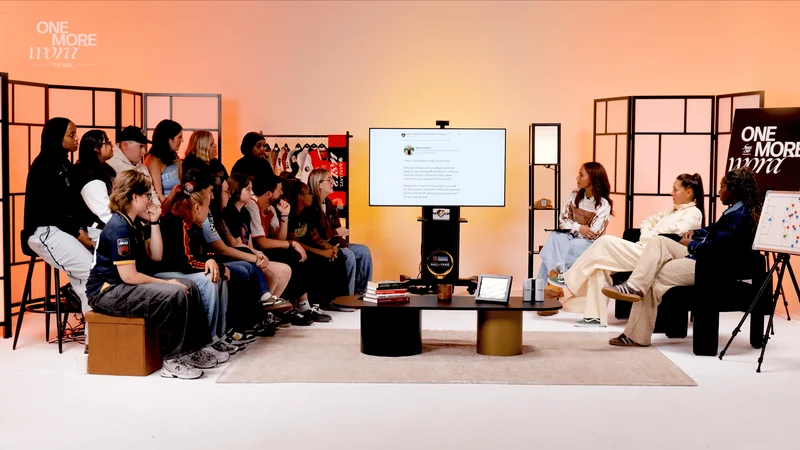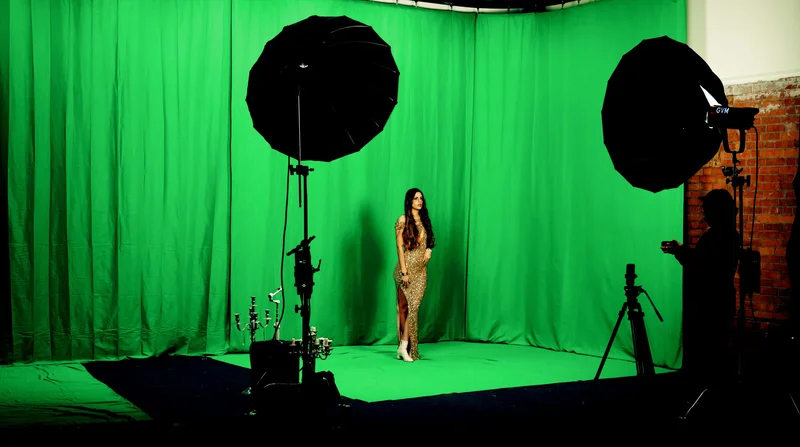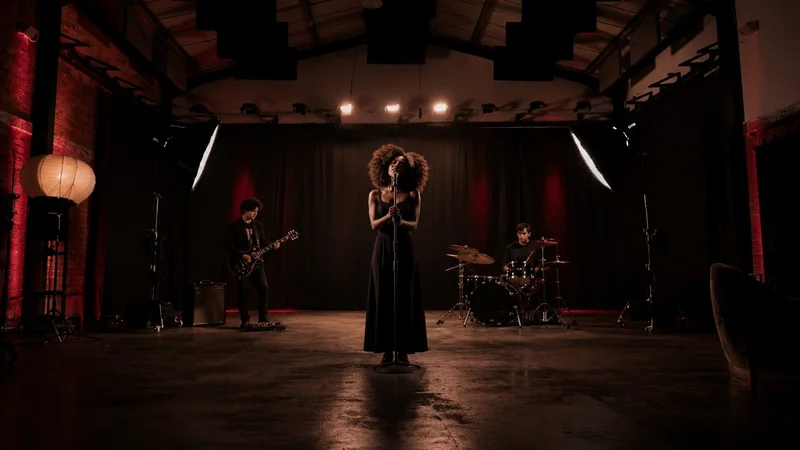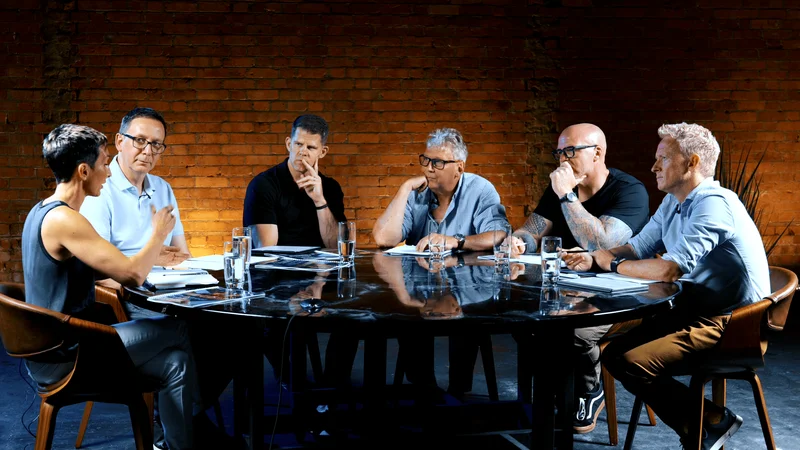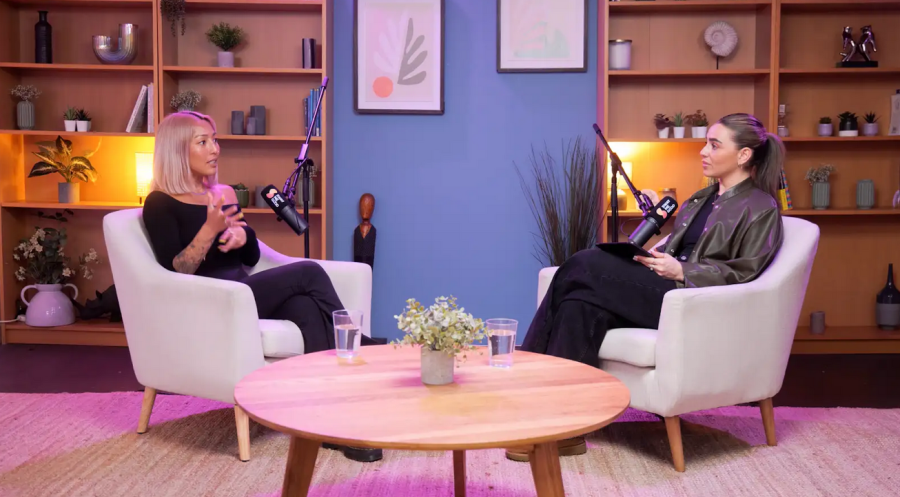
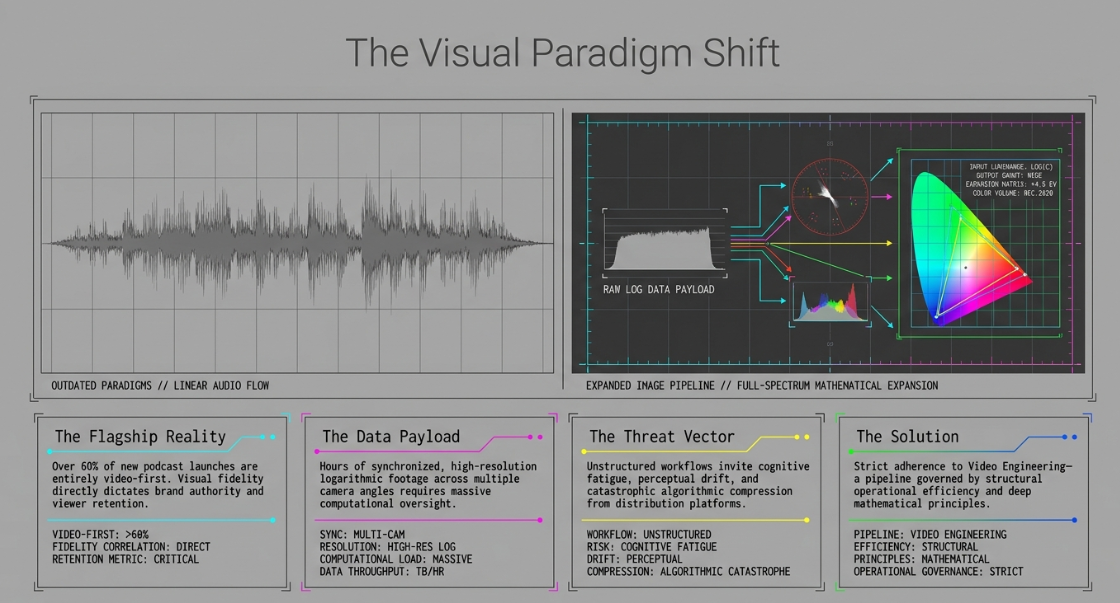
The convergence of traditional broadcasting and digital podcasting has catalyzed a sweeping paradigm shift across media production. In the contemporary digital landscape of 2026, the video podcast is no longer a secondary byproduct of an audio recording; it is often the flagship media property for modern content creators and enterprise brands. With recent data indicating that over 60 percent of new podcast launches are entirely video-first, the visual fidelity of these productions directly correlates with perceived authority, brand value, and overall audience retention.1 As audiences increasingly consume long-form conversational content on high-resolution, color-managed displays, the post-production pipeline for a professional video podcast requires an exhaustive approach to video engineering. This encompasses stringent color management, advanced secondary grading, multi-camera shot matching, and rigorous quality control.
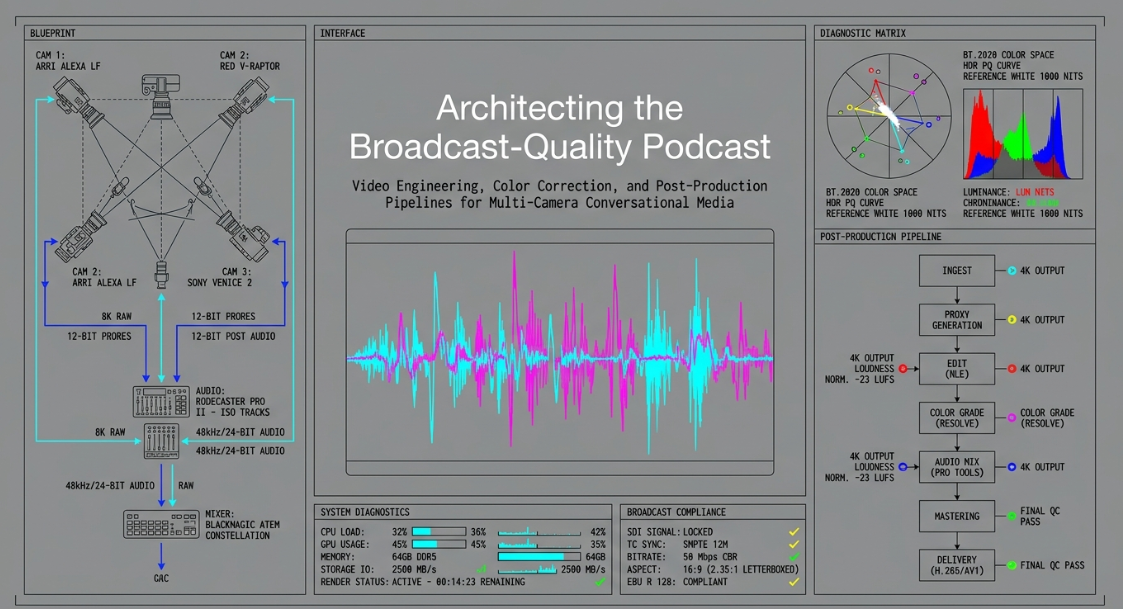
The transition from a raw, multi-camera studio recording to a polished, broadcast-safe master file is governed by both structural operational efficiencies and deep technical principles. Professional editors and colorists must navigate massive data payloads—often hours of high-resolution, logarithmic footage spanning multiple camera angles—while combating cognitive fatigue, perceptual drift, and strict algorithmic compression constraints imposed by distribution platforms like YouTube and Vimeo.2 This document details the technical mechanisms, physiological considerations, and software-agnostic principles necessary to execute high-end color and finishing workflows for multi-camera video podcasts. The following sections will deconstruct the entire visual finishing process, from the initial architectural setup of the color correction environment to the final mathematical compliance required for global distribution.
COLOR CORRECTION WORKFLOWS
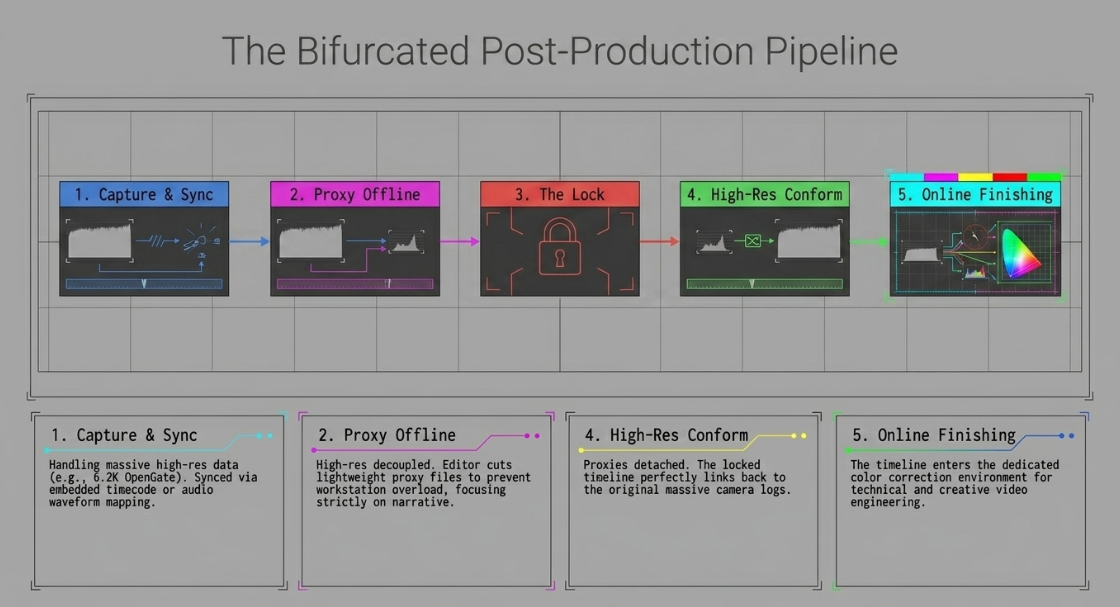
In professional post-production, the color correction workflow represents the critical transition from the offline editorial phase to the online finishing phase. For long-form video podcasts, which often feature hours of multi-camera footage requiring precise synchronization and cutting, architectural organization is paramount. The traditional, unstructured approach—where an editor attempts to evaluate footage, make narrative cutting decisions, and refine visual color grades simultaneously—creates severe cognitive friction and operational inefficiencies.3 Professional workflows strictly bifurcate the cutting and grading processes to optimize computational resources and human focus.
Initial editorial passes are typically executed utilizing lightweight proxy files. When handling modern high-resolution formats, such as 6.2K OpenGate from cameras like the BMPCC6K, real-time playback of synchronized multi-camera angles will catastrophically overload most desktop workstations.4 Generating proxy media dramatically reduces the computational load, allowing the editor to switch seamlessly between angles in a multi-cam sequence.5 Synchronization is typically achieved using embedded timecode (via hardware devices like Tentacle Sync) or by analyzing audio waveforms. However, due to the occasional unreliability of timecode drift over long recordings, waveform synchronization against a master audio track (such as a Zoom H6 mix) remains a highly reliable fallback mechanism.4 Once the narrative structure is locked, the proxy files are decoupled, and the timeline is conformed back to the high-resolution camera originals for the color grading phase.
In node-based non-linear editing (NLE) and finishing systems like DaVinci Resolve, the application of color data must be handled systematically to avoid redundant manual labor. The architecture of grade application is generally divided into local, remote, and grouped structures.6 Local grades apply color metadata exclusively to a specific, isolated clip instance on the timeline.6 For narrative films with unique lighting setups per shot, local grading is standard practice. However, for a video podcast where a single continuous camera angle of a host is chopped into dozens or hundreds of discrete timeline events, local grading is incredibly inefficient.6
Remote grades solve this inefficiency by binding the color correction data directly to the source media file in the media pool rather than the segmented timeline instance.6 When a primary correction is applied to the host's wide shot using a remote grade, that mathematical adjustment instantaneously propagates across every iteration of that source file throughout the entire episode.7 If the podcast features a two-hour interview, the colorist grades the master angle once, and the software updates every corresponding cut.
Furthermore, advanced node-based compositing systems allow for the use of Shared Nodes or Grouping structures to maintain consistency across complex node trees.8 By assigning specific cameras to distinct groups (e.g., "Host Camera A," "Guest Camera B"), grading operations are compartmentalized into Pre-Clip, Clip, Post-Clip, and Timeline levels.
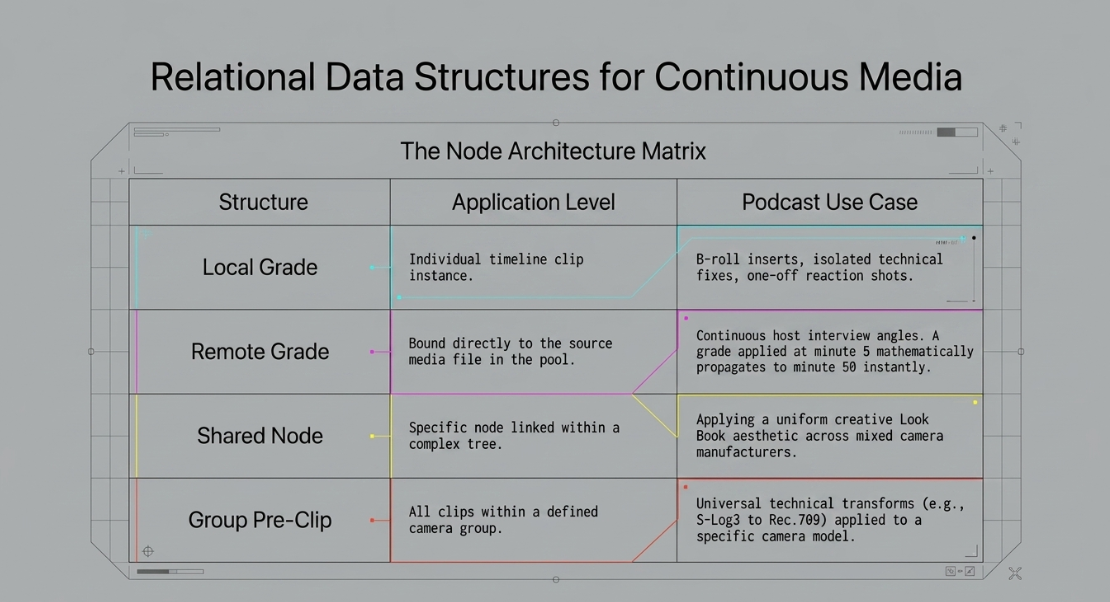
By architecting the workflow using these relational data structures, the video engineer minimizes manual repetition. This ensures that an adjustment to a host's skin tone in the fifth minute of the podcast perfectly mathematically matches their appearance in the fiftieth minute without requiring manual copy-and-paste operations.
SETTING UP A COLOR CORRECTION ENVIRONMENT
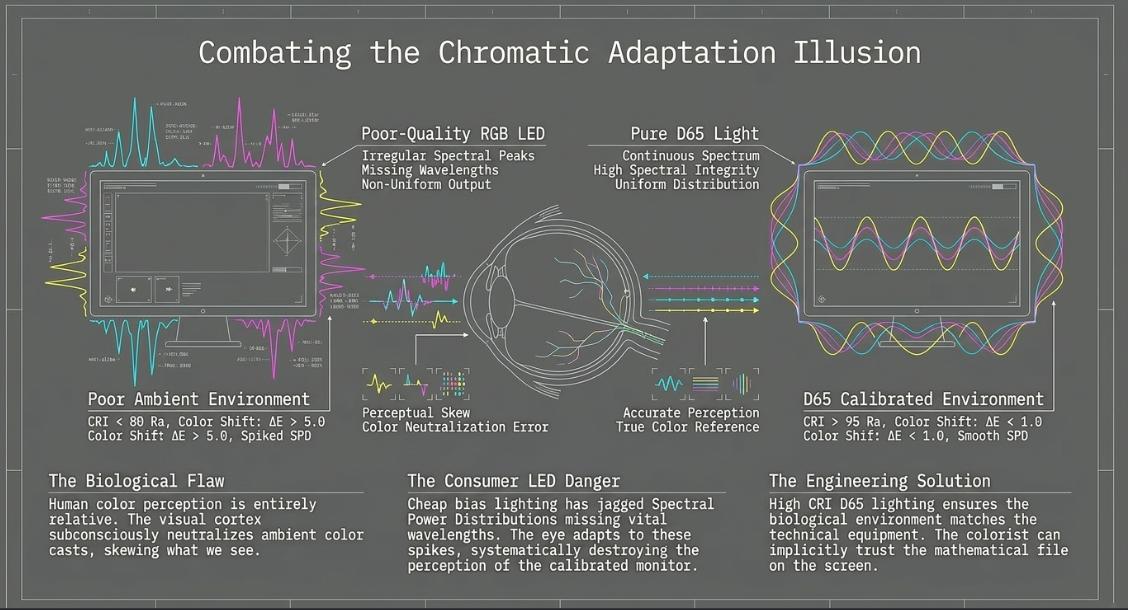
The physiological limitations of the human visual system dictate that color perception is entirely relative. The ambient environment in which grading occurs significantly alters the optical interpretation of the display.10 Without strict environmental controls, a colorist will suffer from chromatic adaptation—a biological phenomenon where the visual cortex subconsciously neutralizes ambient color casts, thereby systematically skewing the perception of the monitor's output.11
A professional color correction suite is engineered explicitly to neutralize environmental variables, establishing a pristine baseline for optical evaluation. The foundational element of this environment is bias lighting.11 Placing a highly accurate light source behind the reference monitor illuminates the wall directly behind the screen, establishing a diffuse halo of neutral illumination.12 This neutral reference anchor prevents perceptual drift and significantly mitigates the pupillary fatigue caused by staring at a luminous display in an otherwise pitch-black room, enhancing the viewing experience and supporting prolonged viewing comfort.12
However, standard consumer RGB LED strips are wholly inadequate for this application. Consumer lights exhibit jagged, discontinuous Spectral Power Distributions (SPD) and often lack critical color wavelengths.11 This causes chromatic adaptation shifts, where the human eye adapts to the specific spectral peaks of the cheap bias light, ultimately skewing how colors are perceived on the calibrated display.11 A professional bias light must possess a high Color Rendering Index (CRI) exceeding 90 Ra, per SMPTE specifications, with high-end modern solutions like MediaLight achieving 98 to 99 Ra.11 The correlated color temperature must adhere strictly to the CIE standard illuminant D65, targeting exact chromaticity coordinates of 

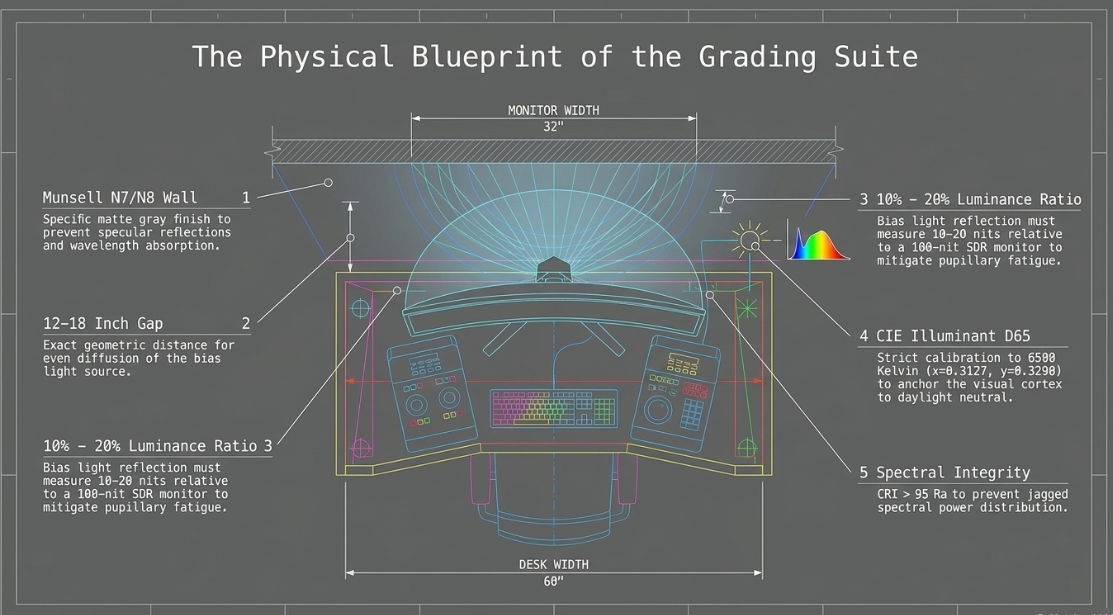
The physical geometry and optical properties of the room itself must also be standardized. The bias light should be positioned exactly 12 to 18 inches behind the display to ensure an even diffusion of light, preventing localized "hotspots" that distract the eye.11 The wall behind the monitor should be painted a highly specific, spectrally flat matte gray—the industry standard being Munsell N7 or N8.11 This specific finish prevents specular reflections and ensures that the wall does not selectively absorb or reflect specific wavelengths, which would instantly contaminate the pure D65 bias light.11
Finally, the luminance output of the bias light must be strictly calibrated against the peak white of the reference monitor. For Standard Dynamic Range (SDR) grading, where the reference monitor is typically calibrated to a peak white of exactly 100 nits, the bias light reflecting off the Munsell wall should measure roughly 10% to 20% of that peak luminance, equating to 10 to 20 nits.11
This highly controlled physical environment ensures that the visual baseline remains absolute.14 By aligning the biological playing field with the technical equipment, the colorist can implicitly trust that the data presented on the screen is an accurate representation of the underlying mathematical file, entirely free from the distortions of optical illusions.
PRIMARY CONTRAST ADJUSTMENTS
Primary corrections focus entirely on establishing the foundational geometry of the image's luminance and chrominance before any creative styling or secondary isolation is applied. The objective of this phase is to create a neutral, mathematically sound baseline.15 The very first stage of this baseline construction is the primary contrast adjustment, which dictates the dynamic range and precise exposure mapping of the video signal.16
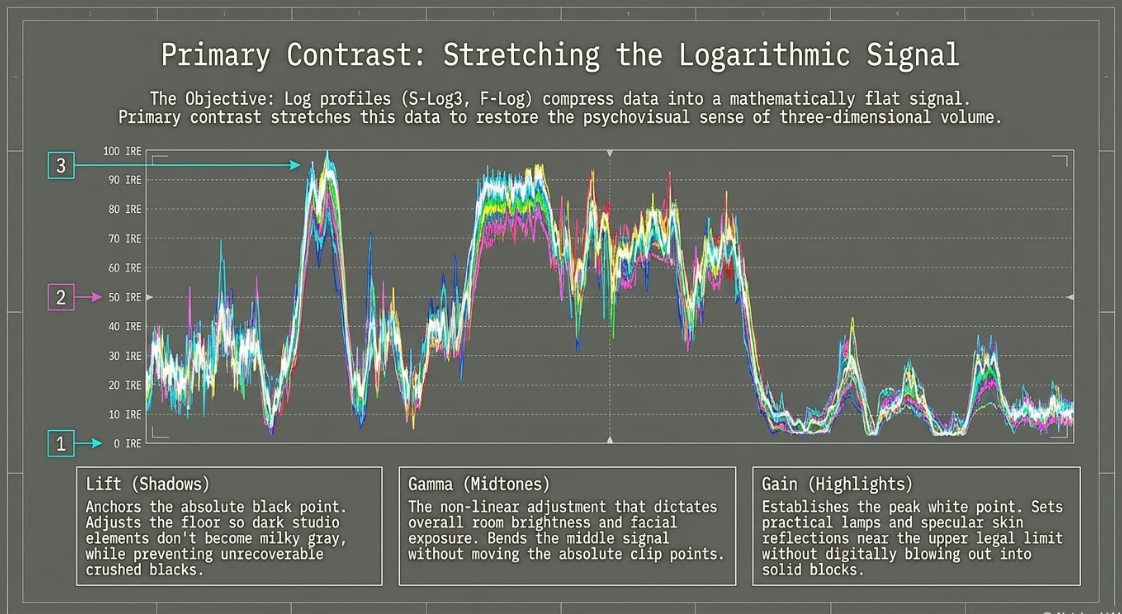
Contrast is visually perceived by the audience as sharpness, volume, and depth. In modern podcast production, footage is often captured using logarithmic camera profiles (such as Sony S-Log3 or Fuji F-Log).18 These proprietary sensor profiles compress the signal to maximize the captured dynamic range, resulting in a mathematically flat, washed-out, low-contrast image straight out of the camera.19 Translating this raw logarithmic data into a linear display space (such as Rec.709) requires expanding the signal through targeted adjustments or mathematical Input Look-Up Tables (LUTs).15 The goal is to stretch the signal so that the darkest pixels approach pure black and the brightest pixels approach pure white, without prematurely clipping vital information.17
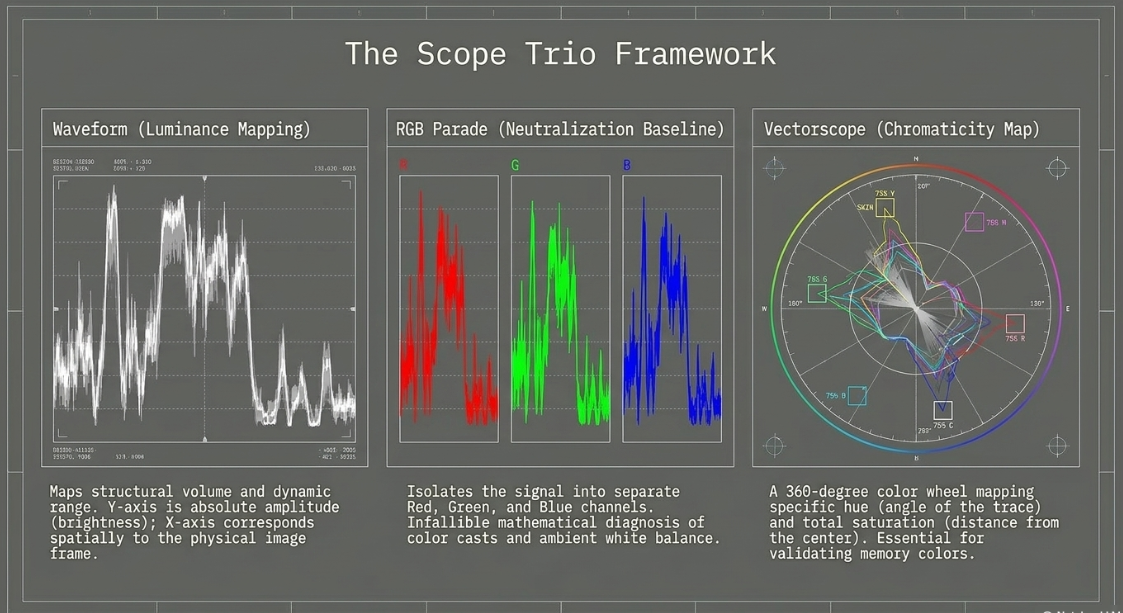
This delicate process is strictly guided by the Waveform monitor scope. The Waveform provides a direct mathematical map of the structural luminance of the video signal. The horizontal x-axis of the scope correlates directly to the spatial x-axis of the recorded image, meaning pixels on the left side of the frame appear on the left side of the scope.20 The vertical y-axis represents the luminance amplitude, tracking from total darkness at the bottom to peak brightness at the top.20 Furthermore, the brightness or intensity of the trace itself indicates pixel density; a bright glowing cluster on the scope denotes a large physical area of the image sharing that exact luminance value.20
When establishing primary contrast for a video podcast, the baseline adjustments typically utilize the industry-standard Lift, Gamma, and Gain mathematical model:
Lift (Shadows): Anchors the absolute black point of the signal. Adjusting the lift moves the bottom of the waveform trace up or down. Proper lift adjustment ensures that the darkest parts of the podcast studio set do not become a "milky" elevated gray, nor do they crush entirely into unrecoverable zero-value black data.
Gain (Highlights): Establishes the peak white point. The gain is adjusted so that the brightest elements in the frame—such as practical background lights, windows, or specular reflections on skin—sit near the upper legal limit without digitally clipping or "blowing out" into a solid white block.
Gamma (Midtones): The non-linear adjustment that controls the distribution of values between the established black and white points. Modifying the gamma shifts the exposure of the host's face and the overall perceived brightness of the room. It does this by bending the middle of the signal without fundamentally altering the absolute black or white clipping points.
Proper primary contrast adjustment fundamentally dictates the perceived physical volume of the image. A mathematically flat image appears two-dimensional and unengaging to the viewer. Conversely, a properly expanded waveform creates a psychovisual sense of three-dimensionality, anchoring the viewer's attention squarely on the subject and establishing a professional aesthetic foundation.
PRIMARY COLOR ADJUSTMENTS
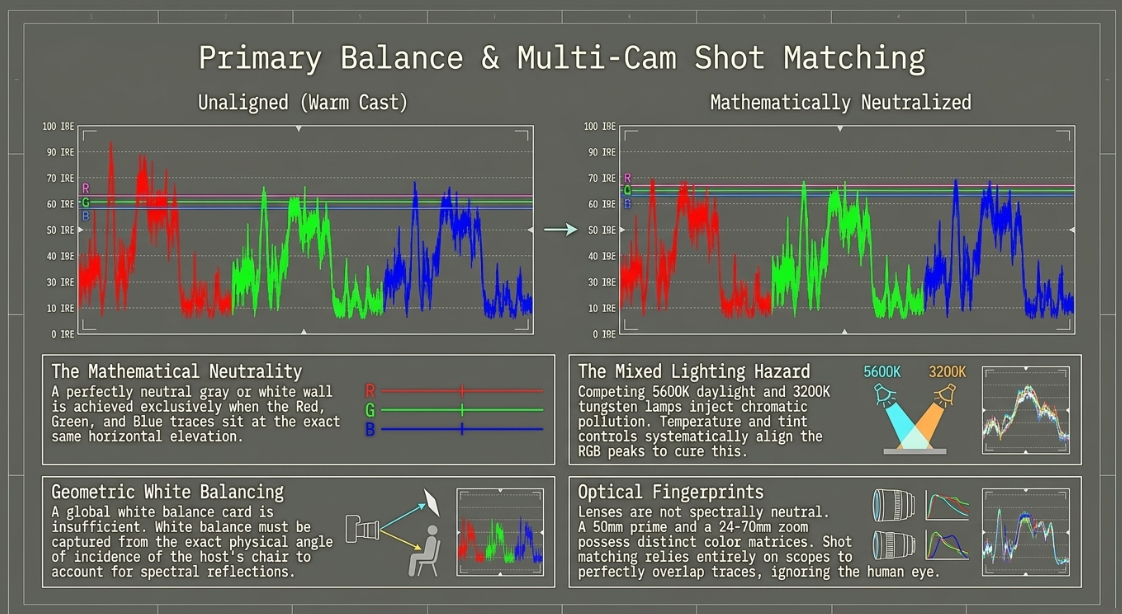
Once the luminance geometry is established and the contrast ratios are properly stretched, the next phase of the neutral baseline is the primary color adjustment. This phase is primarily concerned with establishing absolute white balance and ensuring the removal of any unwanted ambient color casts.16 The ambient color temperature of a video is heavily dictated by the physical lighting conditions present during the podcast recording.16 In a complex multicamera podcast studio, mixed lighting sources are a frequent hazard—such as a 5600K daylight window competing with 3200K tungsten practical lamps, or overhead fluorescent tubes injecting a sickly green spike into the spectrum. This introduces complex chromatic pollution into the sensor data.
The primary diagnostic tool for this operation is the RGB Parade scope. Unlike a standard luminance waveform that combines all light data into a single monochrome trace, the RGB Parade isolates the signal into three separate, dedicated channels—Red, Green, and Blue—displayed sequentially from left to right.20 Because pure white light is achieved through the perfectly equal combination of red, green, and blue light, the RGB Parade provides an immediate, infallible mathematical diagnosis of color neutrality.20 If a cluster of pixels represents a perfectly white wall or a neutral gray shirt, its trace will rest at the exact same horizontal elevation across all three color channels.23
However, if the trace on the Red channel is elevated in the highlights relative to the Green and Blue channels, the image contains a warm, reddish color cast in the bright areas.23 To neutralize this technical error, the colorist utilizes precise temperature and tint controls, alongside primary color wheels, to introduce the complementary color. By pushing the temperature slider toward blue (cooler) or the tint slider toward magenta, the colorist systematically aligns the tops of the three waveforms until they are perfectly parallel, thereby eliminating the cast.16
Increasingly, modern workflows incorporate Artificial Intelligence (AI) algorithms to expedite these initial balancing tasks. Tools such as Adobe Premiere Pro's AI color matching, Fylm.ai's NeuralToneAI, or CapCut's auto-adjust features utilize deep learning to analyze the frame and instantly propose a neutral baseline correction based on vast datasets of properly balanced imagery.24 While these AI tools provide a highly efficient starting point, professional video engineers always manually verify the results against the RGB Parade.
The primary color adjustment must be executed globally across the entire image. It is imperative that absolutely no localized stylistic choices or "looks" are applied at this stage.15 Providing a clean, technically accurate representation of the physical set and the host ensures that all subsequent creative adjustments react predictably.15 If the underlying primary signal is polluted with an uncorrected magenta tint from a cheap LED panel, any secondary adjustments, LUTs, or film emulations layered on top will inherently skew in unpredictable ways, leading to a severely degraded final output.
HSL QUALIFICATION AND HUE CURVES
With a mathematically balanced primary foundation firmly established, the workflow progresses into the granular realm of secondary color correction. While primary adjustments alter the entire image globally, secondaries involve targeting highly specific, localized areas of the frame based strictly on their independent Hue, Saturation, and Luminance (HSL) values.25 In a video podcast environment, secondary grading is routinely used to alter the specific color of a branded prop on a desk, suppress a highly distracting neon background element, or unify fluctuating, uneven skin tones on a guest's face.26
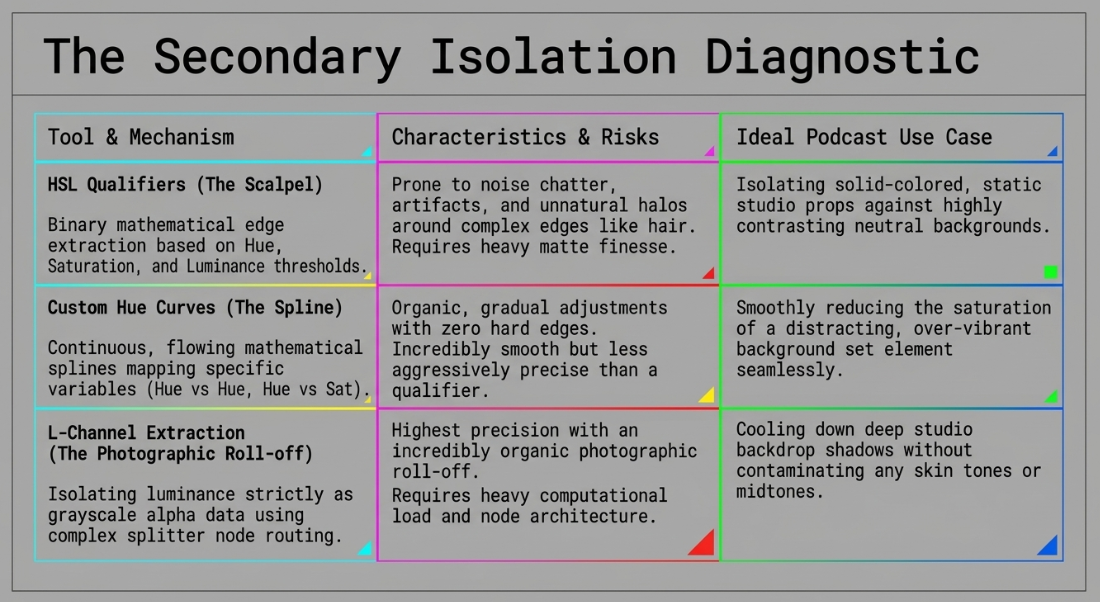
Traditionally, colorists utilize HSL Qualifiers to build an active matte or mask. A qualifier operates functionally like a digital eyedropper, sampling a specific range of pixels and isolating them from the rest of the image.26 However, standard qualifiers possess significant structural downsides. Because they create a hard, binary mathematical edge (a pixel is either selected or it is not), they act akin to a "surgeon's scalpel".28 This often introduces jagged artifacts, digital noise, and visual "chatter" on complex edges like human hair or highly reflective studio surfaces.28 To combat this degradation, the extracted matte must be heavily blurred, eroded, and manipulated using a myriad of Matte Finesse controls, which can inadvertently lead to unnatural, glowing "halo" effects around the subject.28
Advanced finishing workflows strongly favor a more topological, organic approach utilizing Custom Curves, specifically the Hue vs. Hue, Hue vs. Saturation, and Luminance vs. Saturation tools.27 These curves allow the colorist to gently sculpt the image data. For example, by placing a control point on the specific blue hue of a host's shirt on a Hue vs. Saturation curve, the saturation of that exact blue can be smoothly dragged down.29 Because the curve represents a continuous, flowing mathematical spline rather than a hard cutoff threshold, the transition from the adjusted blue shirt to the surrounding colors is incredibly gradual and entirely invisible to the viewer.28
For extreme precision where curves are insufficient but qualifier artifacts are unacceptable, modern node-based logic employs advanced color space transformations and targeted channel extraction.28 By converting the image from an RGB color space into an HSL or HSV color space using a specific Transform node, the colorist can deploy a Splitter node to isolate the Luminance (L-channel) purely as grayscale data.28 This pure grayscale data can then be routed directly into the Alpha channel of a subsequent grading node.
This sophisticated alpha extraction technique allows the colorist to apply a grade exclusively to a specific tonal range—such as cooling down only the absolute darkest shadows of the studio backdrop—with an incredibly organic, photographic roll-off that standard HSL qualifiers simply cannot replicate.
SHAPES
When algorithmic color selection via HSL vectors is insufficient to isolate an element—perhaps because the host is wearing a shirt that is the exact same color as the background set—spatial isolation is required. Shapes, commonly referred to as Power Windows or masks, allow the colorist to draw geometric or custom polygonal boundaries around specific physical regions of the frame.30
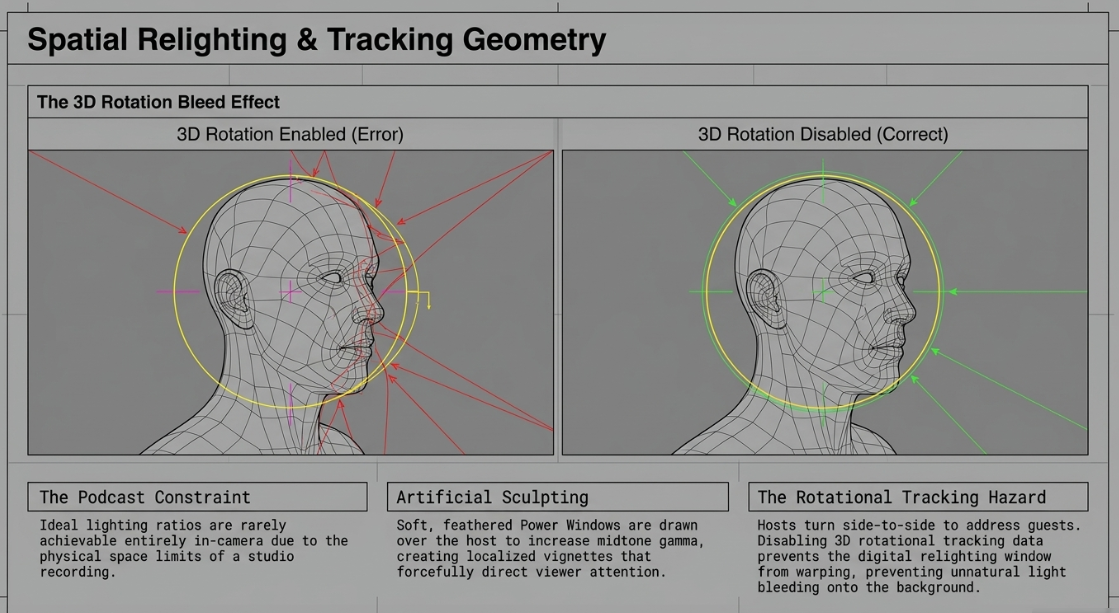
In video podcast production, shapes serve two primary narrative functions: spatial relighting and host isolation. Because podcast studio setups are often heavily constrained by physical space and practical considerations, the ideal lighting ratios between the host and the background may not be achievable purely in-camera. By drawing a soft, heavily feathered circular window over the host's face and slightly increasing the midtone gamma within that specific window, the colorist artificially sculpts the light.31 This creates a subtle, localized vignette that draws the viewer’s eye directly to the speaker's face, circumventing the limitations of the physical lighting grid. Conversely, a large, inverted window can be utilized to subtly pull down the exposure of the peripheral set, artificially deepening the perceived depth of field and minimizing background distractions.31
Because podcasts are inherently motion media, shapes cannot remain static if the subject moves. Professional finishing software utilizes advanced planar and point tracking algorithms to attach the window mathematically to the moving subject.30 The colorist positions the window, invokes the tracking engine, and the software analyzes the high-contrast pixel clusters within the shape, generating precise frame-by-frame keyframes for pan, tilt, zoom, and rotation over time.30
A critical nuance in tracking human faces during a long-form podcast is the management of rotational tracking data. While a host may lean forward or backward in their chair (requiring scale and pan tracking), they will also frequently turn their head side-to-side to look at a guest. If the tracking engine is allowed to record 3D rotation, the mask will actively warp, spin, and distort as the profile of the face changes. This causes the lighting adjustment to bleed unnaturally onto the background as the window loses its structural integrity. By explicitly disabling the 3D rotation parameters before initiating the track, the soft window acts like a highly stable, invisible stage spotlight that smoothly follows the host's positional shifts without morphing out of shape.
ANIMATING GRADES
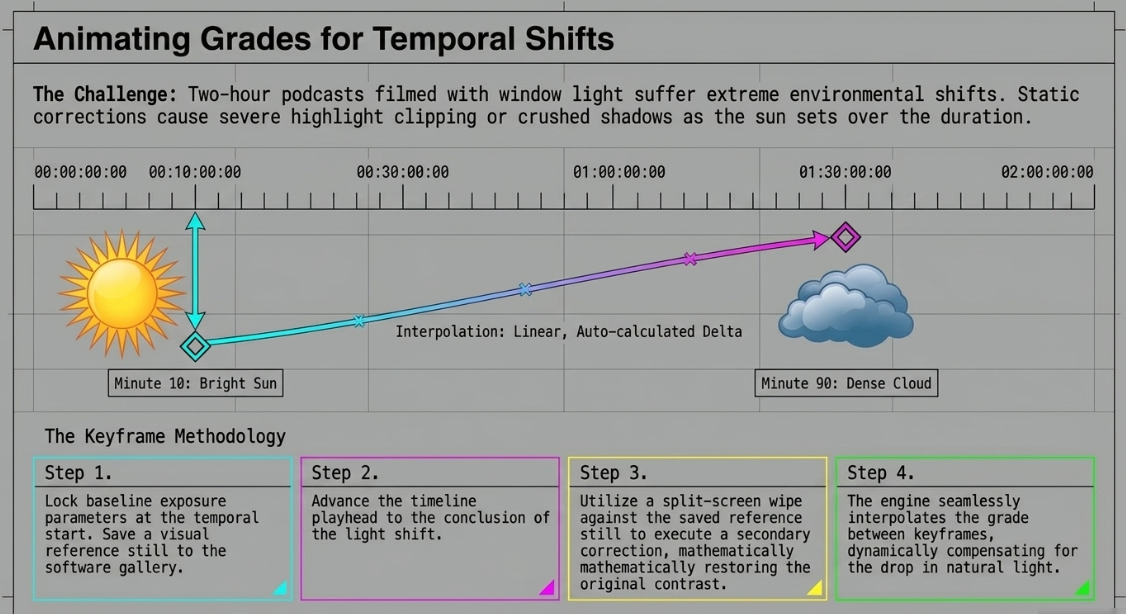
Long-form video podcasts, particularly those filmed in modern architectural spaces with natural window light, are highly susceptible to extreme environmental lighting shifts over their duration. A two-hour recording may begin in bright, hard directional sunlight and end in deep, overcast shadows as the weather changes.34 Static color correction cannot accommodate these severe temporal shifts; a primary grade that perfectly balances the exposure at minute ten will cause severe clipping or crushing if applied uniformly to the darker footage at minute ninety.34
To mathematically resolve this, the color correction parameters must be animated over time utilizing keyframes.35 Keyframing allows the video engineer to establish distinct parameter values at specific temporal timestamps, instructing the software's engine to mathematically interpolate the grade between those defined points.35 Because color correction keyframes control all parameters within a given node or effect, they dictate fluid changes across luminance, hue, and saturation simultaneously.35
The professional methodology for fixing a gradual environmental lighting shift requires a highly systematic approach. First, the colorist navigates to the start of the temporal shift and locks a keyframe on the baseline exposure parameters.34 Next, the colorist grabs a reference still frame—a visual snapshot of the desired, correct exposure—and saves it to the gallery.34 The timeline playhead is then advanced to the point where the lighting shift concludes (e.g., when a passing cloud fully obscures the sun).34
Using a split-screen visual wipe against the saved reference still, the colorist applies a secondary correction to restore the exposure, contrast, and color balance to perfectly match the original state.34 A second keyframe is placed at this point. The software will now seamlessly blend the two states using linear or bezier interpolation. As the natural light drops in the raw footage over the course of five minutes, the digital exposure compensation gradually increases in exact tandem, rendering the environmental shift entirely imperceptible to the audience.
MEMORY COLORS: SKIN TONE, SKIES, AND FOLIAGE
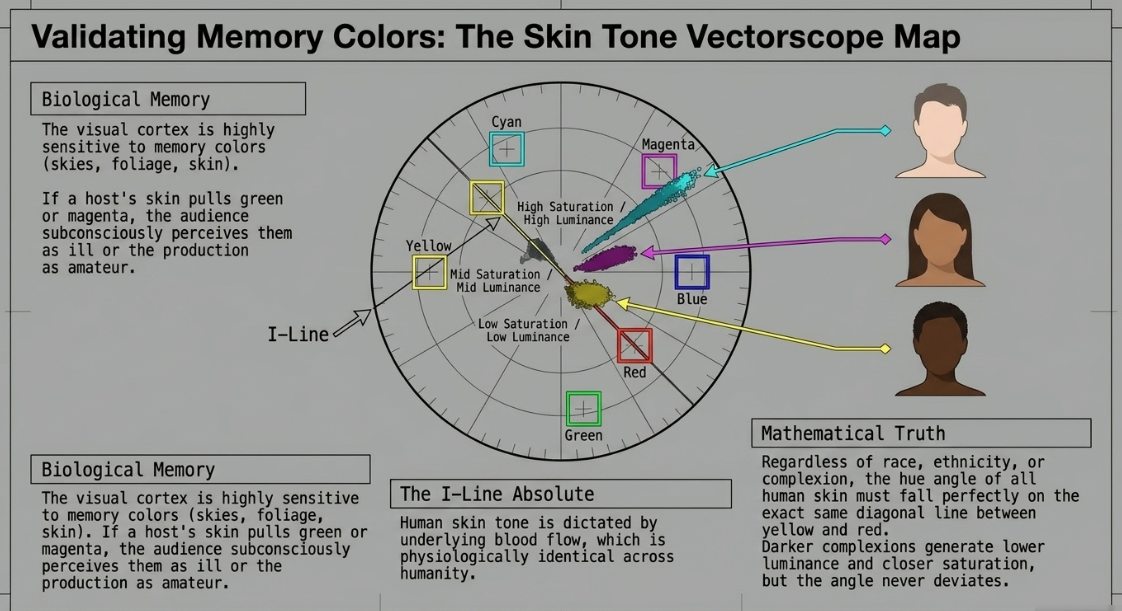
Within the vast spectrum of human visual perception, certain specific hues are deeply ingrained in our psychology and biological memory. These are designated as "memory colors," and they predominantly include the deep blue of a clear sky, the vibrant green of healthy foliage, and, most critically for conversational media, the tone of human skin.38 The human visual cortex has an incredibly acute, subconscious sensitivity to these specific wavelengths. If a brick wall in the background of a podcast is graded slightly too magenta, the audience will simply assume the bricks were manufactured in that color. However, if a host's skin is graded slightly too magenta or green, the audience will subconsciously register the subject as physically ill, or perceive the video production as cheap, amateurish, and unprofessional.38
Validating and mathematically anchoring memory colors requires the strict use of a Vectorscope. While the Waveform monitor maps structural luminance, the Vectorscope exclusively maps chromaticity—the specific combination of hue and saturation within the image.39 The Vectorscope is a circular graticule representing a 360-degree color wheel.39 The exact angle of the trace dictates the hue (e.g., red sits near the top, blue to the right, green to the left), while the distance of the trace radiating from the center dictates the total saturation of that color.40 Highly saturated colors push aggressively toward the outer edge of the circle, while pure white, pure black, and neutral grays reside strictly in the dead center, as they possess zero saturation.39
The vectorscope features distinct, standardized target boxes for the primary colors (Red, Green, Blue) and the secondary colors (Yellow, Cyan, Magenta).39 These targets are typically marked with inner and outer boxes representing 75% and 100% saturation limits.39 When grading environmental memory colors, the trace of a blue sky should align linearly and head upwards toward the blue or cyan vector targets, while the trace of green grass should pull precisely leftwards toward the green vector.41
However, the most vital anatomical feature of the vectorscope for podcast finishing is the Skin Tone Line (often referred to in the industry as the I-line). This is a static diagonal line situated precisely between the yellow and red vector targets.39 Biologically, human skin tone is dictated by two primary factors: the melanin on the surface of the epidermis, and the red blood circulating through the capillaries beneath it.44 Because the underlying blood flow is identical across all humans, the hue angle of skin tone remains constant regardless of the subject's ethnicity or race.44 While a darker-complexioned host will inherently produce a less saturated trace (closer to the center of the scope) and register a lower luminance value on the waveform, the hue angle of their skin must still fall perfectly on this diagonal line.22 By utilizing a shape mask to temporarily isolate a host's face and analyzing the resulting isolated trace on the vectorscope, a colorist can dial in exact, mathematically perfect skin tones, ensuring highly consistent and flattering representation of the talent across every episode.
SHOT MATCHING AND SCENE BALANCING
A primary hallmark of a premium video podcast is the seamless visual integration of multiple camera angles. A narrative cut from a wide, establishing two-shot down to an intimate close-up of a guest should feel entirely invisible to the viewer. If the color temperature, contrast ratio, or overall saturation shifts sharply across the cut, the viewer's visual cortex flags the discrepancy, and they are momentarily pulled out of the conversational narrative. Shot matching is the highly technical discipline of unifying these divergent signals into a cohesive whole.
The foundation of shot matching actually begins on the physical set. Mixing camera manufacturers—for instance, utilizing a Sony FX30 for the wide angle and Fuji GFX100S cameras for the close-ups—introduces massively complex color science disparities.18 Each manufacturer utilizes highly proprietary sensor designs, distinct logarithmic curves (S-Log3 vs F-Log), and unique color matrices.18 While color space transforms can bridge these gaps, utilizing identical camera bodies across all angles provides the strongest possible mathematical baseline and drastically reduces post-production labor.46
However, even when utilizing identical sensors, precise shot matching requires rigorous adherence to physical light geometry. A pervasive production error is holding a white balance card directly in front of the primary camera and using that data for all angles. To match angles perfectly, the white balance reference card must be placed in the exact physical space where the subject will sit.47 Because light reflects at fundamentally different angles of incidence, the specific angle from the host's chair reflecting into Camera A will yield a tangibly different spectral reflection than the angle to Camera B. By setting the white balance from the exact shooting position and angling it toward each specific camera lens sequentially, the cameras perfectly account for this physical geometry.47
Furthermore, lenses themselves are not spectrally neutral. The unique glass formulations, anti-reflective optical coatings, and physical construction of different lenses create distinct "optical fingerprints".47 A 50mm prime lens from one manufacturer may lean slightly warm, while a 24-70mm zoom from another may lean subtly magenta. Therefore, the camera must be white-balanced through each specific lens, rather than relying on a global Kelvin assumption.47
In post-production, shot matching relies entirely on scopes rather than the naked, highly fallible human eye. The colorist selects a primary "hero" angle—usually the most accurately lit wide shot—and mathematically balances all subsequent close-ups to this absolute reference. By employing split screens and precisely aligning the RGB Parades of the two shots, the colorist matches the black points, highlight peaks, and midtone gamma. Any minor residual discrepancies introduced by light polarization or individual lens character are then neutralized using targeted Hue vs. Hue and Hue vs. Saturation curves until the vectorscope traces of both shots perfectly overlap, achieving visual harmony.
QUALITY CONTROL AND BROADCAST SAFE
The final, and arguably most critical, phase of video engineering is Quality Control (QC). This process ensures the absolute mathematical compliance of the digital file against the strict parameters dictated by global distribution platforms.48 An aesthetically beautiful and emotionally resonant grade is entirely useless if the file is rejected by a broadcaster, or if the colors are mangled by a streaming platform's automated compression algorithm.49
In the digital domain, color spaces strictly dictate how visual data is encoded, transmitted, and ultimately displayed. The dominant international standard for web distribution, standard dynamic range (SDR) broadcast, and mobile playback is Rec. 709 (ITU-R BT.709).51 This specification rigidly governs both the color gamut (the maximum range of reproducible colors) and the transfer function (gamma), which dictates exactly how luminance is scaled from black to white.52
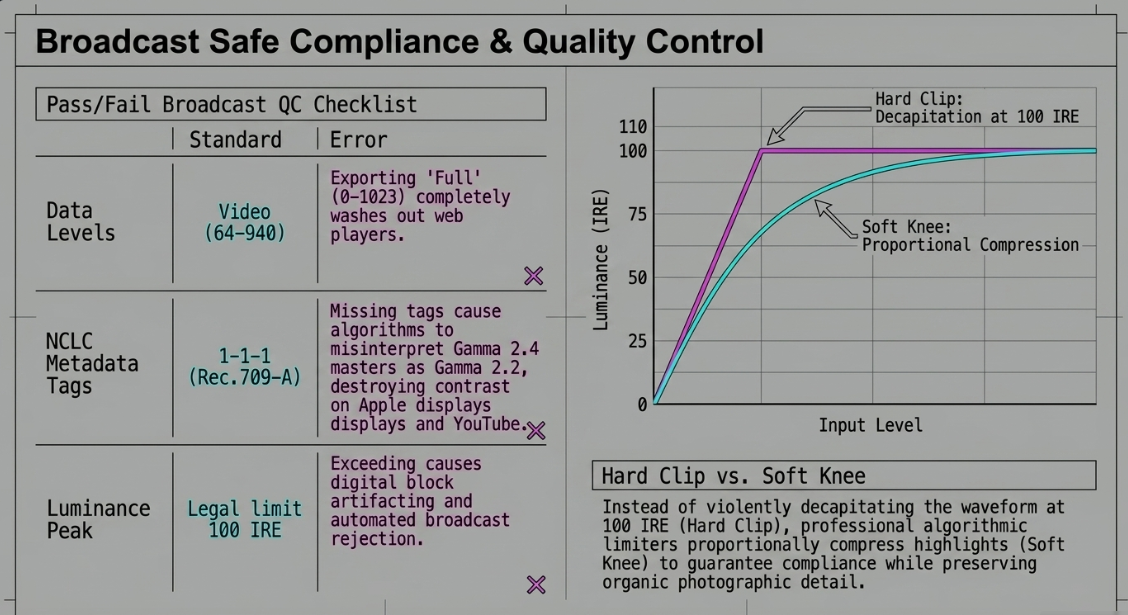
A pervasive technical hurdle in modern video podcast delivery is managing competing gamma standards. Professional broadcast television typically requires mastering at a gamma setting of 2.4, executed in a darkened, controlled grading suite.2 However, computer monitors and mobile phone displays—which are the primary viewing platforms for digital podcasts—operate closer to a gamma of 2.2.2 When a master file graded at Gamma 2.4 is uploaded to a web platform like YouTube or Vimeo without proper metadata tagging, the hosting platform’s conversion algorithms interpret the data incorrectly. This results in the infamous "gamma shift," where the published video appears severely washed out, suffering from crushed contrast, lifted milky blacks, and highly desaturated colors compared to the pristine master file.2
To circumvent this destructive algorithmic shift, platforms like YouTube rely heavily on Non-Colorimetric (NCLC) tags embedded in the file metadata. Specifically, they expect the 1-1-1 tagging standard, indicating BT.709 for Color Primaries, BT.709 for Transfer Characteristics, and BT.709 for Matrix Coefficients.2 In finishing software like DaVinci Resolve operating on Mac OS environments, video engineers frequently output files using the specific "Rec.709-A" tag. This embeds the exact metadata instructions required to force the Mac OS's ColorSync utility and YouTube's FFmpeg ingestion engine to preserve the intended contrast, guaranteeing the image does not wash out upon final delivery.2
Additionally, QC involves enforcing absolute "Broadcast Safe" limits. Video signals are strictly bound by numerical limits; luminance values exceeding 100 IRE or falling below 0 IRE are considered illegal. In legacy analog systems, this would cause audio buzz, while in modern digital systems, it causes aggressive playback errors, visual artifacting, or automatic QC rejection.21 Similarly, the distinction between Full Data Levels (0-1023) and Video Levels (64-940) must be respected. While high-end cinema files use Full levels, YouTube and broadcast require Video levels. Exporting a Full level file by mistake will compress the contrast upon upload, ruining the grade.2
To ensure total mathematical compliance without destroying the aesthetic intent of the highlights, colorists deploy algorithmic limiters, such as the BCC Broadcast Safe plug-in.49 Rather than enforcing a "hard clip"—which sharply decapitates the waveform and causes ugly, blocky artifacting in bright areas like windows or light bulbs—these professional tools use a sophisticated "soft knee" mathematical approach.49 As the signal approaches the legal limit, the software gently and proportionally compresses the highlights, preserving the visual detail and maintaining a smooth, photographic roll-off while guaranteeing absolute broadcast compliance.
PREVIEW: COLOR CORRECTION LOOK BOOK
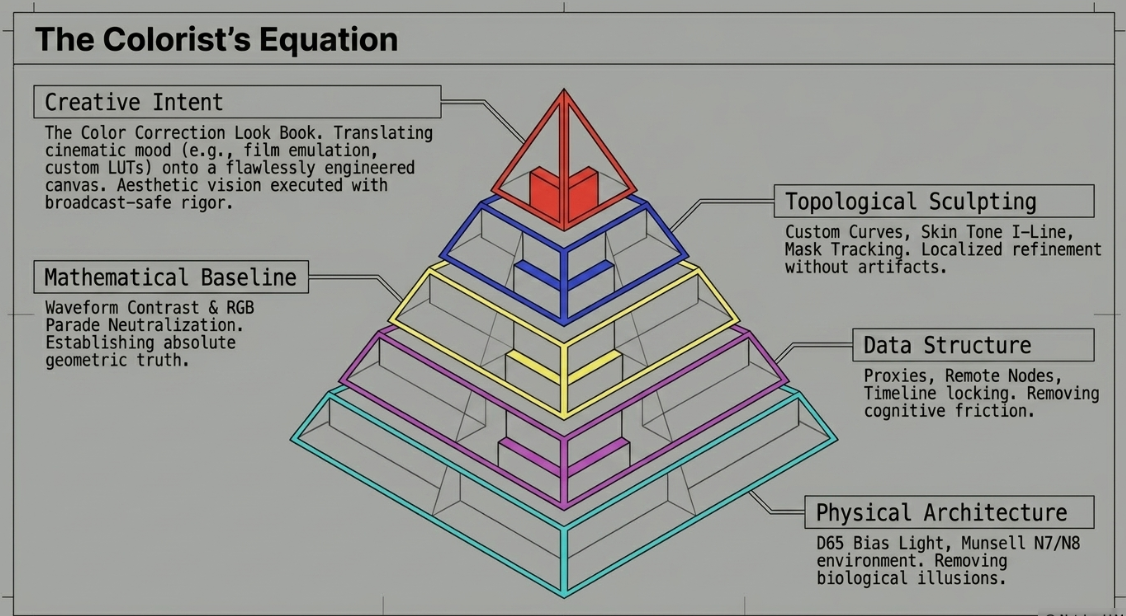
While the bulk of video engineering is highly mathematical, objective, and strictly governed by scopes and parameters, the ultimate application of color is fundamentally about creative storytelling. To ensure that the final grade actively serves the brand identity and emotional tone of the podcast, post-production intent must be deeply integrated into the pre-production planning phase through the creation of a visual Look Book.57
A Color Correction Look Book is a highly curated collection of visual references—often pulling from cinema, photography, and fine art—that establishes the explicit aesthetic blueprint for the entire production.57 This living document categorizes reference imagery across highly specific parameters: target interior lighting contrast ratios, desired emotional mood, specific camera framing and lens choices, and intended color palettes.57
For a high-end video podcast, a Look Book operates as a critical communication mechanism, preventing the colorist from acting in a creative vacuum.57 It dictates the intended visual tone to all Heads of Department (HODs) long before the cameras ever roll. For example, if the Look Book dictates a moody, high-contrast, cinematic aesthetic with heavy teal undertones in the shadows and bleach bypass characteristics 60, the production designer knows to avoid bright white studio backgrounds, and the lighting director knows to drastically increase their lighting ratios, utilizing negative fill and cooler accent lights.57
By analyzing the specific imagery within the Look Book, the video engineer can construct custom mathematical LUTs (Look-Up Tables) that replicate the specific traits outlined in the document.61 This might include simulating specific chemical film stocks, programming cross-processing color shifts, adding blooming halation to the highlights, or implementing specialized contrast curves.60 When these highly customized, branded looks are carefully applied on top of the technically balanced, mathematically verified, and broadcast-safe foundation detailed in the preceding sections, the result is a video podcast that exhibits the exact aesthetic intent of its creators, backed by the uncompromising technical rigor of top-tier professional broadcast media.
Works cited
Video Podcast Editing Guide: Master the Essentials in 2026, accessed May 7, 2026, https://podcastmonkey.co/blogs/news/video-podcast-editing
The Best Davinci Resolve Settings you need to know for great ..., accessed May 7, 2026, https://wolfcrow.com/the-best-settings-in-davinci-resolve-to-upload-your-film-to-youtube-or-vimeo/
Conquer Your Content Mountain: Editing Tips for Overwhelmed Creators, accessed May 7, 2026, https://www.podcastvideos.com/articles/edit-videos-faster-efficient-workflows/
Multicam always a headache (best workflow?) : r/davinciresolve - Reddit, accessed May 7, 2026, https://www.reddit.com/r/davinciresolve/comments/1grlwez/multicam_always_a_headache_best_workflow/
How long would it take to edit an 8 multicam video-podcast episode? - Reddit, accessed May 7, 2026, https://www.reddit.com/r/editors/comments/1ga1hbb/how_long_would_it_take_to_edit_an_8_multicam/
Insider Tips: Use Remote Grades for Faster Editing in DaVinci Resolve, accessed May 7, 2026, https://blog.frame.io/2023/08/02/insider-tips-remote-grades-davinci-resolve/
Efficient Color Grading Workflow for Multiple Cuts from a Single Long Drone Shot in DaVinci? : r/davinciresolve - Reddit, accessed May 7, 2026, https://www.reddit.com/r/davinciresolve/comments/17a7t39/efficient_color_grading_workflow_for_multiple/
Combining Shared Nodes and Group Grades in DaVinci Resolve - Mixing Light, accessed May 7, 2026, https://mixinglight.com/color-grading-tutorials/combining-shared-nodes-groups-davinci-resolve/
The Most Overlooked Trick in DaVinci Resolve for Color Grading Mastery - YouTube, accessed May 7, 2026, https://www.youtube.com/watch?v=Np05mLWRVYM
How To Set Up Your Office For Color Grading - Church Film School, accessed May 7, 2026, https://www.churchfilmschool.com/blog/how-to-set-up-your-office-for-color-grading
Dark Room Color Editing: Bias Lighting & Accuracy - Eureka Ergonomic, accessed May 7, 2026, https://eurekaergonomic.com/blogs/eureka-ergonomic-blog/dark-room-editing-rgb-bias-color-accuracy
Bias Lighting Fundamentals, accessed May 7, 2026, https://www.biaslighting.com/pages/bias-lighting-fundamentals
Are there any particular kinds/specs for bias lighting that colorists prefer? - Reddit, accessed May 7, 2026, https://www.reddit.com/r/colorists/comments/gm8ygc/are_there_any_particular_kindsspecs_for_bias/
The Beginner's Guide to Building a Color Grading Suite, accessed May 7, 2026, https://blog.frame.io/2019/07/22/building-color-grading-suite/
The Best Order Of Operations For Color Grading & Why It Makes All The Difference, accessed May 7, 2026, https://noamkroll.com/the-best-order-of-operations-for-color-grading-why-it-makes-all-the-difference/
Basic color correction options - Adobe Help Center, accessed May 7, 2026, https://helpx.adobe.com/premiere/desktop/correct-color/color-correction-fundamentals/basic-color-correction-options.html
Contrast & Balance: The Core of Cinematic Color Grading | Davinci Resolve Tutorial, accessed May 7, 2026, https://www.youtube.com/watch?v=62CmsM-ClAw
3 camera podcast setup with 2 different systems. How do I spare myself from a world of pain when matching looks? : r/colorists - Reddit, accessed May 7, 2026, https://www.reddit.com/r/colorists/comments/1qj9unq/3_camera_podcast_setup_with_2_different_systems/
Color-grading a video podcast - Reddit, accessed May 7, 2026, https://www.reddit.com/r/podcasting/comments/zo4dve/colorgrading_a_video_podcast/
Waveform and RGB Parade - Scopes - Kdenlive Manual, accessed May 7, 2026, https://docs.kdenlive.org/en/tips_and_tricks/scopes/waveform_and_rgb_parade.html
How to Use and Read the Four Primary Video Scopes - Frame.io Insider, accessed May 7, 2026, https://blog.frame.io/2017/09/27/introduction-to-video-scopes/
Grading by Numbers. When to Use Color Scopes (and When Not To) - Frame.io Insider, accessed May 7, 2026, https://blog.frame.io/2023/09/18/when-to-use-color-scopes-and-when-not-to/
A Guide to Using Waveform Monitors as Artistic Tools in Color Grading -- - Tektronix, accessed May 7, 2026, https://download.tek.com/document/Color-Grading-Primer-Full_App-Note_2PW_28619_1.pdf
How To Color Correct Video (Color Grading Tutorial For Beginners!) - YouTube, accessed May 7, 2026, https://www.youtube.com/watch?v=-yQuERdhO8I
HSL Secondary controls use in Lumetri Color panel - Adobe Help Center, accessed May 7, 2026, https://helpx.adobe.com/au/premiere-pro/using/hsl-secondary-controls.html
Change and Correct Specific Colors with HSL Secondary - Premiere Pro Tutorial - YouTube, accessed May 7, 2026, https://www.youtube.com/watch?v=4dwwn2fjfbM
Master the HSL Curves in DaVinci Resolve - Change Colors of Any Object - YouTube, accessed May 7, 2026, https://www.youtube.com/watch?v=HViLBd6hzwM
Build Your Own Qualifier In HSL Color Space Using Curves (In ..., accessed May 7, 2026, https://mixinglight.com/color-grading-tutorials/build-qualifier-hsl-curves/
how to Color Grade using the HSL CURVES (Davinci Resolve 16) - YouTube, accessed May 7, 2026, https://www.youtube.com/watch?v=mAH68lFT4Lk
Doing It All In DaVinci - PART 4: Power Windows And Tracking - Filmmakers Academy, accessed May 7, 2026, https://www.filmmakersacademy.com/blog-doing-it-all-in-davinci-part-4-power-windows-and-tracking/
Power Windows and Tracking Power Windows in Davinci Resolve - YouTube, accessed May 7, 2026, https://www.youtube.com/watch?v=MYQ3Ykd2TA4
Power Windows in Davinci Resolve Free | Tutorial - YouTube, accessed May 7, 2026, https://www.youtube.com/watch?v=EA1NX0mxzhw
DaVinci Resolve Power Windows and Tracking in 3 Minutes - YouTube, accessed May 7, 2026, https://www.youtube.com/watch?v=TKRBoK70Y7w
Lighting Shifts in the middle of the shot, can that easily be keyframed to hide the lighting shift? : r/colorists - Reddit, accessed May 7, 2026, https://www.reddit.com/r/colorists/comments/t1jlsm/lighting_shifts_in_the_middle_of_the_shot_can/
Keyframe color corrections in Final Cut Pro for Mac - Apple Support, accessed May 7, 2026, https://support.apple.com/guide/final-cut-pro/keyframe-color-corrections-vere6ff000b0/mac
How to Work with Color Keyframes in Effects - VSDC Free Video Editor, accessed May 7, 2026, https://www.videosoftdev.com/how-to-work-with-color-keyframes
Change Your Video's Mood by Keyframing Color Corrections - FCPX Tutorial 2018, accessed May 7, 2026, https://www.youtube.com/watch?v=GZtyvU201mE
Memory Colour | On Landscape, accessed May 7, 2026, https://www.onlandscape.co.uk/2015/09/memory-colour-2/
Vectorscope display options in Final Cut Pro for Mac - Apple Support, accessed May 7, 2026, https://support.apple.com/guide/final-cut-pro/vectorscope-display-options-ver761c9f95/mac
Vectorscope | [MASTER] - SmallHD User Guide, accessed May 7, 2026, https://guide.smallhd.com/a/814239-vectorscope
A Guide to Using Waveform Monitors as Artistic Tools in Color Grading - Tektronix, accessed May 7, 2026, https://download.tek.com/document/2PW_28619_0_HR.pdf
Master the Vectorscope | Da Vinci Resolve - YouTube, accessed May 7, 2026, https://www.youtube.com/watch?v=sSGIuKa8yXs
Vector Scope 75% and 100% Targets #davinciresolve - YouTube, accessed May 7, 2026, https://www.youtube.com/shorts/eak2JVhcOrA
EDIUS.NET Podcast - Skin tone line in vectorscope - YouTube, accessed May 7, 2026, https://www.youtube.com/watch?v=95OqY9hfFGw
EASY Skin Tone Guide - DaVinci Resolve Tutorial - Daniel Grindrod, accessed May 7, 2026, https://www.danielgrindrod.com/blog/skintone
Building a Multi-Camera Video Podcast Setup | B&H eXplora, accessed May 7, 2026, https://www.bhphotovideo.com/explora/video/tips-and-solutions/building-a-multi-camera-video-podcast-setup
Professional Video Equipment Solutions | UK, EU ... - CVP.com, accessed May 7, 2026, https://cvp.com/resources/articles/insights/how-to-perfectly-match-cameras-for-multi-cam-podcast-recording-from-podlabs-ollie-kenchington
Why Media Quality Control is so Important - Lightworks, accessed May 7, 2026, https://lwks.com/blog/why-media-quality-control-is-important
How to Achieve Broadcast Safe in DaVinci Resolve | Boris FX, accessed May 7, 2026, https://borisfx.com/blog/how-to-achieve-broadcast-safe-in-davinci-resolve/
Ensuring High-Quality Video: A Comprehensive Guide to Video Quality Control - Cinedeck, accessed May 7, 2026, https://cinedeck.com/cinedeck-blog/a-comprehensive-guide-to-video-quality-control/
What is Rec709 and How Can You Apply It to Your Video Edits? - Uppbeat, accessed May 7, 2026, https://uppbeat.io/blog/motion-graphics/color-grading/what-is-rec709
How to Choose the Right Video Color Space - Richard Lackey, accessed May 7, 2026, https://www.richardlackey.com/choosing-video-color-space/
Understanding Rec. 709: The Color Standard Explained - AWOL Vision, accessed May 7, 2026, https://awolvision.com/blogs/awol-vision-blog/what-is-rec-709
Confused about Rec.709 Scene, gamma 2.2 vs 2.4, and YouTube consistency, what is the correct Resolve workflow? - Reddit, accessed May 7, 2026, https://www.reddit.com/r/davinciresolve/comments/1q180un/confused_about_rec709_scene_gamma_22_vs_24_and/
Avoid Gamma Shift from DaVinci Resolve to YouTube - Creative Video Tips, accessed May 7, 2026, https://creativevideotips.com/tutorials/best-youtube-settings
Grading & exporting for YouTube. Recommended color space/gamut : r/colorists - Reddit, accessed May 7, 2026, https://www.reddit.com/r/colorists/comments/1f7rq6m/grading_exporting_for_youtube_recommended_color/
Commercial Cinematography Series (Part 2): Building a Visual Lookbook, accessed May 7, 2026, https://wanderingdp.com/videos-2/visual-lookbook/
Film Lookbook Examples & How to Make a Lookbook for Film - StudioBinder, accessed May 7, 2026, https://www.studiobinder.com/blog/film-lookbook-examples/
How to Create a Cinematographer's Look Book - YouTube, accessed May 7, 2026, https://www.youtube.com/watch?v=LcY6RzRxaQM
Color Correction Look Book, accessed May 7, 2026, https://books.apple.com/us/book/color-correction-look-book/id780508223
Podcast LUTs & Color Grading Video Templates for Editors - Envato, accessed May 7, 2026, https://elements.envato.com/video-templates/podcast+luts