Multicamera Engineering and Timeline Initialization in Post-Production
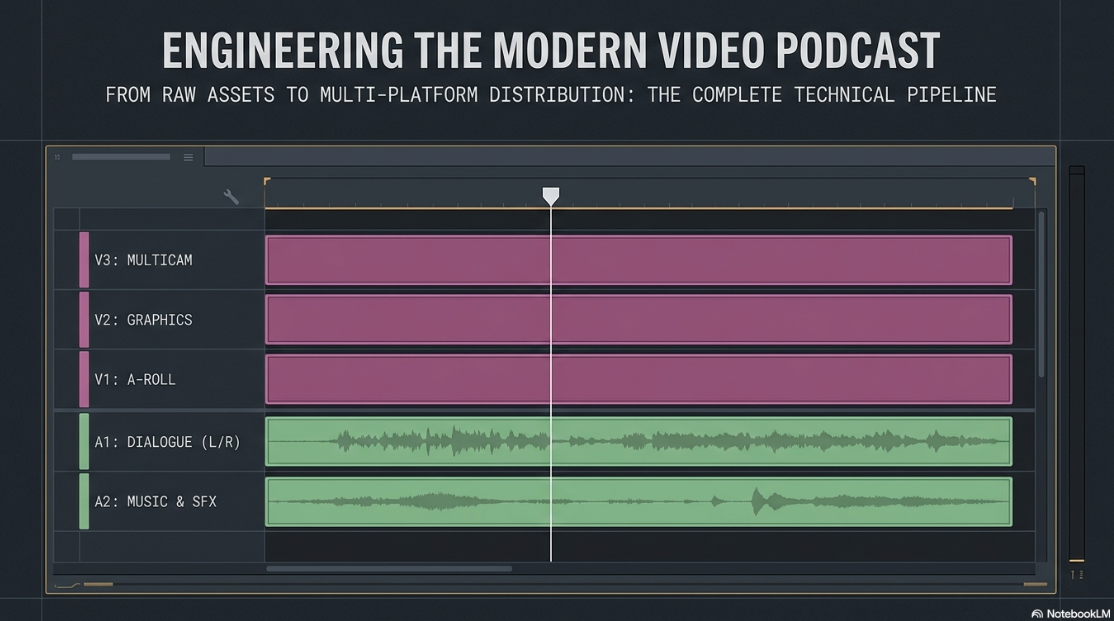
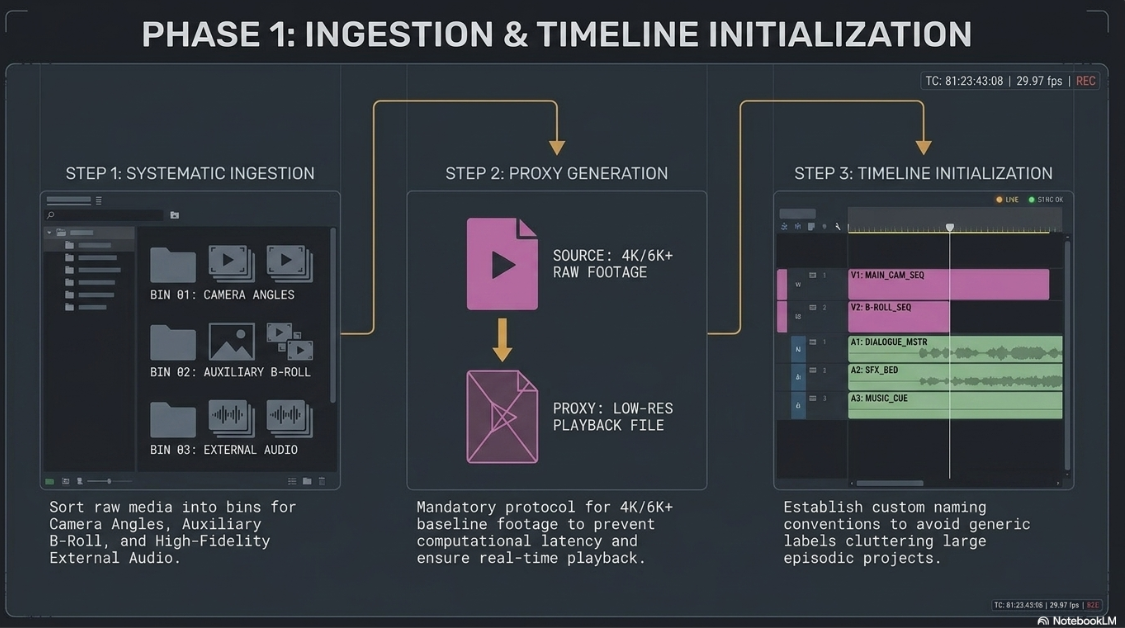
Executing a professional video podcast requires a robust post-production pipeline that begins with systematic asset management and technical timeline initialization1. Prior to synchronization, media files must be systematically ingested and organized within a non-linear editor (NLE) such as Adobe Premiere Pro or DaVinci Resolve1. Organizing raw footage into bins sorted by camera angle, auxiliary roll, and high-fidelity external audio recordings prevents project clutter and minimizes computational latency1. When working with high-resolution source media, such as footage captured at a baseline or higher, generating lightweight proxy files prior to multicamera assembly is a standard industry protocol to ensure real-time playback and avoid timeline lag1.
Standard Synchronization Protocols
The primary synchronization phase aligns raw camera clips and independent multi-track audio files into a unified multicamera source sequence1. In Adobe Premiere Pro, this is initiated in the Project panel by holding Control on Windows or Command on macOS and selecting all related video and audio clips1. Right-clicking the selected assets activates the Create Multi-Camera Source Sequence command; if this option is unavailable, it typically indicates that the editor selected the clips within the timeline panel rather than the Project panel6. In DaVinci Resolve, a similar process is initiated by highlighting the assets in the Media Pool, right-clicking, and selecting Create New Multicam Clip Using Selected Clips4.
During the configuration dialog, editors should replace default naming conventions with custom sequence names1. Default settings append generic labels that can quickly clutter large projects when editing multiple segments or episodes1. The choice of synchronization method is determined by the production assets and the metadata generated on set1.
Technical Synchronization Methodologies
Once synchronized, right-clicking the new multicamera source sequence and selecting New Sequence From Clip generates an editing sequence with the multicamera clip properly nested1. The editor can then open the Multi-Camera Monitor—accessible by clicking the wrench icon in the Program Monitor, selecting Display Mode > Multi-Camera, or using the standard keyboard shortcut Shift+0—to enable real-time playback switching using the numerical keys 1.
Non-Standard Multicamera Configurations
For unique production constraints, editors can use non-standard multicamera configurations to match specific visual styles:
The One-Camera Multicamera Technique: For single-camera interviews, editors can duplicate a high-resolution wide shot ( or ) three times on separate timeline tracks1. By cropping and scaling each track to represent a wide, medium, and close-up perspective, nesting the tracks, and enabling multicamera mode, editors can switch between virtual angles without needing additional cameras1.
The Split-Screen Third Angle Workflow: To create dynamic split screens, the editor duplicates the multicamera source sequence in the Project panel1. By opening the duplicate sequence, cropping one camera angle to the left half of the frame and the other to the right, and nesting the sequence, the editor can switch to a pre-configured split-screen angle in the main timeline1.
Handling Long-Session Overlaps: When a production includes continuous, long-format audio paired with multiple shorter, stop-and-start video files, editors should trim the long recording into overlapping chunks1. Syncing the primary clip first via audio waveform provides a structural baseline, allowing the shorter clips to align cleanly against the master timeline1.
Multi-Track Audio Management and Collaborative Audio Integration
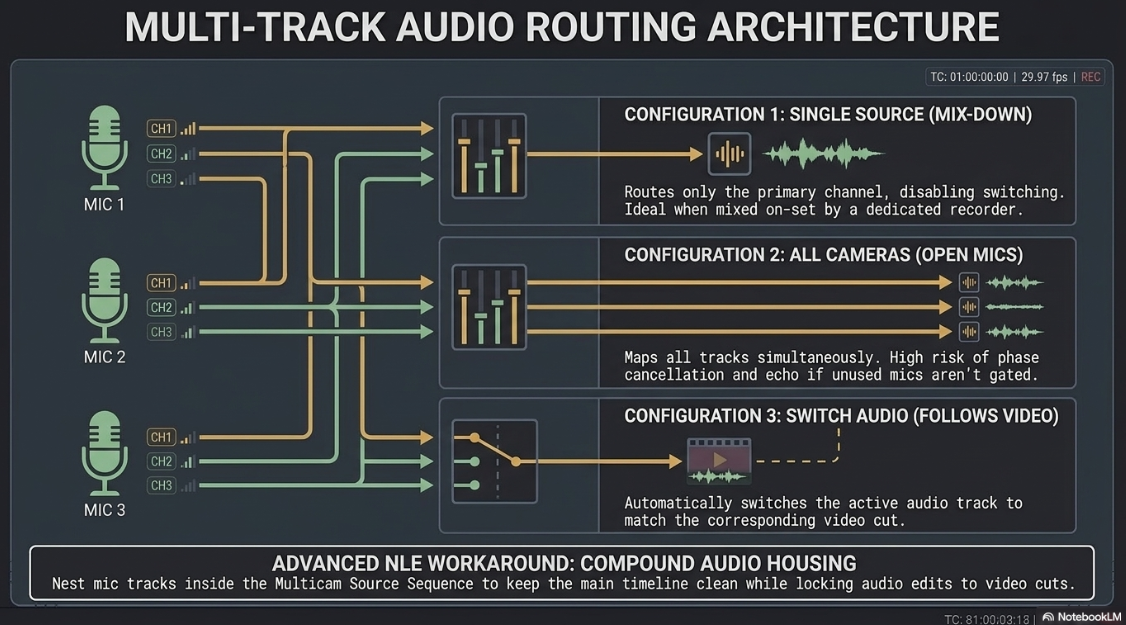
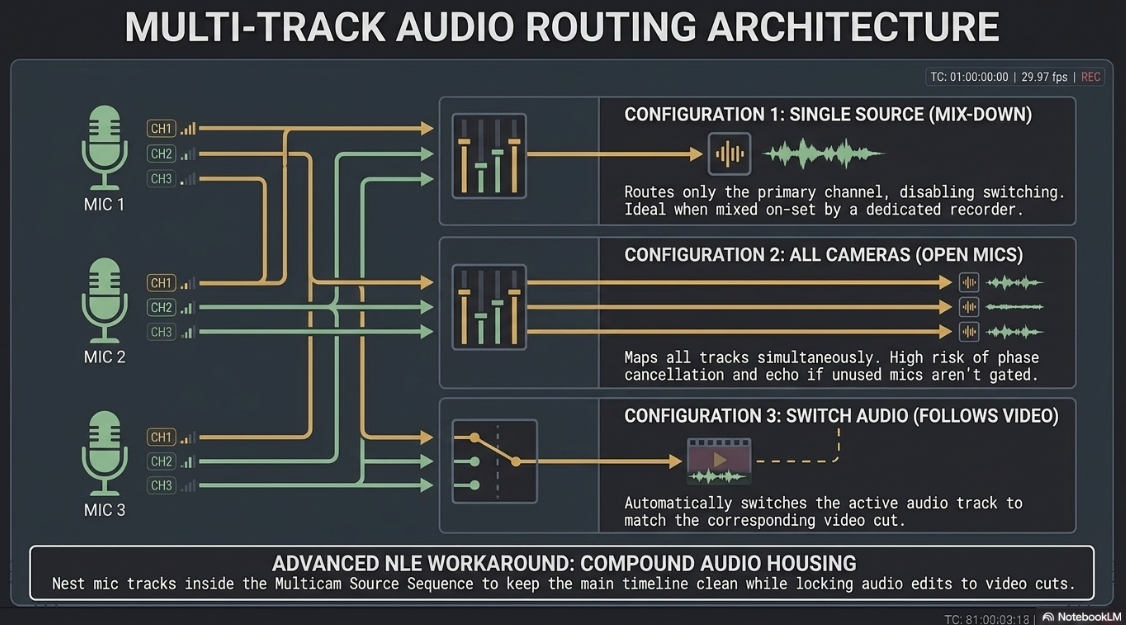
Managing multi-track audio within a multicamera timeline requires careful routing to preserve independent vocal tracks while preventing phase cancellation6. When configuring a multicamera source sequence, the routing path for audio must be selected based on the production's microphone configuration6.
Multicamera Audio Routing Modes
Single Source (Camera 1): Routes only the primary audio channel throughout the entire edit, disabling active audio switching6. This is ideal when all microphones are mixed into a dedicated external recorder on set6.
All Cameras: Maps and mixes all synchronized audio tracks simultaneously6. While this provides access to all individual microphone tracks, it can introduce phase cancellation and echo if unused microphones are not gated or muted6.
Switch Audio (Audio Follows Video): Automatically switches the active audio track to match the corresponding video cut6. This is useful for setups where each speaker has a dedicated microphone routed directly to their respective camera6.
In DaVinci Resolve, managing multiple independent microphones can become complex during long-form edits9. If an editor mixes multi-track audio before editing, adjusting dynamic audio errors on a secondary pass can become inefficient9. Editors can utilize three primary workarounds to manage this complexity:
METHOD 1: INDIVIDUAL TRACK SELECTION
[Multicam Clip] -> Right-Click -> Select Multicam Angle -> Assign Mic A / Mic B
(Best for basic two-mic setups; requires manual duplication if both speak simultaneously)
METHOD 2: COMPOUND AUDIO HOUSING
[Mic A + Mic B] -> Create Compound Clip -> Nest inside Multicam Source Sequence
(Keeps the main timeline clean; allows easy mixing by opening the compound clip)
METHOD 3: STACKED TIMELINE ROUTING
[Audio Master Timeline] -> Map to Track A2 -> Mute Scratch Track A1 -> Cut & Ripple
(Best for long-form shows; locks audio edits to video cuts across stacked timelines)
To streamline these steps, editors can integrate external helper utilities9. macOS utilities like Syncolux Studio automate multi-track audio synchronization before importing assets into an NLE, reducing manual matching steps9.
Additionally, plugins like Nice Touch integrate with multicamera sequences in both Premiere Pro and DaVinci Resolve, allowing editors to make non-destructive audio edits that ripple across the master timeline10.
Visual Continuity, Pacing, and the Geometry of Split-Edit Dialogue
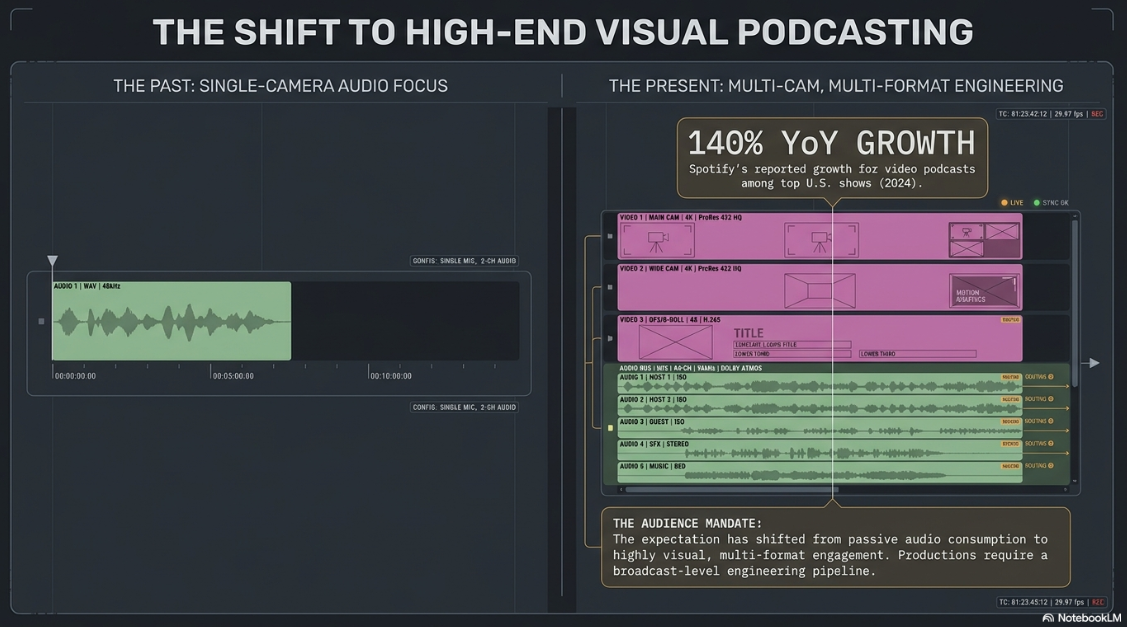
Video podcasts have transitioned from basic, single-camera recordings into highly visual productions11. This shift is supported by platform metrics; for example, Spotify reported a 140% year-over-year increase in video podcasts for its top U.S. shows in 2024, demonstrating that audiences expect high-quality visual content11.
To meet these expectations, productions must use structured camera coverage and clean visual continuity to maintain viewer engagement2.
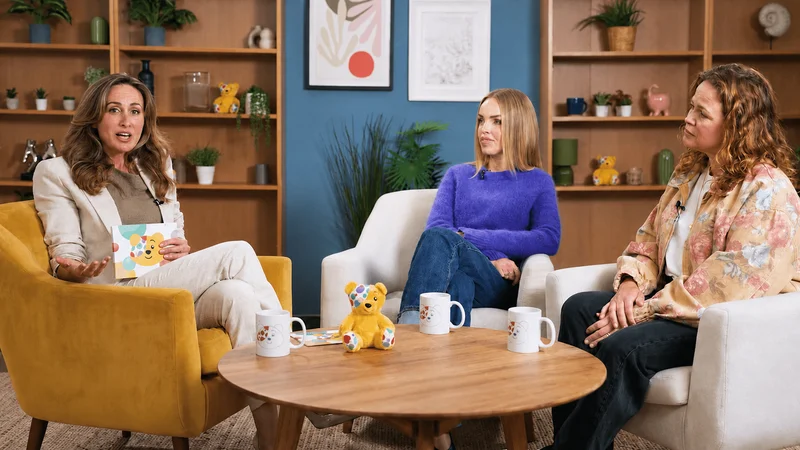
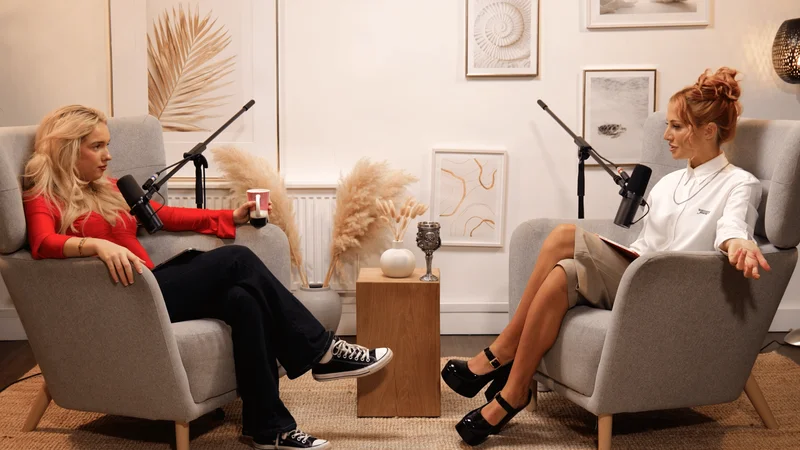
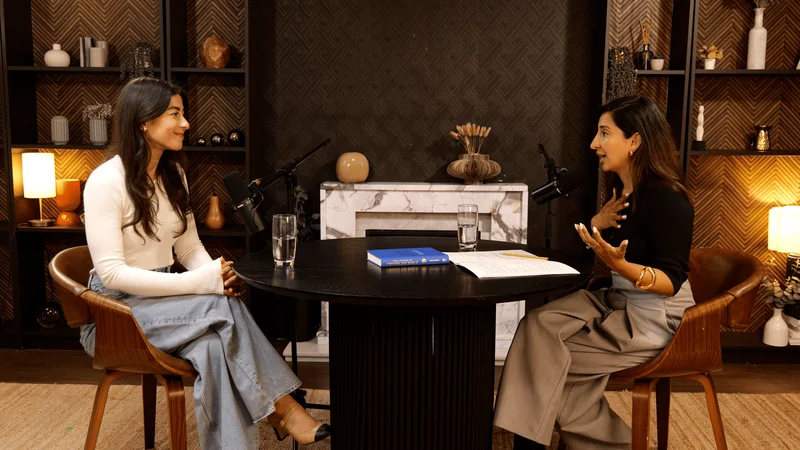
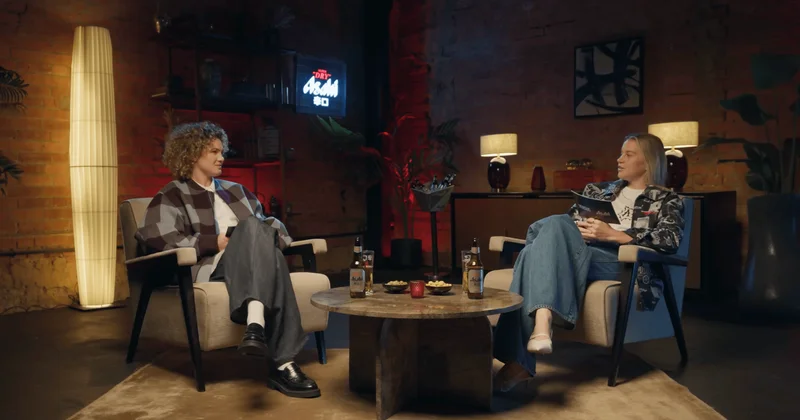
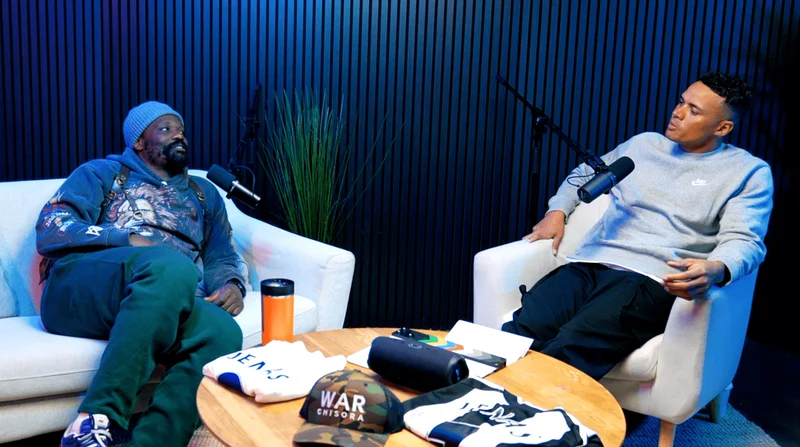
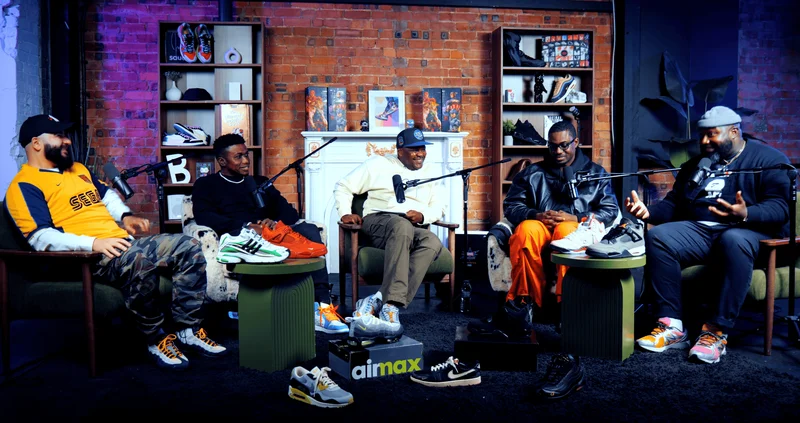
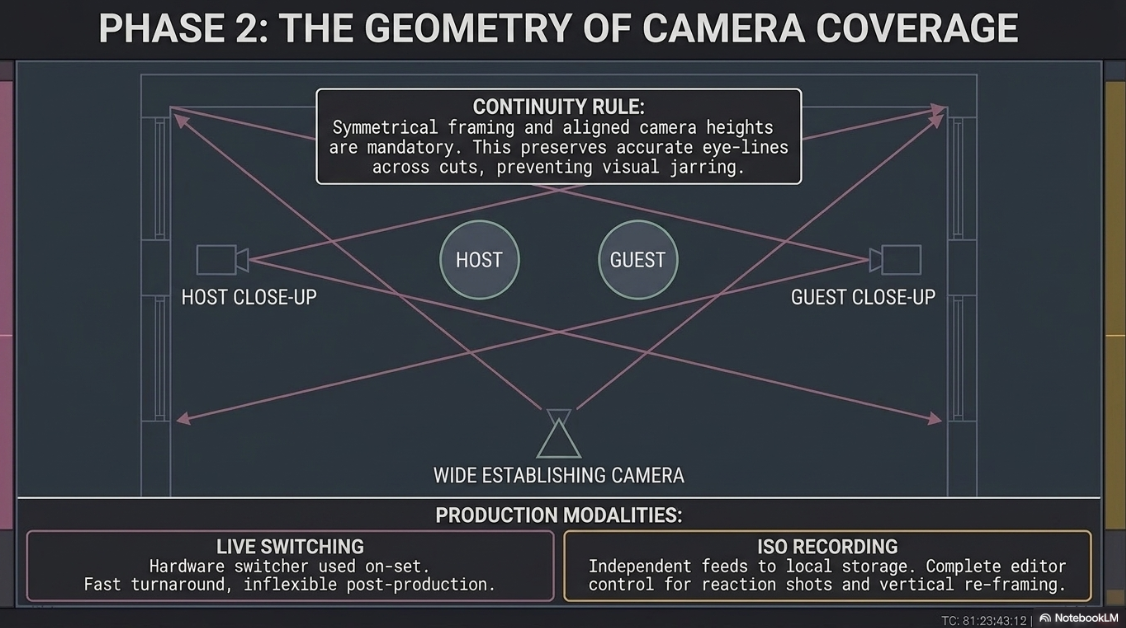
The standard baseline for a two-person interview uses a three-camera setup: one wide establishing shot of both speakers and the studio environment, paired with symmetrical, tight close-ups for the host and guest2.
Maintaining visual continuity requires both close-up cameras to be positioned at similar heights and angles to keep eye lines aligned across cuts2. Symmetrical framing prevents visual jarring when switching angles, keeping the audience focused on the conversation2.
THREE-CAMERA SETUP GEOMETRY:
[Host Close-Up] [Guest Close-Up]
\ /
\ /
\ /
[Host] [Guest]
| |
+--- Establish ---+
|
[Wide Camera]
Editors must also choose between ISO-recorded and live-switched production formats2:
Live Switching: A director switches angles in real-time using a hardware switcher during the recording2. This approach minimizes post-production time, making it ideal for quick-turnaround shows, but limits the editor's ability to adjust cuts afterward2.
ISO Recording: Each camera captures its own independent feed to local storage2. This approach increases post-production time but provides the editor with complete coverage, allowing them to adjust cut timing, insert reaction shots, and export vertical clips2.
Dialogue Pacing and Split Edits
Pacing should match the natural rhythm of human speech13. Standard "ping-pong" editing—where a cut occurs at the exact frame a speaker begins talking—can feel repetitive and unnatural15.
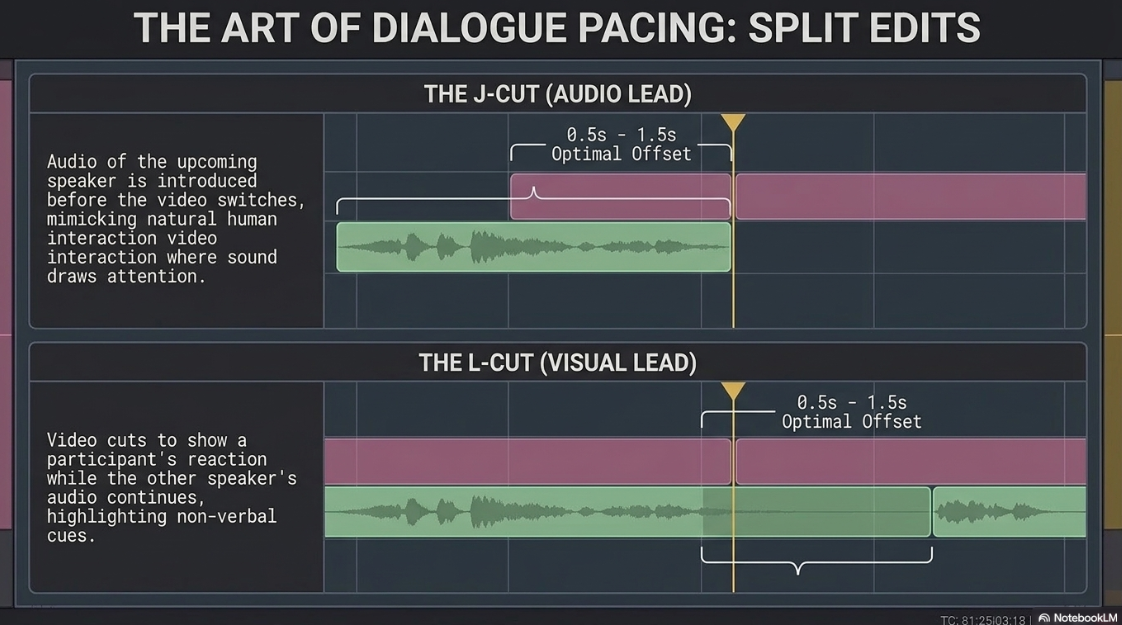
To create a more natural flow, editors use split edits, such as J-cuts and L-cuts, to offset audio and video transition points16.
The J-Cut (Audio Lead): The audio of the upcoming speaker is introduced before the video switches to their close-up13. This prepares the audience for a change in speaker and mimics natural human interaction, where sound often draws our attention before we turn to look at the source14.
The L-Cut (Visual Lead / Post-Lapped Audio): The video cuts to show a participant's reaction while the other speaker's audio continues to play14. This is highly effective for highlighting listening gestures, non-verbal cues, and emotional responses12.
To ensure smooth pacing, editors should keep offset transitions within a range13. Transitions longer than can feel disjointed, making the audio and video feel out of sync13.
Conducting a final "ears-only" playback pass with the video monitor turned off is a helpful quality control step13. If the dialogue edits sound natural and seamless to the ear, the underlying timeline transitions are well-balanced13.
Strategic Integration of B-Roll
Integrating B-roll footage helps shape raw interview content into a polished, structured narrative19. Rather than relying on a static talking-head perspective, layering in relevant supplementary footage provides visual context, breaks up long talking segments, and helps maintain viewer attention12.
B-roll also serves a functional role: it allows editors to hide jump cuts or trim speech cleanly without visual disruption19.
To build a reliable library of B-roll, podcasters can set up a secondary camera or tripod on set to record behind-the-scenes footage—such as planning, setup, editing, or social media preparation—during their normal workflow20. This footage can then be utilized as contextual overlays during the final edit20.
Technical Signal Processing and Audio Mastering Standards
High-quality audio is essential for professional video podcasts21. Even engaging conversations can lose impact if the sound is uneven, muddy, or obscured by background noise21.
Long editing sessions with highly dynamic speech can also cause listener fatigue or tinnitus for the editor23. To mitigate this, editors should apply a temporary multiband compressor or limiter during the editing process to level out volume spikes and protect their hearing23.
Standard video podcast distribution formats require stereo or mono audio at a sample rate of or , and a or depth21.
A sample rate of is preferred for video post-production because it aligns directly with common video frame rates, preventing audio sync drift over long durations21.
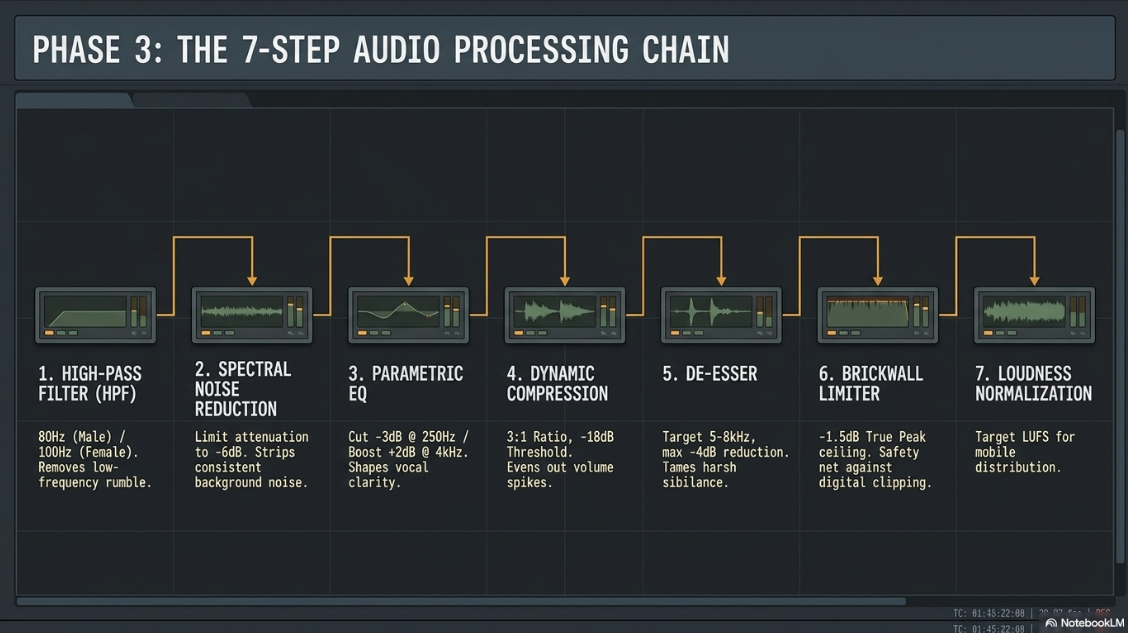
To ensure a balanced and clean sound, editors should apply a standardized 7-step signal processing chain8. Because each processor builds on the work of the previous one, maintaining this precise order is critical8.
AUDIO SIGNAL FLOW:
[High-Pass Filter] -> [Noise Reduction] -> [EQ] -> [Compression] -> [De-Esser] -> [Limiter] -> [Loudness Sync]
The 7-Step Audio Processing Chain
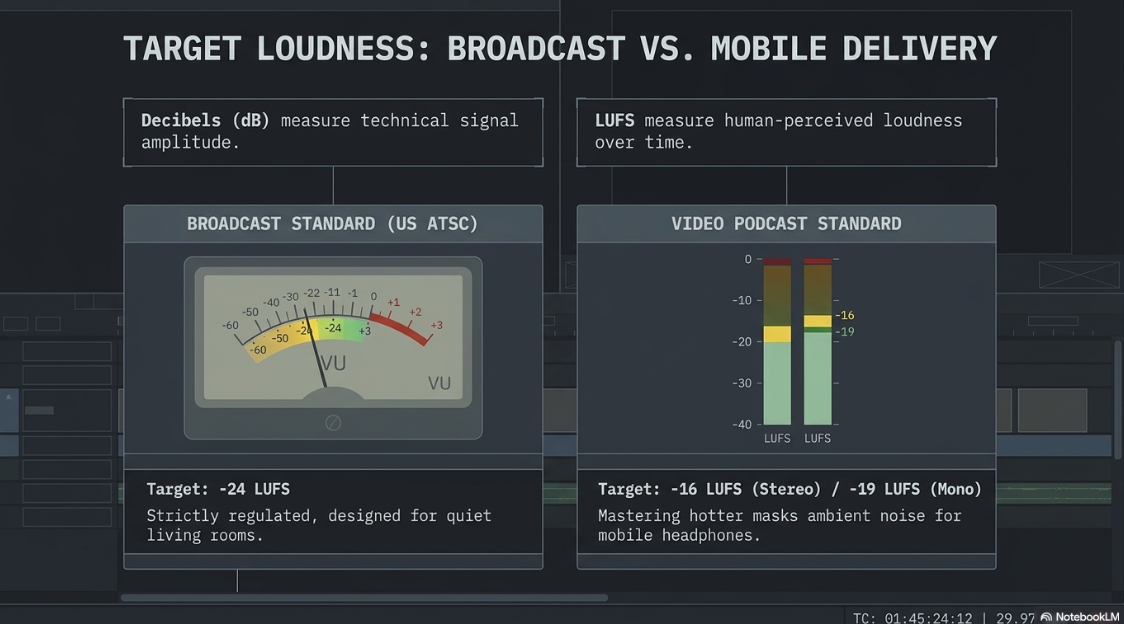
Editors should understand the difference between decibels (dB), which measure technical signal amplitude, and Loudness Units Full Scale (LUFS), which measure human-perceived loudness over time22.
While traditional broadcast laws enforce strict, quieter levels for televisions and radios (such as the US ATSC target of or the EU ETU R128 target of ), mobile headphones require louder levels23.
Mastering stereo podcast files to (and mono files to ) helps mask background noise and compensates for the hardware limitations of mobile devices23.
Video Scopes and Color Grading Workflows for Multicamera Matching
Color grading video podcast footage requires objective, technical measurement3. Relying solely on how colors look on a standard computer monitor can be unreliable, as ambient room lighting and uncalibrated displays can lead to inaccurate color adjustments3.
To ensure visual consistency, editors should use standardized video scopes to guide their color correction and grading workflows3.
Standardized Video Scopes
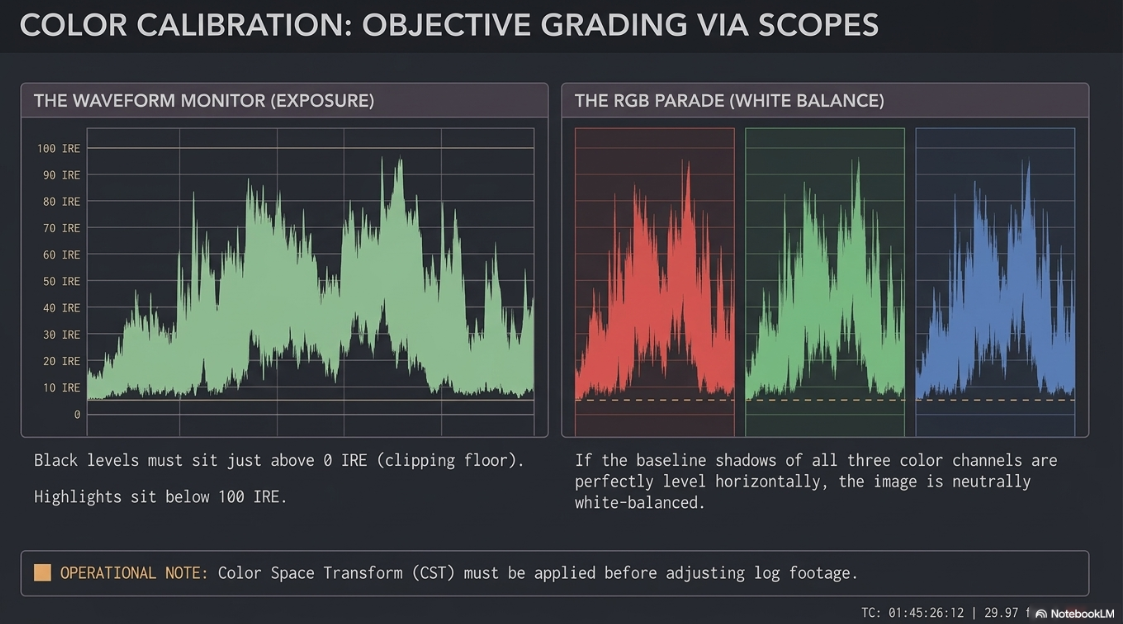
Waveform Monitor: Charts the luminance (brightness) of the image from left to right, matching the horizontal composition of the video frame25. It uses an IRE scale from (pure black, clipping floor) to (pure white, highlight ceiling) to help editors balance exposure25.
RGB Parade: Splitting the standard waveform into Red, Green, and Blue channels, this scope displays the individual color intensities side-by-side26. It is the primary tool for identifying and resolving color casts26. If the highlighted peaks or baseline shadows of all three channels are level, the white balance of the image is neutrally aligned26.
Vectorscope: A circular polar display that charts hue (color type) and saturation (color intensity)26. Saturation is represented by the distance from the center, which has zero saturation26. The angle of the trace represents the hue26. Standard vectorscopes include indicators for primary (R, G, B) and secondary (C, M, Y) colors26.
Histogram: Measures the global distribution of pixels across the tonal range, from shadows on the left to highlights on the right26. It is primarily used to detect overall clipping in the shadows or highlights26.
The Technical Grading Workflow
[Organize & Label] -> [Color Management (CST)] -> [Waveform Exposure] -> [RGB Parade White Balance] -> [Vectorscope Skin Tone Sync]
The primary correction workflow begins by organizing clips by camera angle and applying a Color Space Transform (CST) or a Log-to-Rec.709 input LUT if the source footage was captured in a logarithmic color space3. Attempting to balance or grade raw log footage without first converting it to a standardized color space can amplify exposure issues and introduce visual noise3.
Next, primary exposure is adjusted using the Waveform monitor3. The editor sets the black level just above to retain shadow detail and adjusts the highlights to sit below 3. Specular highlights, such as small light bulb reflections, can occasionally reach up to depending on platform-specific broadcast tolerances28.
To match skin tones across different cameras and ethnicities, editors use the vectorscope's built-in Skin Tone Indicator Line27. This diagonal line sits at approximately the position, between the red and yellow color targets27. It represents the universal color of blood beneath human skin, making it a reliable reference for skin hue across all human demographics29.
Skin Tone Calibration Reference
Once primary adjustments are complete, secondary styling or creative look-up tables (LUTs) can be applied3. To keep skin tones looking natural and protect the overall image from oversaturation, creative LUTs should be applied at a reduced intensity of 3.
Finally, all secondary camera angles must be balanced against the primary angle3. This can be verified using comparison monitors, gallery stills in DaVinci Resolve, or the Reference View in Adobe Premiere Pro to ensure visual consistency across every cut3.
Graphical Safe Zones, Typography, and Captioning Standards
Integrating graphic elements and text overlays into a video podcast requires careful attention to platform interface layouts and title-safe boundaries5. Modern distribution channels overlay active user interfaces (UI)—such as comments, profile links, channel icons, and interactive buttons—directly onto the video frame, which can easily obscure critical on-screen graphics5.
+-----------------------------------------------------------+
| [Top Safe Zone] - Ideal for Open Captions when |
| Lower Thirds are Visible |
+-----------------------------------------------------------+
| |
| [ACTIVE SCREEN] |
| |
| [Left UI Area] [Right UI Area] |
| Keep clear of Avoid placing |
| critical text text overlays |
| |
+-----------------------------------------------------------+
| [Bottom Safe Zone] - Lower Third Placement |
| (Avoid overlapping face/neck) |
+-----------------------------------------------------------+
Lower thirds are categorized by structural tiers based on the amount of information they display34:
One-Tier Lower Thirds: Typically contain a single line of text34. They are best used to introduce the main topic, identify a segment, or show the presenter's name34.
Two-Tier Lower Thirds: Feature two lines of text, with the speaker’s name on the top line and their professional title, organization, or location on the second line34.
Three-Tier Lower Thirds: Add a third line of text to provide deeper context, such as temporal data (e.g., "Recorded November 12, 2026") or secondary branding elements34.
When designing graphic assets, editors should use standardized Motion Graphics Templates (.mogrt) in Premiere Pro or pre-composed templates in After Effects to ensure styling remains consistent across episodes35. These templates utilize the alpha channel in video files to define transparency, allowing background video to show through cleanly around the graphic34. Lower thirds must be placed in negative space within the frame and should never overlap the speaker's face or neck33.
For captioning, editors should use bold, high-contrast, sans-serif fonts to ensure legibility on small mobile displays33. Decorative or script fonts can be difficult to read quickly and should be avoided37.
A standard style convention is using white text paired with a black drop shadow or a thin black outline34. This ensures the text remains readable against any background34. When a lower third graphic is active on screen, any on-screen captions should temporarily shift to the top-center of the frame to prevent visual clutter33.
Multi-Format Content Strategy and Strategic Cross-Platform Distribution
Modern audience consumption habits show a clear split between short-form and long-form video formats38. In 2026, audience interaction research shows a 52-49 split in favor of short-form video, making it essential to produce both formats from a single master episode38.
Core Strategic Differences
Short-form algorithms (such as YouTube Shorts, TikTok, and Instagram Reels) ignore thumbnail performance entirely38. Instead, they prioritize completion rates, replay loops, and "viewed vs. swiped away" ratios37.
This requires short-form content to use fast, immediate hooks in the first three seconds, tight visual pacing, and the removal of verbal pauses to maintain viewer engagement37.
Long-form algorithms, on the other hand, prioritize search discoverability, high average view duration (AVD), and overall session time38.
Long-form edits benefit from structured, programmatic pacing that allows conversation to develop naturally38. This helps establish host authority and build audience trust38.
To capture high-quality vertical vertical crops from horizontal footage, editors should use a "frame for the tightest crop" design discipline5. This requires framing subjects so that the vertical crop works, ensuring sets, lighting, and titles hold up in both landscape and vertical orientations5.
Capturing footage at a baseline or higher (, , or up to ) provides additional resolution, allowing editors to zoom in and reframe vertical clips without losing image quality5.
LANDSCAPE VS PORTRAIT CROPPING (16:9 to 9:16)
+-----------------------------------+
| 16:9 FRAME |
| +--------+---------+--------+ |
| | | 9:16 | | |
| | | Crop | | |
| | Left | Area | Right | |
| | Area | | Area | |
| | | | | |
| +--------+---------+--------+ |
+-----------------------------------+
Technical Export Guidelines for Major Platforms
Native Editors, Automated Plugins, and Third-Party Solutions
Modern video editors utilize a suite of native tools and specialized plugins to streamline their post-production pipelines6. The choice of tools depends on the production team's software ecosystem, workflow complexity, and budget constraints51.
Post-Production Tool Ecosystem
Native NLE Editing: Editing directly in Premiere Pro or DaVinci Resolve provides frame-level precision, advanced color grading, and granular control over visual elements4. However, editing long-form interviews and manually switching camera angles can be highly time-consuming53.
Automated Timeline Plugins: Plugins like Autopod and Premiere Assistant operate within standard NLEs to automate multi-camera switching6. By analyzing individual audio tracks, they generate edits automatically, reducing manual work while keeping files inside the primary editing workspace6. These plugins require clean, well-isolated multi-track audio to make accurate cutting decisions7.
Standalone Text-Based Editors: Platforms like Descript transcribe video into text, allowing editors to make cuts and rearrangements by modifying the transcript51. While efficient for rough cuts and narrative structuring, they lack the advanced, color management, and visual effects tools found in traditional NLEs51.
Technical Platform and Tool Comparison
Actionable Recommendations and Consolidated Operational Guidelines
To establish a consistent, professional post-production workflow, production houses and independent editors should implement the following standardized guidelines:
Ingestion and Preparation: Sort all imported media by camera angle, b-roll, and external audio tracks1. For high-resolution files ( and above), generate proxy files before building multicamera sequences to ensure smooth playback1.
Synchronization Standards: Use timecode synchronization as the primary option when cameras are jam-synced1. For other productions, utilize automated audio waveform synchronization, using manual markers (such as visual cues or slate claps) as a fallback option1.
Clean Audio Routing: Configure audio routing to keep vocal tracks separated while preventing phase issues6. For dual-mic setups, use compound clips or nested timelines to keep the main editing timeline clean and make audio adjustments more efficient9.
Structural Grading with Scopes: Avoid grading by eye3. Rely on the Waveform monitor and RGB Parade to set neutral black points just above and keep highlights below 3. Isolate skin tones with an HSL qualifier and use the vectorscope's Skin Tone Line as a reference to keep skin hues natural and balanced across all cameras3.
Platform-Specific Optimization: Customize export settings for the target platform37. For long-form landscape formats, prioritize high-quality VBR 2-pass compression48. For short-form vertical vertical video formats, design compositions specifically for a crop and use tight visual pacing, dynamic on-screen text overlays, and fast hooks to improve viewer retention5.
Works cited
Premiere Pro Multicam Editing: Complete 2026 Workflow Guide - Pixflow.Net, https://pixflow.net/blog/premiere-pro-multicam-editing-workflow/
Your Multi Camera Podcast Setup: A Pro-Level Guide, https://flexworkstudios.com/multi-camera-podcast-setup/
How to Color Grade Video Podcast Footage for a Cinematic Look, https://nextmedia.london/podcast-color-grading/
DaVinci Resolve Multicam Editing - Steps Guide for You - CapCut, https://www.capcut.com/resource/multicam-editing-in-daVinci-resolve
What's the Best Aspect Ratio for Marketing Videos in 2026? - Picturesmith, https://picturesmith.com/notes/aspect-ratio-marketing-videos/
Premiere Pro Multicam Editing: Tools & Tips Guide - Cutback, https://cutback.video/blog/the-ultimate-guide-to-multicam-editing-in-premiere-pro-best-tools-tips-workflows
Best Multi-cam Editing Plugins for Premiere Pro Users in 2026 - Cutback, https://cutback.video/blog/best-multi-cam-editing-plugins-for-premiere-pro-users
Podcast Audio Mixing: The Complete Production Guide (2026) | Ruah Creative House, https://ruahcreativehouse.org/blog/podcast-audio-mixing/
Multicam podcast with two audio tracks : r/davinciresolve - Reddit, https://www.reddit.com/r/davinciresolve/comments/1ts6pw1/multicam_podcast_with_two_audio_tracks/
DaVinci Resolve Multicam Tutorial: Audio Sync, Color Correction & More - YouTube, https://www.youtube.com/watch?v=q0J5tYnyfV8
Blending Visual Storytelling With the Rise of Video Podcasting, https://thevisualcommunicationguy.com/2026/02/17/blending-visual-storytelling-with-the-rise-of-video-podcasting/
Podcast Videos Engaging Audiences Through Clever Videography Editing - Finchley Studios, https://www.finchley.co.uk/finchley-learning/podcast-videos-engaging-audiences-through-clever-videography-editing
J Cut and L Cut Explained (2026): Smoother Dialogue Edits - CutFast, https://cutfa.st/blog/j-cut-l-cut-audio-transition-editing-cutfast-method-2026-en
Mastering the Split Edit: How J-Cuts and L-Cuts Work - FireCut, https://firecut.ai/blog/mastering-the-split-edit-how-j-cuts-and-l-cuts-work/
L Cut vs J Cut: Types of Cuts in Film and How to Make Them - Vimeo, https://vimeo.com/blog/post/guide-to-film-cuts
Smoother and More Cinematic L-cuts and J-cuts in Video Editing - Boris FX, https://borisfx.com/blog/l-and-j-cuts-smoother-more-cinematic/
J cuts vs L cuts examples in video editing - Adobe, https://www.adobe.com/uk/creativecloud/video/discover/j-cut-and-l-cut.html
How to Edit Videos: L-Cuts and J-Cuts - TechSmith, https://www.techsmith.com/blog/how-to-edit-videos-l-cuts-and-j-cuts/
B-Roll Footage Essentials for Engaging Video - The Video Effect, https://www.thevideoeffect.tv/articles/crafting-depth-emotion-power-b-roll
How to Film Engaging B-Roll Clips as a Podcaster - Lynelle Lillian, https://lynellelillian.com/b-roll-clips-for-podcasters/
How to Enhance Audio in Video Podcasts - LALAL.AI, https://www.lalal.ai/blog/how-to-enhance-audio-in-video-podcasts/
Why Setting the Correct LUFs for Your Podcast is Crucial: A Guide for Podcasters, https://www.podcaststudioglasgow.com/podcast-studio-glasgow-blog/why-setting-the-correct-lufs-for-your-podcast-is-crucial-a-guide-for-podcasters
To edit pre or post loudness? : r/podcasting - Reddit, https://www.reddit.com/r/podcasting/comments/z1almv/to_edit_pre_or_post_loudness/
HOW LOUD SHOULD YOUR PODCAST BE? LUFS AND DB EXPLAINED, https://content.sport-social.co.uk/blog/how-loud-should-your-podcast-be
Video scopes: Waveform, Vectorscope & Histogram for accurate color grading - Vegas Pro, https://www.vegascreativesoftware.com/blog/video-scopes-waveform-vectorscope-for-accurate-color-grading/
How to Read Video Scopes Fast: Waveform, Vectorscope, RGB Parade and Histogram Explained - Pixflow.Net, https://pixflow.net/blog/read-video-scopes-fast/
Vectorscope display options in Final Cut Pro for Mac - Apple Support, https://support.apple.com/guide/final-cut-pro/vectorscope-display-options-ver761c9f95/mac
Color Correction for Video - Telestream, https://www.telestream.net/pdfs/technical/Color-Correction-for-Video-2BW244030.pdf
How to use the Selective Vectorscope - Corel Discovery Center, https://learn.corel.com/tutorials/pinnacle-selective-vectorscope/
5 Tips for Getting Perfect Skin Tones in DaVinci Resolve - Frame.io Insider, https://blog.frame.io/2020/10/05/skin-tones-in-davinci-resolve/
The Skin Tone Line - Pixel Valley Studio, https://pixelvalleystudio.com/pmf-articles/the-skin-tone-line
Correct Skin Tones with the Selective Vectorscope in Pinnacle Studio, https://www.pinnaclesys.com/en/landing/color-grading/selective-vectorscope/
Graphics for video | Enterprise Brand, Communications and Marketing Guide, https://brandguide.asu.edu/execution-guidelines/photo-video/graphics
Lower third - Wikipedia, https://en.wikipedia.org/wiki/Lower_third
MyGlasgow - MyGlasgow Staff - Brand Toolkit: new for 2026 - Resources and guides - Photography and video - Video brand guidelines - Video brand elements - Lower thirds - University of Glasgow, https://www.gla.ac.uk/myglasgow/staff/brandtoolkit/resources/photographyandvideo/video/brand/captions/
Lower Thirds Editable Video Templates - Envato, https://elements.envato.com/video-templates/lower+thirds
How to Edit Podcast Shorts Like a Pro in 2026 - quso.ai, https://quso.ai/blog/how-to-edit-podcast-shorts-like-a-pro
YouTube Shorts vs Long-Form Content | Sprout Social, https://sproutsocial.com/insights/youtube-shorts-vs-long-form-content-strategy/
How to keep up with short-form video content demand | TIA - The Influence Agency, https://theinfluenceagency.com/blog/short-form-video-content
Video Editing for Different Social Media Platforms, https://diyvideoeditor.com/video-editing-for-different-social-media-platforms/
Long-Form Video Marketing Tips – How Brands Can Win in 2026 - ShortVids, https://shortvids.co/long-form-video-marketing/
Publishing videos - Spotify Support, https://support.spotify.com/us/creators/article/publishing-videos/
Video specs - Spotify Support, https://support.spotify.com/us/creators/article/video-specs/
Video Distribution on Spotify | Megaphone Help Center, https://support.megaphone.fm/en/articles/12043267-video-distribution-on-spotify
Best export settings for Premiere Pro - Adobe, https://www.adobe.com/creativecloud/video/hub/guides/best-export-settings-for-premiere-pro.html
Spotify Uploading Podcast: Complete Guide for 2026, https://podcastmonkey.co/blogs/news/spotify-uploading-podcast
Best Export Settings for Premiere Pro (YouTube/Insta/TikTok) - Boris FX, https://borisfx.com/blog/best-export-settings-for-premiere-pro-youtube-insta/
Best Export Settings for Premiere Pro (For Every Platform and Use Case - Hollyland Store, https://store.hollyland.com/blogs/creator-hub/best-export-settings-for-premiere-pro
What are the correct video and audio bitrates in Adobe Premiere? - Help Center, https://help.filmhub.com/en/articles/5642946-what-are-the-correct-video-and-audio-bitrates-in-adobe-premiere
4 Best AI Podcast Editors Compared: Selects, Descript, Autopod, and More - Cutback, https://cutback.video/blog/4-best-ai-podcast-editors-compared-selects-descript-autopod-and-more
Autopod vs Descript - Swell AI, https://www.swellai.com/blog/autopod-vs-descript
Autopod vs Adobe Podcast vs Podcastle – A Complete Guide for Marketing Leaders in 2026, https://genesysgrowth.com/blog/autopod-vs-adobe-podcast-vs-podcastle
Non-Subscription Multi-Cam Podcast Editing options in Premiere Pro?, https://phantomeditor.video/blog/non-subscription-multicam-podcast-editing-premiere-pro
AutoPod | Automatic Podcast Editing for Premiere Pro, https://www.autopod.fm/
Best Podcast Recording Software in 2026: An Honest Listicle | Autozy Blog, https://autozy.co/blog/best-podcast-recording-software-2026
AutoPod – AI-Powered Podcast Editing for Adobe Premiere Pro - Daidu.ai, https://www.daidu.ai/products/autopod-ai
Pricing - AutoPod, https://www.autopod.fm/pricing
Riverside vs Descript: The Ultimate Comparison (Updated), https://riverside.com/riverside-vs-descript
Riverside Overtakes Descript as My Podcast Production Tool of Choice, https://thepodcastsetup.com/riverside-vs-descript-why-i-use-riverside/