Part I: The Sonic Foundation - Core Audio Principles
The journey into podcasting begins not with an audience or a distribution platform, but with the capture of a single, fundamental element: sound. The quality of this initial capture dictates the potential of the final product. This section establishes the foundational knowledge every creator needs, moving beyond simple gear lists to explain the principles behind each choice. This approach empowers the aspiring podcaster to make strategic, long-term decisions from the very first day, ensuring that initial investments serve both immediate needs and future ambitions.
Data source: nytimes.com
Section 1: Your First and Most Important Decision: The Microphone
The microphone is the primary interface between the creator's voice and the listener's ear. It is not merely a piece of equipment but the most critical hardware investment in the entire audio chain.1 A thoughtful choice here can set a podcast up for success, while a misguided one can create persistent challenges in post-production.
Understanding Microphone Technology: Dynamic vs. Condenser Microphones Explained
The first technical distinction to understand is the difference between dynamic and condenser microphones, which relates to the physical mechanism they use to convert sound waves into electrical signals.
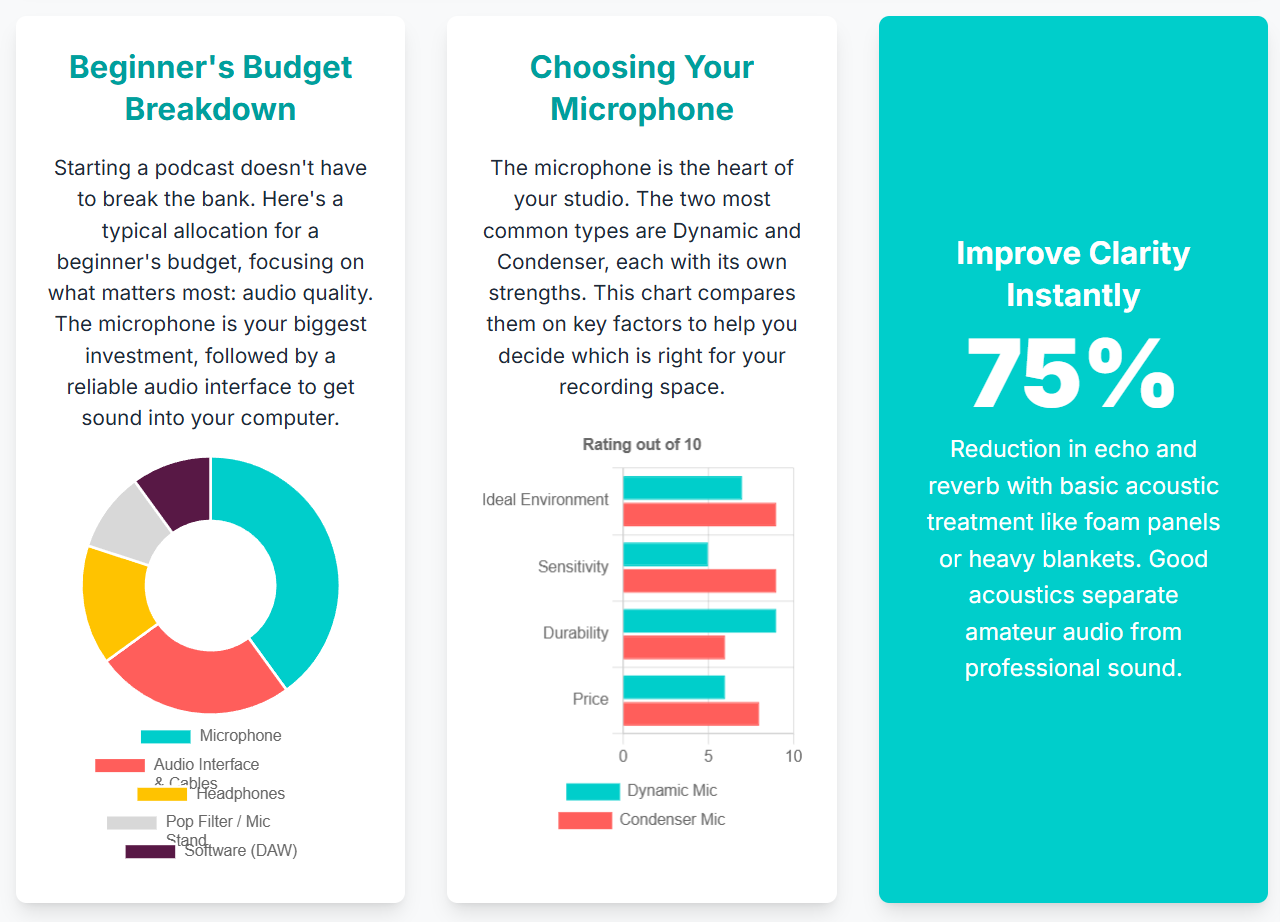
A dynamic microphone operates using a simple and robust principle involving a diaphragm, a voice coil, and a magnet. When sound waves hit the diaphragm, it vibrates the attached coil within a magnetic field, generating an electrical signal. This construction makes dynamic microphones durable and less sensitive to quiet sounds or sounds from a distance.2 For the beginner podcaster, this lower sensitivity is a significant advantage. Most beginners record in acoustically untreated spaces like a home office or bedroom, which are filled with ambient noise from computer fans, air conditioning, or traffic outside. A dynamic microphone excels in these environments because it naturally focuses on the sound source directly in front of it—the speaker's voice—while rejecting much of the unwanted background noise.3 This results in a cleaner initial recording that requires less cleanup in post-production. Furthermore, many dynamic mics exhibit a "proximity effect," where bass frequencies are boosted as the speaker moves closer to the microphone, which can be leveraged to achieve a classic, intimate "broadcast" sound.6
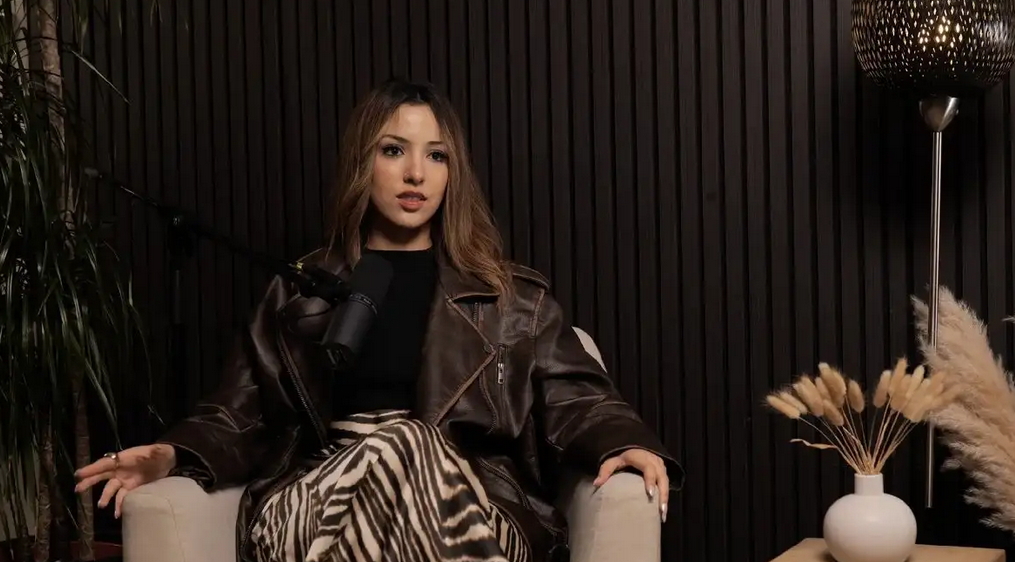
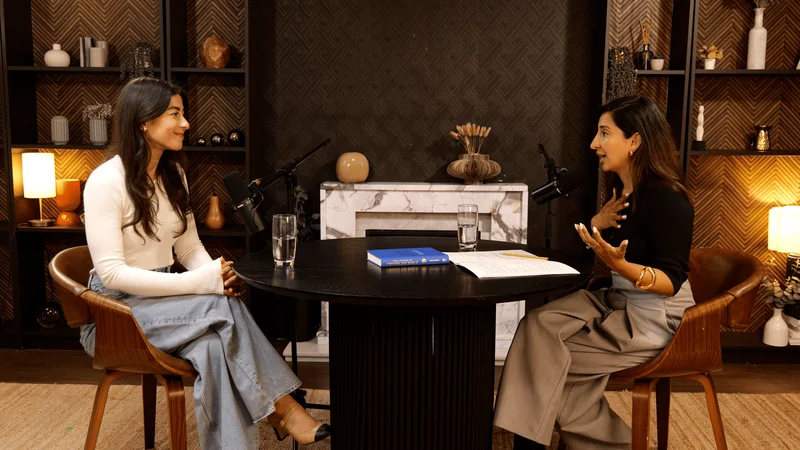
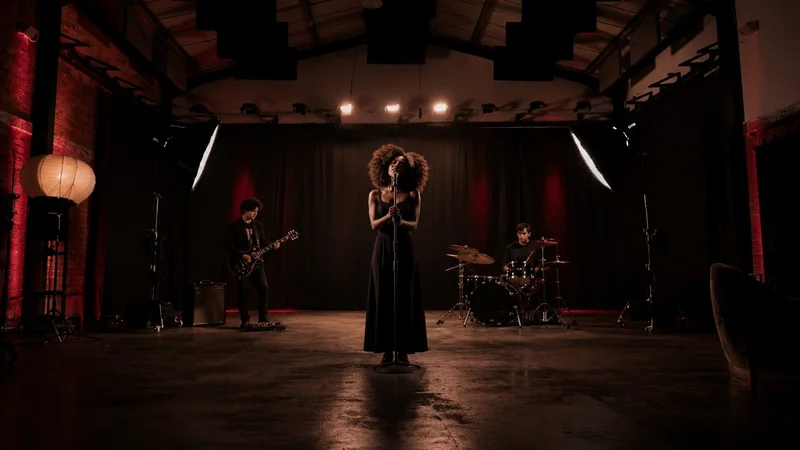
Finchley Studio (Blackwood): book this setup for your podcast
A condenser microphone, in contrast, uses a more delicate mechanism. It features a thin, electrically charged diaphragm positioned close to a solid backplate, forming a capacitor. Sound waves cause the diaphragm to vibrate, changing the distance between it and the backplate, which in turn alters the capacitance and generates an electrical signal.3 This design makes condenser mics much more sensitive, allowing them to capture subtle nuances and a wider frequency range, resulting in a very detailed and natural sound.3 However, this sensitivity is a double-edged sword in a home studio. In an untreated room, a condenser mic will not only capture the detail in a voice but also every echo, reverberation, and ambient sound, from a chair squeak to a refrigerator hum.5 This can create a recording that sounds distant and unprofessional, requiring significant and often imperfect post-production work to fix. Condenser microphones also require an external power source, known as "+48V phantom power," which must be supplied by the audio interface or mixer they are connected to.2
The choice between these two technologies is therefore less about which is "better" in an absolute sense and more about which is appropriate for the recording environment. The technical specifications of the microphone must be matched to the acoustic reality of the room. A highly sensitive condenser microphone, while excellent in a professional, sound-treated studio, will produce a far inferior recording in a typical bedroom compared to a less sensitive dynamic microphone. The quality of the recording environment dictates the appropriate microphone technology, making the dynamic microphone the superior and safer choice for the vast majority of beginners.
The Connectivity Crossroads: USB vs. XLR Microphones
After understanding the core technology, the next critical decision involves connectivity: how the microphone sends its signal to the recording device. The two standards are USB and XLR.
USB microphones are an all-in-one solution, integrating the microphone capsule, the preamplifier (preamp), and the analog-to-digital converter (ADC) into a single unit.10 They are the definition of "plug-and-play," connecting directly to a computer's USB port and requiring no additional hardware to function.1 This simplicity makes them incredibly convenient, affordable, and portable, representing the ideal entry point for a solo podcaster just starting out.12
XLR microphones, on the other hand, represent the professional audio standard.12 An XLR connection is purely analog; the microphone's job is only to capture the sound and output it as an electrical signal via a three-pin connector.13 To use an XLR microphone with a computer, it must be connected to an external audio interface or mixer. This external device houses the necessary preamp to amplify the microphone's weak signal and the ADC to convert that analog signal into a digital one that the computer can process.10 While this requires more equipment and a higher initial investment, this modularity is the system's greatest strength. It allows for every component in the audio chain—the mic, the preamp, the converter—to be upgraded independently, offering a clear path for improving quality over time.
A critical consideration for any aspiring podcaster is the limitation of USB microphones in multi-person recording scenarios. Attempting to connect and record with multiple USB microphones on a single computer is notoriously problematic. Computers often struggle to differentiate between the identical audio drivers, leading to software glitches, instability, and immense frustration.12 This has been described by experienced podcasters as a "path of pain and anger and suffering".16 Therefore, if there is any plan to record with an in-person co-host or guest, an XLR setup is not merely an option—it is a necessity.12
The Best of Both Worlds: Why a Hybrid USB/XLR Mic is the Smartest First Purchase
Given the trade-offs between USB's simplicity and XLR's scalability, a new class of hybrid microphones has emerged as the single smartest investment for a new podcaster. Microphones such as the Samson Q2U and the Shure MV7 feature both a USB port and an XLR output, offering a direct and seamless upgrade path.1
This dual-connectivity design allows a beginner to start their podcast immediately using the simple, plug-and-play USB connection for a solo show. As their ambitions grow and they wish to incorporate in-person interviews or improve their audio quality with a dedicated interface, they can simply switch to using the microphone's XLR output without needing to purchase a new mic.1 This future-proofs the initial investment and provides maximum flexibility.
This trend toward hybrid microphones reflects a significant shift in the mindset of new creators. They are no longer approaching podcasting as a simple hobby but as "pro-ams"—professional-amateurs—who are planning for success and scalability from the outset. The choice of a hybrid microphone is not just a purchase for the present need of a solo show but a strategic investment in the anticipated future need for a more complex, multi-host setup. It acknowledges that the limitations of a USB-only workflow will likely become a bottleneck and proactively provides the solution. For these reasons, the Samson Q2U is widely recommended as the best entry-level podcasting microphone due to its excellent sound quality, dynamic capsule (ideal for home environments), and dual outputs, all at an affordable price point.1 The Shure MV7 serves as a premium alternative, offering similar hybrid functionality with audio quality inspired by the legendary Shure SM7B broadcast microphone.1
Data source: independent.co.uk
Decoding Polar Patterns: How Your Mic Hears the World
A microphone's polar pattern describes its directional sensitivity—essentially, a map of where it picks up sound most effectively. While there are many patterns, podcasters primarily need to be concerned with one: cardioid.2
A cardioid polar pattern is heart-shaped, capturing sound with high sensitivity from directly in front of the microphone, less sensitivity from the sides, and maximum rejection from the rear.2 This is the ideal pattern for nearly all podcasting applications because it helps to isolate the speaker's voice from ambient room noise and potential reflections bouncing off the wall behind the microphone.3 Other patterns, like omnidirectional (picks up sound equally from all directions) or bidirectional (picks up from the front and back, but rejects the sides), have niche applications but are generally unsuitable for a typical home studio setup.2 For a beginner, ensuring their chosen microphone has a cardioid pattern is a key step in capturing clean, focused audio.
Section 2: The Unsung Heroes: Headphones, Stands, and Filters
While the microphone receives the most attention, a set of essential accessories is equally critical for achieving professional-quality audio. These often-overlooked items are not luxuries; they are fundamental components of a proper recording workflow that can save countless hours of frustration in post-production.
The Critical Role of Monitoring: Why You Need Closed-Back Headphones
Monitoring is the practice of listening to the audio signal in real-time as it is being recorded through a pair of headphones.1 This is a non-negotiable step in professional audio capture. It allows the podcaster to hear exactly what the microphone is picking up, providing immediate feedback on performance and technical issues. Without monitoring, problems like distracting plosive sounds, background noise from an air conditioner, or incorrect microphone placement might go unnoticed until the editing phase, when they are much more difficult to fix.1 More than 70% of podcasters use headphones while recording for this very reason.2
The type of headphones used is also crucial. Closed-back headphones are essential for recording vocals.2 Their earcups are sealed, which provides sound isolation and prevents the audio from the headphones from "bleeding" out and being picked up by the sensitive microphone. Using open-back headphones or speakers would create a feedback loop or a faint echo in the recording. For comfort during long recording sessions, an over-ear design is also highly recommended.2 For podcasters who are also recording video, in-ear monitors (IEMs) are an excellent alternative. They provide the same sound quality and isolation as over-ear headphones but are much less obtrusive and often invisible on camera.11
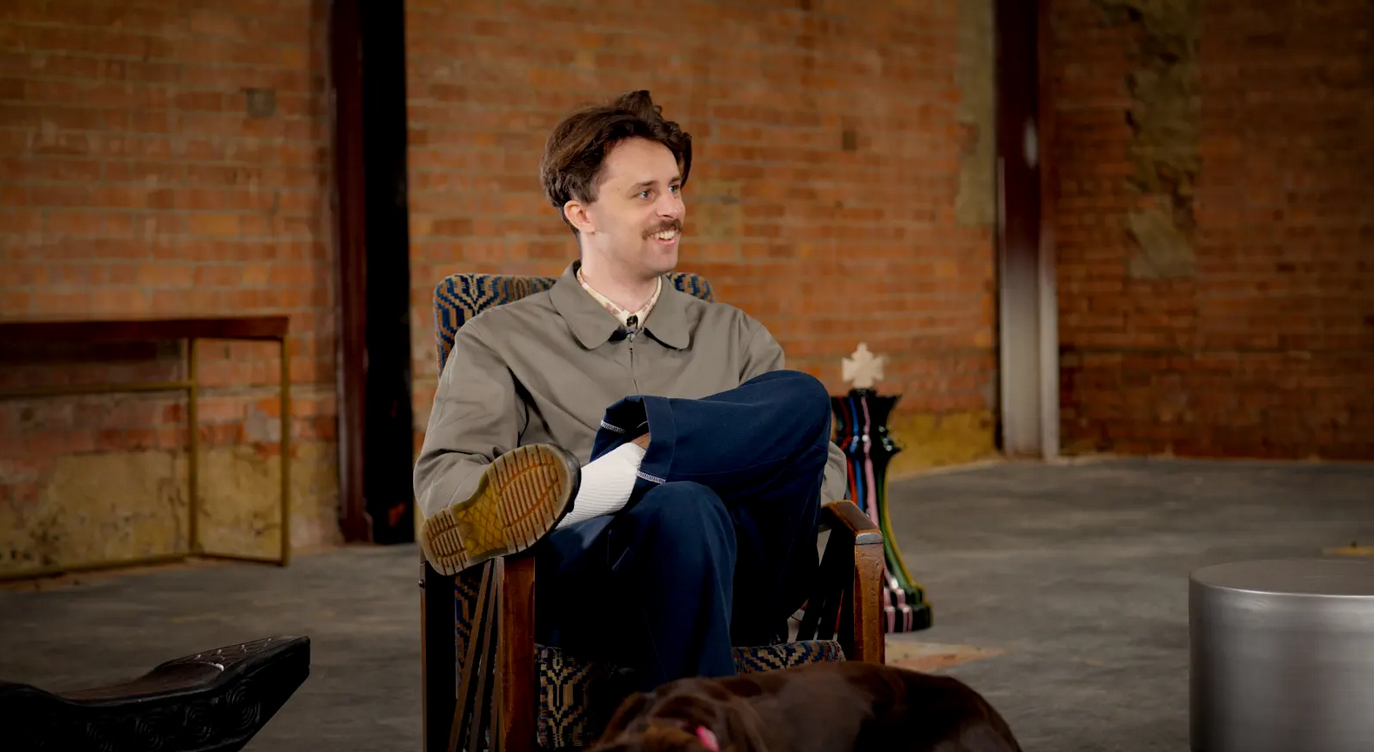
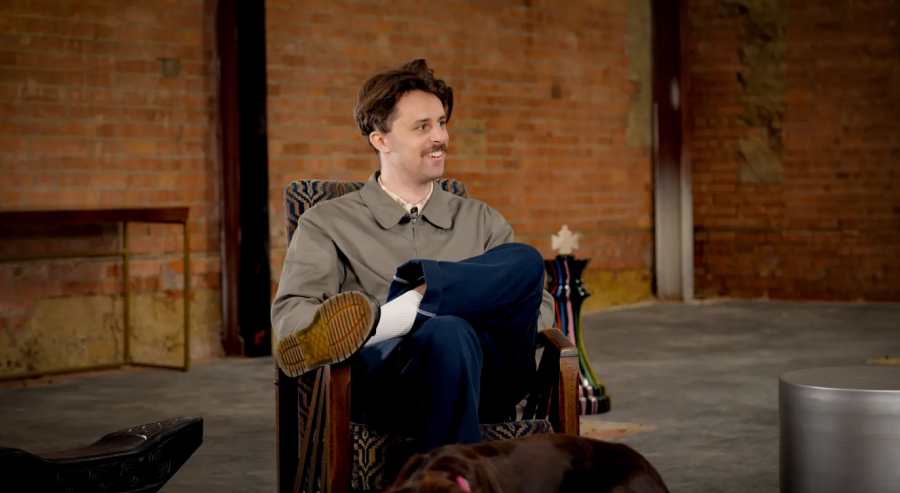
Finchley Studio (The Brick Studio): book this setup for your podcast
Essential Support: Mic Stands, Boom Arms, and Shock Mounts
A microphone should never be handheld or placed directly on a desk during a podcast recording. A proper mic stand or, preferably, a boom arm is a crucial investment for several reasons. First, it allows for consistent and optimal microphone positioning—typically a few inches from the speaker's mouth. Second, and more importantly, it isolates the microphone from structure-borne noise. Any bump, tap, or vibration on the desk surface will travel through a desk-mounted stand and be picked up by the microphone as a low-frequency rumble or thump.11
A boom arm, such as the popular Rode PSA1+, clamps to the side of the desk and allows the microphone to be suspended in the air, providing maximum isolation and flexibility in positioning while keeping the desk space clear.1 For even greater isolation, a shock mount can be used. This device suspends the microphone within an elastic cradle, absorbing any vibrations that might travel up the boom arm itself, ensuring the cleanest possible signal.11
Taming Plosives: The Necessity of a Pop Filter
A pop filter is a simple but indispensable accessory for any vocal recording. Plosives are the bursts of air created when pronouncing hard consonants like "p," "b," and "k".11 This rush of air can overwhelm the microphone's sensitive diaphragm, causing a distorted, bass-heavy "popping" sound that is unpleasant for the listener and difficult to remove in editing.
A pop filter, typically a screen of fine mesh fabric or metal, is placed a few inches between the speaker's mouth and the microphone.11 It works by dissipating the energy of the air burst before it can strike the microphone's capsule, effectively eliminating the pop while allowing the rest of the vocal sound to pass through unaffected.11 This inexpensive tool dramatically improves the quality of the raw audio recording.
The consistent emphasis on using these accessories points to a fundamental principle of professional production: it is always more efficient and effective to capture clean audio at the source than to attempt to repair flawed audio in post-production. Real-time monitoring allows for the immediate detection and correction of problems. A pop filter prevents plosives from ever being recorded. These are proactive measures that occur during the recording process. The alternative is a reactive workflow, where audio problems are discovered during editing and must be painstakingly removed with specialized software. This is not only time-consuming but often yields imperfect results. By investing in these simple, inexpensive accessories, a beginner can fundamentally shift their workflow from a time-intensive "fix it in post" model to a more efficient, professional "get it right at the source" model, saving countless hours of future work.
Part II: Building Your Audio Engine
With the physical components for sound capture in place, the focus shifts to the digital heart of the studio. This part covers the essential software and hardware needed to record, edit, and expand the podcast's capabilities, transforming raw audio into a polished, professional product.
Section 3: The Digital Heart of Your Studio: Recording & Editing Software (DAWs)
The Digital Audio Workstation (DAW) is the software where all audio recording, editing, and mixing takes place. The market offers a wide range of options, from powerful, free programs to industry-standard subscription services and innovative, AI-driven platforms. The right choice depends on the creator's budget, technical comfort level, and desired workflow.
Getting Started for Free: A Deep Dive into Audacity and GarageBand
For the budget-conscious beginner, two free options stand out as exceptionally capable.
Audacity has long been the most popular free, open-source DAW for podcasters.21 Its key advantages are that it costs nothing and is cross-platform, running on Windows, macOS, and Linux.21 Despite its somewhat dated and potentially intimidating user interface, Audacity is a powerful multi-track editor packed with enough features to produce a professional-sounding podcast.19 It supports high-quality recording and offers a wide array of built-in effects for noise reduction, equalization, and compression. The vast online community provides a wealth of free tutorials, making it accessible for those willing to invest some time in learning its functions.21
GarageBand is the ideal free choice for creators within the Apple ecosystem, as it comes pre-installed on every Mac and is also available on iPhone and iPad.21 Its primary strength is its intuitive and user-friendly interface, which makes the recording and editing process remarkably straightforward for beginners.21 GarageBand includes podcast-specific templates, allows for multi-track recording, and provides a library of royalty-free music and sound effects that can be easily dragged and dropped into a project.21 While its functionality is more limited than professional DAWs, it is more than sufficient for most podcasting needs and offers a seamless workflow for Mac users.26 The only significant drawback is its exclusivity to Apple devices.21
The Professional Standard: When to Consider Adobe Audition or Reaper
As a podcaster's skills and ambitions grow, they may consider upgrading to a professional-grade DAW that offers more advanced features and a more efficient workflow.
Adobe Audition is widely regarded as the industry gold standard for podcast and broadcast production.21 As part of the Adobe Creative Cloud suite, it is a paid subscription service. Its strength lies in its specialized toolset designed for working with spoken word audio. Features like the Spectral Frequency Display allow for surgical precision in removing unwanted sounds (like a cough or a door creak), while its powerful adaptive noise reduction and restoration tools can salvage challenging recordings.21 While it has a steeper learning curve than free options, Audition is an investment for creators who are serious about achieving the highest possible audio quality and want a platform that can grow with them.21
Reaper is another highly respected professional DAW that offers immense power and flexibility at a remarkably affordable price (a one-time fee of $60 for a discounted license).24 It is a full-featured multi-track audio and MIDI production suite that is praised for its stability, customizability, and efficient performance. While its interface can be complex for a newcomer, its capabilities are on par with much more expensive software, making it a favorite among audio professionals and serious hobbyists who want maximum control without a recurring subscription.24
The Rise of AI and Simplicity: Text-Based Editing and Automated Platforms
A new generation of podcasting software is emerging, designed to minimize technical complexity and accelerate the production workflow through automation and artificial intelligence.
Descript has pioneered a revolutionary approach to audio and video editing. Instead of manipulating waveforms on a timeline, users edit a highly accurate, automatically generated transcript.19 Deleting a word or sentence in the text removes the corresponding audio or video segment. This text-based workflow is incredibly intuitive, especially for creators who are more comfortable with writing than with traditional audio engineering.24 Descript also includes powerful AI features like "Studio Sound" for audio enhancement and "Overdub" for correcting mistakes by typing new words in the user's own synthesized voice.
Alitu is designed as an "all-in-one" podcast-making tool that automates the most tedious parts of production.25 A user can record a solo episode or a remote interview directly within the platform. Alitu then automatically processes the audio, applying noise reduction, equalization, and volume leveling to ensure consistency and clarity.25 Its simple editor allows for easy removal of mistakes and the addition of music and segments. Alitu even includes podcast hosting and transcription services, creating a complete end-to-end solution for creators who want to focus entirely on their content, not the technical details of production.25
The current software landscape reveals a split into two distinct philosophies. Traditional DAWs like Audacity and Audition are tool-centric. They provide a powerful but neutral set of tools, requiring the user to learn them and assemble them into a functional workflow. The user is the master technician. In contrast, newer platforms like Alitu and Descript are workflow-centric. They abstract away the granular technical tools to provide a streamlined, opinionated, end-to-end production process. The platform acts as the master technician. This shift reflects a change in the primary bottleneck for creators. Historically, the challenge was access to professional tools. Now, with powerful free DAWs widely available, the bottleneck has become time and technical expertise. Workflow-centric platforms are a direct response to this new reality, succeeding not by offering more features, but by collapsing a complex, multi-stage process into a single, highly automated environment.
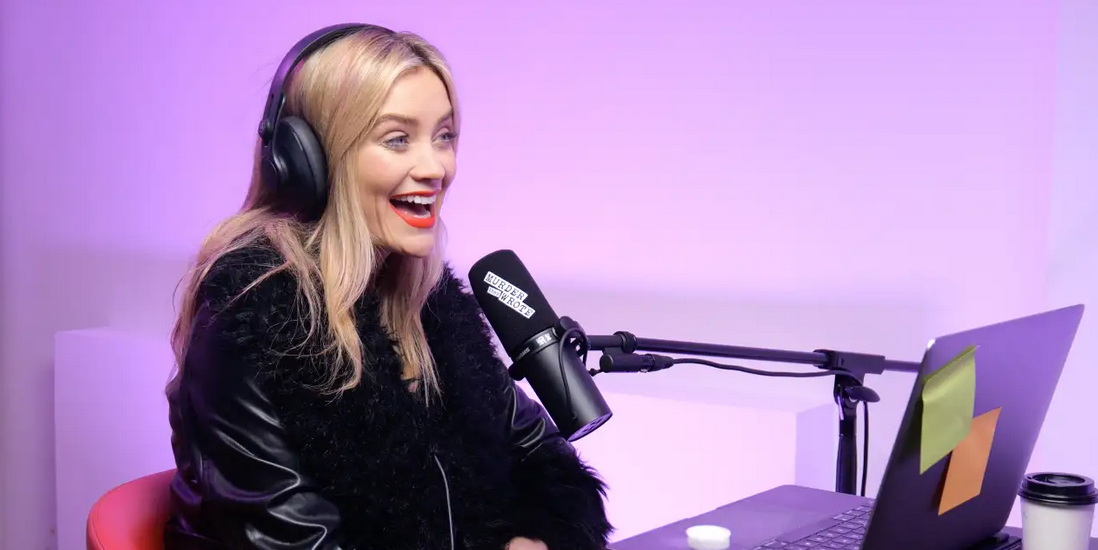
Finchley Studio (Gathering): book this setup for your podcast
Section 4: Expanding Your Capabilities: Audio Interfaces and Mixers
To move beyond the limitations of a single USB microphone and unlock the flexibility and quality of an XLR-based setup, additional hardware is required. This section demystifies the roles of audio interfaces and mixers, the essential components for any multi-host or professional-grade podcast studio.
Making the Leap to XLR: An Introduction to Audio Interfaces
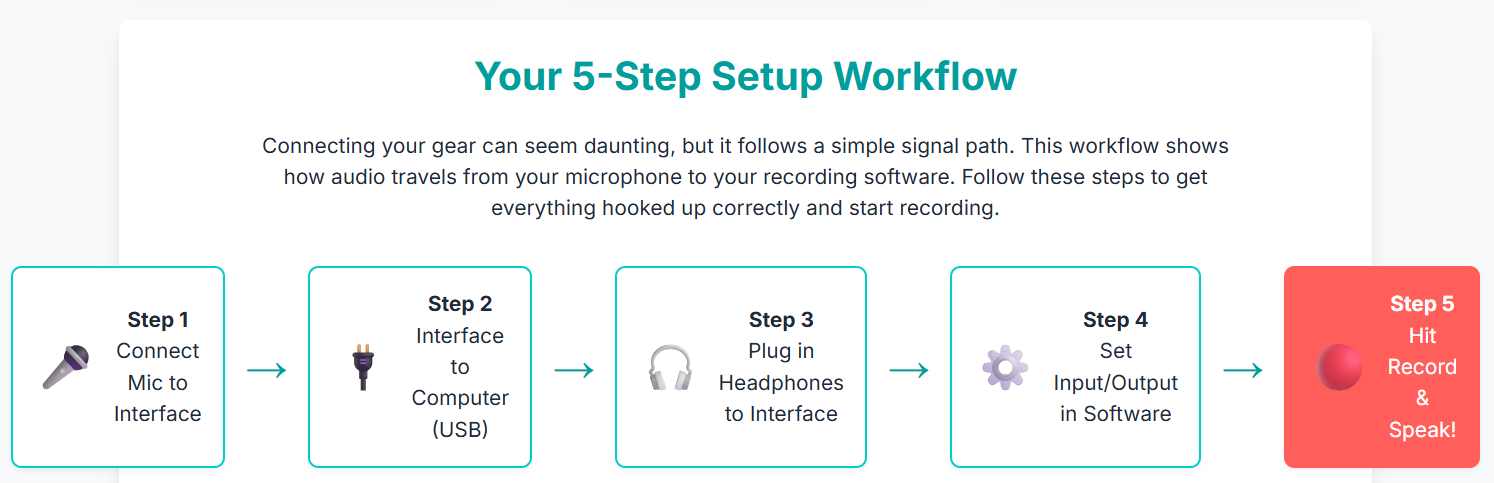
An audio interface is a device that acts as the crucial bridge between an analog XLR microphone and a digital computer.10 It performs two essential functions. First, it contains a preamplifier (preamp), which takes the very weak electrical signal from the microphone and boosts it to a stronger, more usable level known as "line level." Second, it houses an analog-to-digital converter (ADC), which translates that amplified analog signal into the binary language of ones and zeros that a computer can understand and record.10
When selecting an interface for a beginner podcasting setup, there are several key features to look for.28 It should have at least two XLR inputs to accommodate a host and a guest. It must provide +48V phantom power, which is necessary to operate condenser microphones.28 Finally, a direct monitoring feature is highly desirable, as it allows the user to hear the microphone's signal directly through their headphones with zero latency, which is critical for a natural-sounding performance.29
The Focusrite Scarlett 2i2 is consistently and overwhelmingly recommended as the best all-around audio interface for beginners.28 It is praised for its high-quality preamps, which provide clean and clear audio, its rugged build, and its ease of use. Other excellent options include the Audient iD4 MkII, noted for its exceptional preamps and value, and the Behringer U-Phoria UMC22, which offers a solid entry-level option for those on the tightest of budgets.28
Multi-Host Mastery: The Power of a Podcast-Specific Mixer/Recorder
While an audio interface is designed primarily to get audio into a computer for recording, a podcast mixer/recorder is often a more powerful, all-in-one solution for multi-person shows. These devices are purpose-built for the specific needs of podcasters and function as standalone production studios, often capable of recording directly to an SD card without needing to be connected to a computer.11
The market has seen the rise of the "podcast appliance"—a single, user-friendly box that integrates the functions of multiple traditional audio components. A traditional setup for a multi-host show would require separate microphones, a mixer, a headphone amplifier, and a digital recorder, a complex and intimidating prospect for a non-engineer. Devices like the Zoom PodTrak P4 and Rodecaster Pro II combine all these functions into one intuitive package.1 They typically offer four or more XLR inputs, a dedicated headphone output with individual volume control for each participant, built-in sound pads for playing intros, outros, and sound effects live, and seamless integration for recording remote guests over the phone or internet (a feature known as mix-minus).
This integration dramatically lowers the technical barrier to producing a professional, multi-host podcast. The Zoom PodTrak P4 is an exceptional entry point into this category, offering four XLR inputs and immense flexibility for under $150, making it the ideal upgrade from a basic two-channel interface.18 For those with a larger budget seeking the ultimate podcast production hub, the Rodecaster Pro II and the Tascam Mixcast 4 represent the premium, feature-rich end of the market.34
Data source: aljazeera.com
Connecting with the World: Platforms for Recording Remote Interviews
Recording interviews with remote guests is a staple of modern podcasting. While standard video conferencing tools like Zoom or Skype are ubiquitous, they are not ideal for high-quality podcast recording. These platforms heavily compress audio to conserve bandwidth, which can result in a thin, digitized, and unprofessional sound.27
To solve this problem, specialized remote recording platforms have been developed. Services like Riverside, Zencastr, and SquadCast use a technology often referred to as "double-ender" recording.1 Instead of recording the compressed audio that is transmitted over the internet, these platforms record each participant's audio (and video) locally on their own computer in high quality. After the call is finished, these pristine local recordings are automatically uploaded to the cloud. This process makes the final recording quality completely independent of the stability or speed of anyone's internet connection, eliminating the risk of glitches, dropouts, or lag ruining the audio.27
Among these platforms, Riverside is frequently highlighted for its ability to capture uncompressed audio and up to 4K video, making it a top choice for video podcasters.1 Zencastr is praised for its user-friendly interface and integrated monetization and hosting tools, while SquadCast is also a leading contender known for its excellent audio fidelity.21 For those on a strict budget, Cleanfeed offers a free tier that provides high-quality audio recording through a web browser.27
Part III: Mastering Your Environment
While creators often fixate on microphones and software, the most neglected—and arguably most important—component of the audio chain is the recording space itself. An expensive microphone in a bad-sounding room will produce a bad-sounding recording. This part provides a practical, actionable guide to understanding and treating room acoustics, transforming an echo-filled space into a functional environment for capturing clean, professional audio.
Section 5: The Room Is Your Instrument: A Practical Guide to Acoustics
The room is not a passive container for sound; it is an active instrument that shapes every word spoken into the microphone. Understanding its behavior is the key to achieving professional audio quality.
Why Your Room Matters More Than Your Mic
When a person speaks, sound waves travel outward in all directions. In a typical room with hard surfaces like drywall, windows, hardwood floors, and ceilings, these sound waves bounce around. The microphone captures not only the direct sound from the speaker's mouth but also thousands of these reflections arriving a few milliseconds later from every surface in the room. This collection of reflections is what we perceive as echo (distinct, delayed sounds) and reverberation (a dense wash of overlapping reflections).9 This "room sound" makes a recording sound distant, hollow, and unprofessional. It is also extremely difficult to remove in post-production, as the room's sonic signature becomes baked into the vocal track.
The goal of acoustic treatment is to control these reflections. This is achieved through two primary methods: absorption and diffusion.39 Absorption involves using soft, porous materials (like foam, fiberglass, or thick blankets) to trap sound energy and convert it into a tiny amount of heat, effectively killing the reflection.39 Diffusion uses irregularly shaped surfaces (like a bookshelf filled with books or a purpose-built wooden diffuser) to scatter the sound energy in many different directions, breaking up strong, direct reflections without making the room sound completely acoustically "dead".39 For a beginner's vocal recording space, absorption is the highest priority.9
The Beginner's Toolkit: DIY Sound Treatment on a Budget
Effective acoustic treatment does not have to be expensive. Significant improvements can be made using common household items and a strategic approach.
The simplest first step is to fill the recording space with soft, sound-absorbing objects. Laying down a thick carpet or area rug on a hard floor can drastically reduce floor-to-ceiling reflections. Hanging heavy curtains or drapes over windows serves a similar purpose.11 A bookshelf filled with books of varying sizes and depths can act as an excellent, and functional, sound diffuser.41
For more targeted absorption, hanging heavy moving blankets on the walls is a highly effective and budget-friendly solution.11 These can be hung from temporary stands (like C-stands) or curtain rods to treat the reflection points around the recording position. Even thick towels can make a noticeable difference.43
A common piece of beginner advice is to record in a clothes-filled closet.19 While the clothing does provide excellent sound absorption, this is often a misguided strategy. Closets are typically very small, and the close proximity of the walls can create a "boxy," unnatural, and claustrophobic sound that is just as undesirable as excessive reverb.9 A larger room treated with blankets will almost always yield a more natural and professional-sounding result. As one expert source strongly advises: "Don't record in a closet. So many people do this, and it never sounds good".9
For the more ambitious DIYer, building professional-style acoustic panels is the most cost-effective path to high-performance treatment. These typically consist of a simple wooden frame filled with a slab of rigid mineral wool insulation (such as Rockwool or Owens Corning 703) and wrapped in a breathable fabric.41 These panels are far more effective at absorbing a wider range of frequencies than foam or blankets and can be built for a fraction of the cost of commercial equivalents.
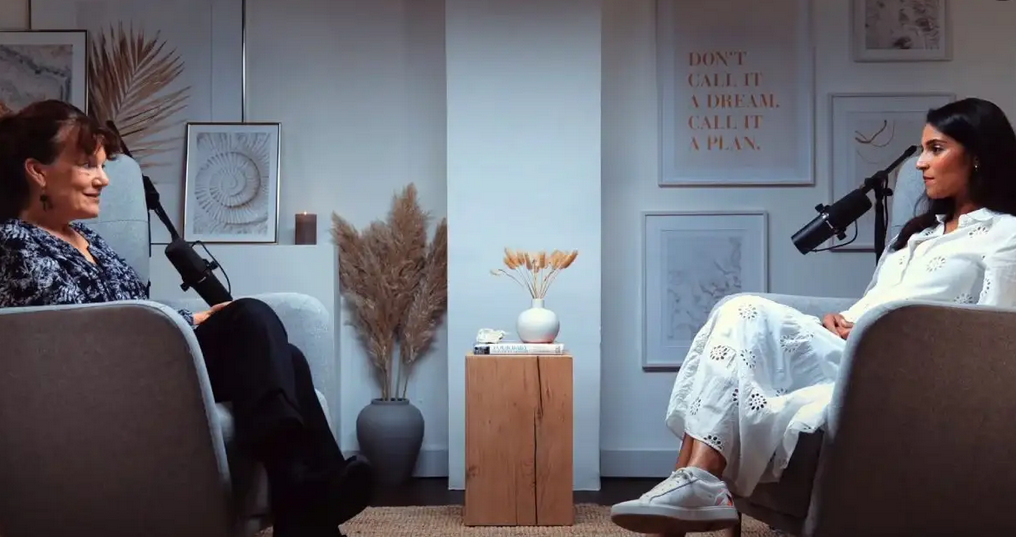
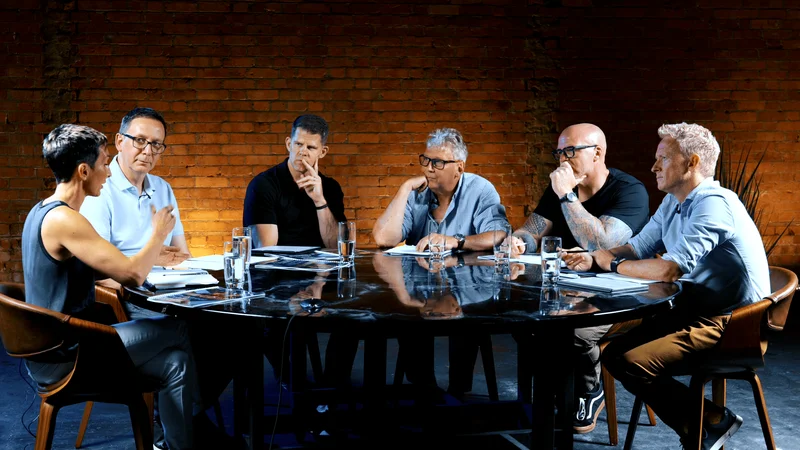
Finchley Studio (Dialogue set): book this setup for your podcast
Investing in Silence: An Overview of Commercial Acoustic Solutions
For those who prefer a ready-made solution, a variety of commercial acoustic products are available. It is important to distinguish between cheap acoustic foam squares and professional acoustic panels. While the thin, egg-crate style foam found on Amazon can help tame some high-frequency flutter echo, it is largely ineffective at absorbing the mid and low-range frequencies where the human voice has most of its body.9
Professional acoustic panels, made from dense fiberglass or mineral wool, are significantly more effective across the entire vocal spectrum.40 Other key product types include bass traps, which are thicker panels designed specifically to be placed in the corners of a room where low-frequency energy builds up, and diffusers, which are used to scatter sound and maintain a sense of spaciousness in the room.39
Navigating the world of commercial acoustics can be daunting. To eliminate guesswork, companies like GIK Acoustics offer free, professional acoustic advice. A customer can submit the dimensions and photos of their room, and an expert will recommend a specific treatment plan tailored to their space and budget, ensuring an effective and efficient investment.38
Common Environmental Mistakes and How to Avoid Them
Many beginners fall into common traps that degrade their audio quality. Avoiding these pitfalls is as important as buying the right gear.9
DON'T record in a closet or under a blanket. The resulting sound is often boxy and muffled.
DON'T record directly next to hard, reflective surfaces like windows, bare walls, or large computer monitors. These create harsh reflections that make the audio sound thin and phasey.
DON'T record with air conditioners, fans, refrigerators, or other noisy appliances running in the background. This introduces noise that is difficult to remove.
DO use a directional (cardioid) microphone to help reject off-axis sound and room noise.
DO introduce as much sound absorption into the room as possible, even if it's just temporary blankets and pillows to start.
DO follow the 3-to-1 rule when recording multiple people in the same room, if space allows: the distance between the microphones should be at least three times the distance from each speaker to their respective microphone. This minimizes bleed between mics.
The prevalence of poor advice online represents a significant challenge for beginners. Solutions that seem "good enough," like recording in a closet, often solve one obvious problem (high-frequency echo) while creating a less obvious but equally detrimental one (a boxy, resonant sound). Effective acoustic treatment is not simply about "echo reduction" but about achieving a balanced, controlled sound across the full frequency spectrum.
Part IV: The Visual Dimension - Entering the World of Video Podcasting
Adding a video component to a podcast is a powerful way to expand reach on platforms like YouTube and Spotify, offering audiences a more engaging and personal connection to the content. Creating a professional-looking video podcast does not require a Hollywood budget. In fact, the barrier to entry is lower than ever, provided the creator focuses on the right elements.
Section 6: Choosing Your Lens: A Guide to Video Podcast Cameras
The camera is the most obvious component of a video setup, but it is not necessarily the most important. Excellent lighting can make a budget camera look great, while poor lighting will make an expensive camera look terrible.
Starting Smart: Leveraging Your Smartphone and Webcam
For the absolute beginner, the best camera is often the one they already own.
Smartphones manufactured in recent years are equipped with remarkably capable camera systems. Devices like the iPhone 11 Pro or Samsung Galaxy S20 (and their subsequent models) can capture high-quality 4K video that is more than sufficient for a professional-looking podcast.1 The key to using a smartphone effectively is to take it out of your hand. It must be mounted on a stable tripod to eliminate shaky footage and ensure a consistent frame.20
Webcams are another accessible entry point. While the camera built into a laptop is a bare-minimum option, a high-quality external webcam like the Logitech Brio 4K offers a significant improvement in image quality.37 Webcams are particularly well-suited for remote interview podcasts where each participant is capturing their own video feed.
The Quality Upgrade: Introduction to Mirrorless and DSLR Cameras
To achieve a more cinematic and professional look, creators can upgrade to a dedicated mirrorless or DSLR camera. The primary advantages of these cameras are their larger image sensors and interchangeable lenses.47 A larger sensor performs much better in low-light conditions, producing a cleaner image with less grain. The ability to use different lenses provides creative control; for example, using a lens with a wide aperture (e.g., f/1.8) can create a shallow depth of field, resulting in a beautifully blurred background that makes the subject pop.
When selecting a dedicated camera specifically for video podcasting, several features are critical:
Clean HDMI Out: This allows the camera to send a video signal to a computer or video switcher without any of the camera's interface overlays (like battery life or settings) appearing on the screen.
Continuous Power: The camera must be able to run on AC power, typically via an accessory called a "dummy battery," to prevent the real battery from dying during a long recording session.51
No Recording Limit/Overheating: Many cameras designed primarily for still photography will automatically stop recording video after 29 minutes to avoid overheating and tax classifications. A good podcasting camera must be able to record continuously without shutting down.51
Articulating Flip Screen: A fully articulating screen is essential for solo creators, as it allows them to see themselves while recording to ensure proper framing and focus.51
Reliable Autofocus: A fast and accurate autofocus system with face and eye detection is crucial to keep the speaker sharp without any manual adjustments.49
External Microphone Input: A 3.5mm microphone jack is non-negotiable for connecting a high-quality external microphone and bypassing the camera's inferior internal mic.49

Finchley Studio (White Infinity Cove): book this setup for your podcast
Camera Recommendations for Every Budget
Entry-Level Mirrorless: The Sony ZV-E10, Canon EOS M50, and Panasonic LUMIX G7 are consistently recommended as fantastic starting points for video podcasters. They offer an excellent balance of image quality, essential video features, and affordability.1
Premium Options: For those with a larger budget seeking top-tier quality, cameras like the Sony ZV-1, Sony A7 series, or Fujifilm X-S20 provide professional-level results and greater flexibility.49
Section 7: Painting with Light: A Primer on Video Lighting
Proper lighting is the single most important factor in achieving a professional video look. It is more impactful than the choice of camera. A well-lit smartphone video will always look better than a poorly-lit video from a high-end cinema camera.
The Fundamentals of Three-Point Lighting
Three-point lighting is the classic standard for illuminating a subject in video and photography. It consists of three distinct light sources:
Key Light: This is the main and brightest light source. It is typically placed at a 45-degree angle to the subject and slightly above eye level, illuminating one side of their face and creating shape and dimension.54
Fill Light: This is a secondary, less intense light placed on the opposite side of the subject from the key light. Its purpose is to "fill in" the dark shadows created by the key light, reducing contrast and revealing detail on the other side of the face.54
Backlight: Also known as a rim light or hair light, this is placed behind the subject, often pointing down at their head and shoulders. It creates a subtle outline of light that separates the subject from the background, adding depth and preventing them from looking like a flat cardboard cutout.54
A beginner does not need to start with all three lights. A great look can be achieved with just a single key light, using a simple white foam board or a reflector to bounce some of that light back onto the shadow side of the face, acting as a fill.55
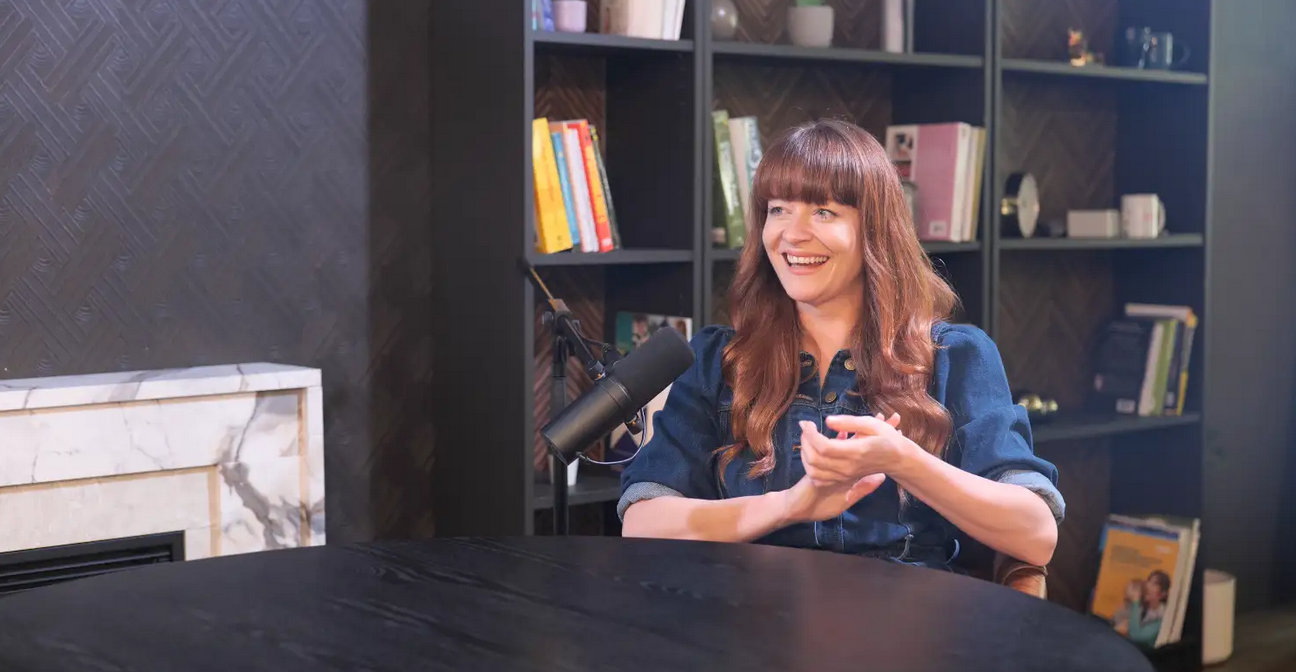
Finchley Studio (CEO Set): book this setup for your podcast
Gear Guide: From Budget Ring Lights to Professional LED Panels
Natural Light: The best and cheapest light source is a large, soft window. Positioning the desk and camera so the podcaster is facing the window will provide beautiful, flattering, and free illumination.37
Ring Lights: A ring light is a popular and affordable starting point for many creators. It produces a soft, direct, and relatively shadowless light that is very flattering for faces. Many models also include a built-in phone mount, making them a convenient two-in-one solution.37
LED Panels and Softboxes: The next step up in quality and control involves using LED panel lights. To create a soft, pleasing light, these panels should be paired with a softbox. A softbox is a fabric enclosure that fits over the light, increasing its surface area and diffusing the output, which mimics the quality of natural window light.20 Brands like Godox, Aputure, and Neewer offer excellent and affordable options.55
Color Temperature: When choosing LED lights, it is important to select bi-color models that allow for adjustable color temperature, measured in Kelvin (K). This allows the creator to match the color of their lights to the ambient light in the room or to create a specific mood. For a natural, clean daylight look, a setting between 5000K and 6500K is recommended.54
Creating Mood and Professionalism Through Light
Lighting is not just about visibility; it is about storytelling and branding. The quality and color of light can profoundly affect the mood and atmosphere of the podcast. Soft, warm-toned lighting (around 3200K) can create a cozy, intimate, and inviting feel. Bright, cool, neutral-toned lighting (around 5600K) can evoke a more professional, clean, and clinical atmosphere.54
In addition to lighting the subject, creators should also consider lighting the background. Adding small, practical lights, such as a colored LED strip behind a bookshelf or a stylish lamp in the corner of the shot, can add depth, color, and visual interest to the set, making it look more dynamic and professional.59
Section 8: Bringing It All Together: Video Production Essentials
With camera and lighting choices made, a few final components are needed to complete the video production setup and ensure a smooth, professional workflow.
Stability and Framing: Tripods, Mounts, and Composition
Stable footage is a hallmark of professional video. A tripod is therefore a non-negotiable piece of equipment; hand-holding a camera is not a viable option for a podcast.20 For those with limited desk space, a C-stand that clamps to the edge of the desk can be an excellent alternative for mounting a camera or microphone.47
Beyond stability, thoughtful composition is key to creating a visually engaging shot. The camera should typically be placed at the subject's eye level.20 A basic compositional guideline is the "rule of thirds," where the frame is imagined as a 3x3 grid. Placing the subject's eyes along the top horizontal line and their body along one of the vertical lines often creates a more balanced and visually appealing image than centering them directly in the frame.
Going Live and Multi-Cam: An Introduction to Video Switchers and Software
For podcasters looking to create a more dynamic show with multiple camera angles or to stream their episodes live, a video switcher is the central tool. A switcher allows the producer to cut between different video sources (such as multiple cameras, a computer screen for presentations, or pre-recorded video clips) in real-time, just like a live television broadcast.
This can be accomplished with a hardware device, like the popular and affordable Blackmagic Design ATEM Mini, which allows for switching between up to four HDMI camera inputs.1 Alternatively, software solutions can achieve the same result. OBS Studio is a powerful, free, and open-source application that can mix various video sources, add graphics and lower thirds, and stream directly to platforms like YouTube and Twitch.60 Other user-friendly software options like vMix and Switcher Studio offer professional switching capabilities, with Switcher Studio even allowing a collection of iPhones and iPads to be used as a wireless multi-camera production system.61
The consistent recommendation to start with a smartphone for video podcasting highlights a significant democratization in video production. The barrier to entry for high-quality video is no longer the cost of the camera but the application of knowledge, particularly in lighting and composition. The bottleneck for achieving a professional look has shifted from hardware acquisition to skill acquisition. A beginner's budget is often better spent on a good, versatile lighting kit than on an immediate camera upgrade, as lighting will have a far greater impact on the final image quality.
Part V: Strategic Blueprints for Your Studio
This final part synthesizes all the preceding information into concrete, actionable plans. It provides curated equipment lists tailored to different budgets and ambitions, offering clear and logical pathways for beginners to start their podcasting journey and scale their studio over time.
Section 9: Assembling Your Kit: Curated Setups by Budget and Ambition
The following tables present itemized equipment lists for four distinct studio setups, from a minimal-investment solo audio kit to a professional-grade audio and video production suite. These blueprints serve as practical shopping lists, removing the guesswork and allowing creators to align their investment with their financial commitment and production goals.
Table 5: Curated Audio-Only Studio Packages
Table 6: Curated Video-Enabled Studio Packages
Section 10: The Podcaster's Growth Trajectory
Launching a podcast is a journey, not a single event. A strategic approach to growth involves upgrading equipment and capabilities in a logical sequence that aligns with the evolution of the content itself.
Your First Year: A Recommended Upgrade Path
A sensible growth trajectory prioritizes content needs over gear acquisition for its own sake.
Phase 1 (Months 1-3: Launch & Consistency): Begin with the "Solo Powerhouse" audio setup. The primary goal is to establish a consistent production schedule and find a content rhythm. The focus should be 100% on the quality of the content and mastering the basics of recording and editing, not on accumulating gear.
Phase 2 (Months 4-9: Content Expansion): Once the show has gained traction and a small audience, the first logical expansion is to incorporate other voices. This is the time to upgrade to the "Two-Host Talk Show" setup, centered around a device like the Zoom PodTrak P4. This new capability allows for in-person co-hosts and remote interviews, fundamentally expanding the types of content that can be created. Concurrently, acoustic treatment should be improved, moving from temporary DIY solutions to more permanent and effective panels.
Phase 3 (Months 10-12: Adding Visuals): When the audio workflow is solid and the audience is growing, expanding to video is the next frontier. Start with the "Video Starter" kit, leveraging a smartphone and investing primarily in good lighting. The goal is to master the fundamentals of lighting and composition before spending significant money on a dedicated camera.
Phase 4 (Year 2 and Beyond: Professionalization): As the podcast evolves from a passion project into a serious venture or business, it is time to invest in the "Pro-Level" components. This includes upgrading to a high-quality mirrorless camera system, professional microphones, and a premium mixer like the Rodecaster Pro II. This phase is about refining the quality and workflow to a professional broadcast standard.
This upgrade path is guided by a "content-first" principle. Gear acquisition should be a reaction to a content need, not an end in itself. The studio is not the product; it is the factory that builds the product, which is the content. The factory should only be expanded when the product line demands it.
Beyond the Studio: Essential Hosting and Distribution
The final step in the podcasting process occurs after the episode is recorded and edited. The finished audio file must be uploaded to a dedicated podcast hosting service, such as Libsyn, Buzzsprout, or Castos.19 This service stores the media files and generates an RSS feed, which is a standardized web feed that contains all the information about the podcast and its episodes. This RSS feed is what is submitted to directories like Apple Podcasts, Spotify, and Google Podcasts. When a listener subscribes to a show, their app is actually reading this RSS feed to find and download new episodes. This final, crucial step takes the content created in the studio and delivers it to the world.
Now that you have a comprehensive guide to getting started, the next step is to choose a studio that makes the process simple, professional, and stress-free for beginners. At Finchley Studio, we specialise in providing a supportive, full-service environment that removes the technical guesswork, so you can focus on creating great content. We're proud to be trusted by industry leaders like the BBC and Lloyds bank, and we bring that same level of professionalism to every creator we work with.
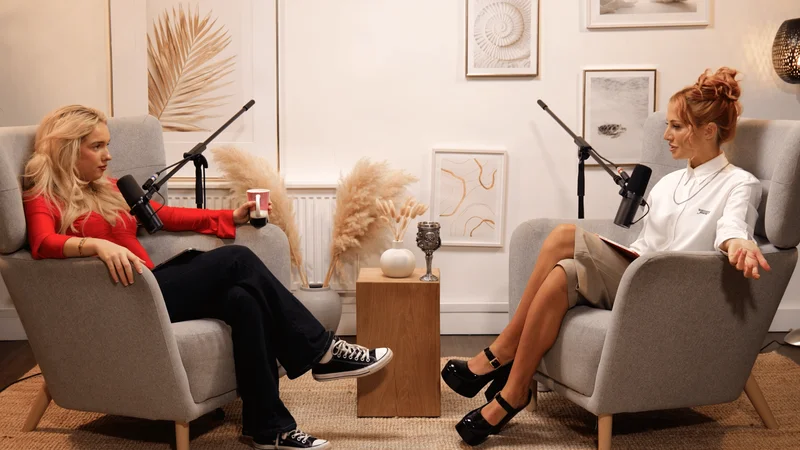
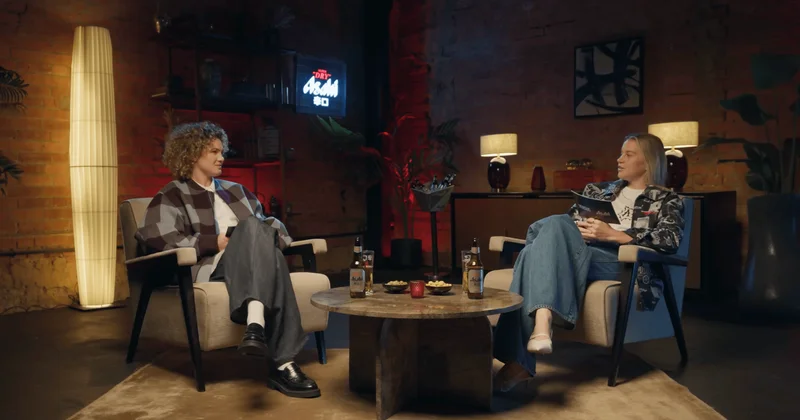
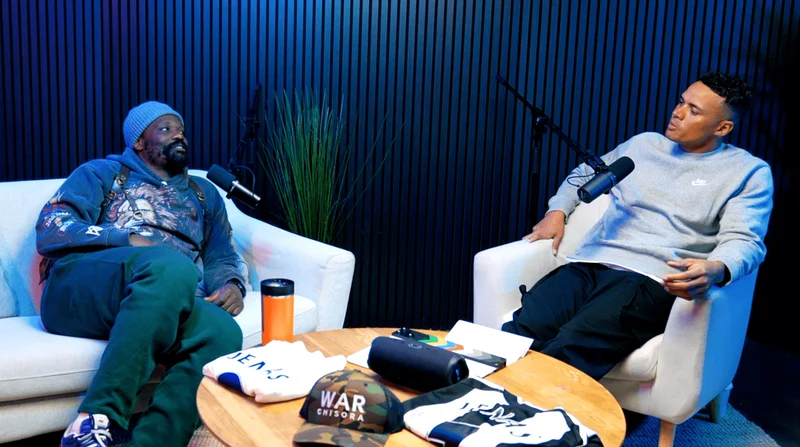
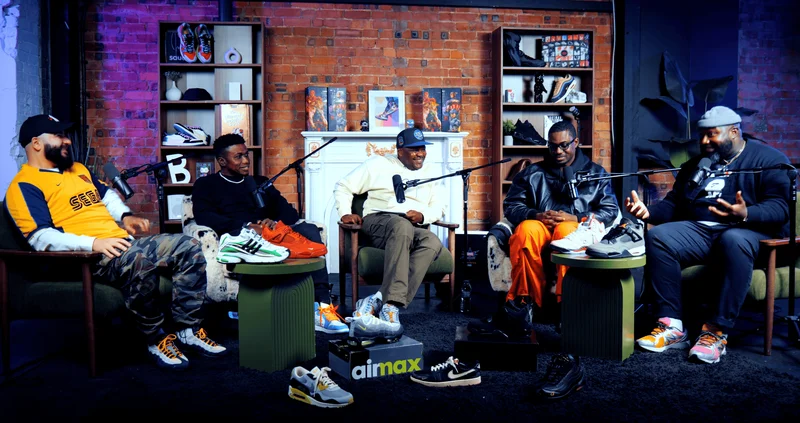
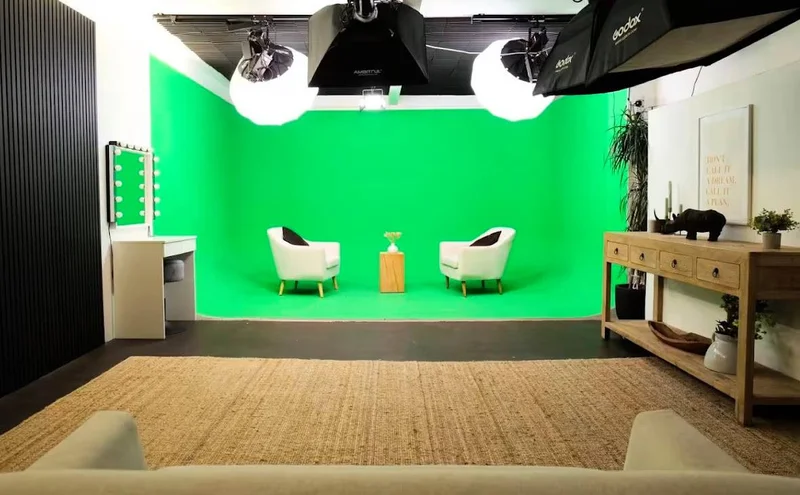
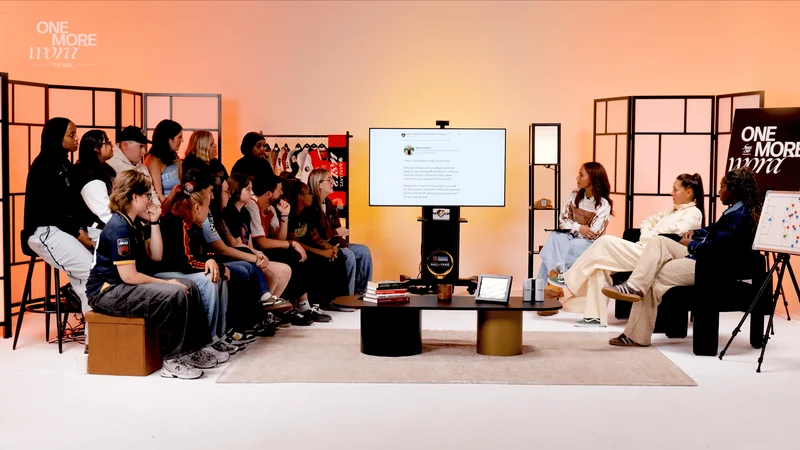
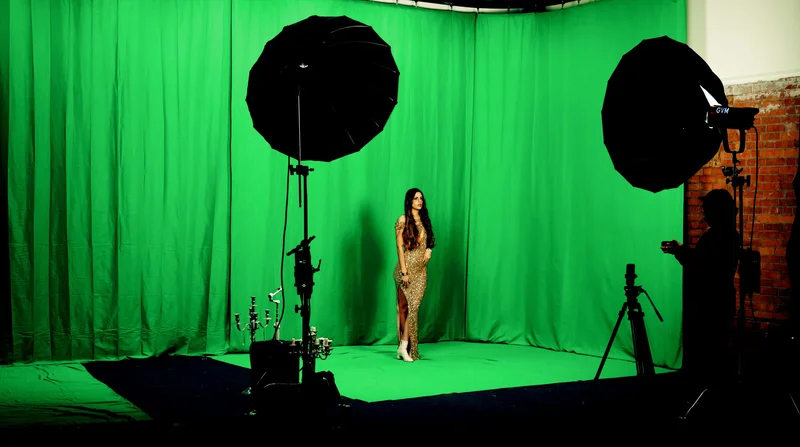
As a beginner, finding the right look and feel for your show is essential. We offer a wide variety of specialised sets to match any vision. For engaging, conversation-led podcasts, you can choose from our intimate Dialogue Room, the relaxed LOUNGE STUDIO, the sophisticated Blackwood Studio, or the premium CEO SET. For larger discussions or a corporate feel, we have the spacious GATHERING STUDIO. If your project requires creative flexibility, you can explore our Green Screen Cove, the industrial-chic THE BRICK STUDIO, the flawless White Infinity Cove, the dramatic BLACKOUT SET, or even our GIANT GREEN SCREEN.
Our support for beginners doesn't end when you finish recording. We can help you perfect your content with our professional Video Editing Service, transforming your raw footage into a polished episode ready for your audience. See what other creators have to say about their experience by checking our outstanding reviews on Google review and Trust Pilot. With a reputation for helping new podcasters launch successfully, Finchley Studio is the perfect partner for your creative journey.
Ready to take the first step from guide to creator? Explore our spaces and find the perfect home for your new podcast. The team at Finchley Studio is here to help you get started with a professional, high-quality production. Your podcasting journey starts here, so Book now and let's create something incredible together.
Our studio is conveniently located just two minutes from Finchley Central station on the Northern Line. We provide one free parking space per booking, and for those travelling, we are located adjacent to the Travelodge London Finchley. You can find us easily using Google map, Apple maps, [suspicious link removed], or at our precise What 3 Words address: orders.yards.jokes.
Stay connected with us and see behind-the-scenes content on Instagram, YouTube, TikTok, LinkedIn, and X (Twitter).
If you have any questions, please check our FAQ or get in touch directly via WhatsApp, call us on +447587827200, or send an Email. We look forward to welcoming you to Finchley Studio.
Works cited
Best Podcast Equipment for Beginners & Pros in 2025 - All Budgets - Riverside, accessed October 16, 2025, https://riverside.com/blog/podcast-equipment
Essential Podcast Equipment Guide: From Beginners to Pros (2025) - NearStream, accessed October 16, 2025, https://www.nearstream.us/blog/essential-podcast-equipment-guide
Dynamic vs Condenser Microphones : r/podcasting - Reddit, accessed October 16, 2025, https://www.reddit.com/r/podcasting/comments/1ec7dpc/dynamic_vs_condenser_microphones/
Dynamic vs condenser mics: which captures better content? - JOBY, accessed October 16, 2025, https://joby.com/us-en/creator-journal-blog/dynamic-condenser-microphones-guide/
Podcast Microphones: Dynamic vs. Condenser, USB vs. XLR, and more! - YouTube, accessed October 16, 2025, https://www.youtube.com/watch?v=whL_nS46lRQ
Dynamic vs Condenser Microphones, What's the Difference? I found this video helpful for when I was doing research into what type microphone to buy. : r/podcast - Reddit, accessed October 16, 2025, https://www.reddit.com/r/podcast/comments/bv8f4u/dynamic_vs_condenser_microphones_whats_the/
Dynamic vs. Condenser Mics – Which One is Best for You? - YouTube, accessed October 16, 2025, https://www.youtube.com/shorts/14SdvQ7pP8w
Dynamics vs. Condenser Mic: What's the Difference (PGOA 1.2) - Podcastage, accessed October 16, 2025, https://podcastage.com/rev/pgoa12
How to Set Up a Podcast Studio - iZotope, accessed October 16, 2025, https://www.izotope.com/en/learn/how-to-set-up-a-podcast-studio
USB vs. XLR Microphones for Content Creation | Which Should You Choose? - Sweetwater, accessed October 16, 2025, https://www.sweetwater.com/insync/usb-vs-xlr-microphones-for-content-creation/
Podcast Equipment Checklist - MACKIE, accessed October 16, 2025, https://mackie.com/en/blog/all/podcast_equipment_checklist.html
What's the Difference Between an XLR and USB Mic? - Buzzsprout, accessed October 16, 2025, https://www.buzzsprout.com/blog/usb-mic-vs-xlr
Should You Use USB or XLR Mics for Your Podcast?, accessed October 16, 2025, https://oneminutepodcasttips.com/episode/usb-xlr-mic
XLR vs USB Microphone: Which is Best for Your Recording Needs? - Maono, accessed October 16, 2025, https://www.maono.com/blogs/news/xlr-vs-usb-microphone-which-is-best-for-your-recording-needs
USB vs XLR mics: which do you prefer and why? : r/podcasting - Reddit, accessed October 16, 2025, https://www.reddit.com/r/podcasting/comments/1n87fep/usb_vs_xlr_mics_which_do_you_prefer_and_why/
Starting a Podcast. XLR vs USB mics? - Reddit, accessed October 16, 2025, https://www.reddit.com/r/podcasting/comments/1bldnre/starting_a_podcast_xlr_vs_usb_mics/
Best Podcast Equipment & Setup for 2025, accessed October 16, 2025, https://www.thepodcasthost.com/equipment/podcast-equipment-guide/
Best Podcast Starter Kit for All Budgets & Formats - The Podcast Host, accessed October 16, 2025, https://www.thepodcasthost.com/equipment/minimum-equipment-podcast-starter-kit/
I am starting a podcast, what software and equipment would you recommend? - Reddit, accessed October 16, 2025, https://www.reddit.com/r/podcasting/comments/1hzdzfc/i_am_starting_a_podcast_what_software_and/
Video Podcast Equipment: Everything You Need for a Video Podcast Setup | Castos, accessed October 16, 2025, https://castos.com/video-podcast-equipment/
8 Best Podcasting Software for Beginners - Castmagic, accessed October 16, 2025, https://www.castmagic.io/post/best-podcasting-software
The Best Free Audio Editor Options for Podcasts in 2023, accessed October 16, 2025, https://www.quillpodcasting.com/blog-posts/free-podcast-editor
The Best DAW for Podcasting: Our Favorite Digital Audio Workstations - Castos, accessed October 16, 2025, https://castos.com/podcasting-daw/
The Top Podcast Editing and Recording Software for 2025 - Podigy, accessed October 16, 2025, https://www.podigy.co/top-podcast-recording-and-editing-software
Best Podcast Editing Software for Podcasters of All Levels, accessed October 16, 2025, https://www.thepodcasthost.com/editing-production/best-podcast-editing-software/
The Best Podcast Editing and Recording Software in 2025, accessed October 16, 2025, https://www.eofire.com/the-best-podcast-software/
Best Podcast Call Recording App? 8 Tools Tested & Compared!, accessed October 16, 2025, https://www.thepodcasthost.com/recording-skills/best-tools-for-recording-a-podcast-online/
Best audio interface 2025: For home recording and more | MusicRadar, accessed October 16, 2025, https://www.musicradar.com/news/the-best-audio-interfaces
4 Best Beginner Audio Interfaces for Home Studio Recording - Von Baron Music, accessed October 16, 2025, https://vonbaronmusic.com/best-beginner-audio-interfaces/
Podcast Audio Interfaces: A Comprehensive Guide, accessed October 16, 2025, https://thepodcastconsultant.com/blog/podcast-audio-interface
Essential Podcast Equipment Setup for Beginners in 2025 - Descript, accessed October 16, 2025, https://www.descript.com/blog/article/podcast-equipment-for-beginners
Best Audio Interfaces For Podcasting | 4 Options For 2024 - Charles Cleyn, accessed October 16, 2025, https://www.charlescleyn.com/blog/best-audio-interfaces-for-podcasting
Best Podcast Mixers 2025: 7 Top Options Compared, accessed October 16, 2025, https://thepodcastconsultant.com/blog/podcast-mixer
Best Podcast Mixers: Costs, Features, & Flexibility (Our Top Picks), accessed October 16, 2025, https://www.thepodcasthost.com/equipment/podcast-mixers/
The perfect podcast mixer - podcast console comparison - SoundAndGo, accessed October 16, 2025, https://soundandgo.com/en/perfect-podcast-mixer-podcast-console-comparison/
Top 5 Remote Recording Platforms for Podcasters, accessed October 16, 2025, https://independentpodcast.network/training/top-5-remote-recording-platforms-for-podcasters/
Your Complete Video Podcast Setup Guide + Tips in 2025 - Descript, accessed October 16, 2025, https://www.descript.com/blog/article/what-you-really-need-to-start-a-video-podcast
How to Set Up a Podcast Studio - iZotope, accessed October 16, 2025, https://www.izotope.com/en/learn/how-to-set-up-a-podcast-studio.html
A Beginner's Guide To Acoustic Treatment - Sound On Sound, accessed October 16, 2025, https://www.soundonsound.com/sound-advice/beginners-guide-acoustic-treatment
How to Soundproof for Podcasts: Acoustic Panels, Foam & More, accessed October 16, 2025, https://www.soundproofcow.com/soundproof-room-for-podcasts/
easy, cheap soundproofing : r/podcasting - Reddit, accessed October 16, 2025, https://www.reddit.com/r/podcasting/comments/vem2qi/easy_cheap_soundproofing/
Easy Sound Treatments for Home Podcast Studio - YouTube, accessed October 16, 2025, https://www.youtube.com/watch?v=h83TPkUgFag
What are your best recommendations for sound dampening, DIY or otherwise? : r/podcasting - Reddit, accessed October 16, 2025, https://www.reddit.com/r/podcasting/comments/15qs71n/what_are_your_best_recommendations_for_sound/
Need help with acoustic treatment/building suggestions : r/podcasting - Reddit, accessed October 16, 2025, https://www.reddit.com/r/podcasting/comments/1j3fotp/need_help_with_acoustic_treatmentbuilding/
Recording - Home studio soundproofing and DIY acoustic room treatment - Cafe Saxophone, accessed October 16, 2025, https://cafesaxophone.com/threads/home-studio-soundproofing-and-diy-acoustic-room-treatment.36868/
Acoustic Treatment Solutions: Panels, Bass Traps & Diffusers | GIK Acoustics, accessed October 16, 2025, https://www.gikacoustics.com/
Everything you need for a video podcast setup - Videomaker, accessed October 16, 2025, https://www.videomaker.com/how-to/shooting/camera-equipment/everything-you-need-for-a-video-podcast-setup/
Video Podcast Equipment: Video Starter Kit Essentials (2025) - Riverside, accessed October 16, 2025, https://riverside.com/blog/video-podcast-equipment
10 Best Podcast Cameras in 2025 - OBSBOT, accessed October 16, 2025, https://www.obsbot.com/blog/camera/podcast-camera
The Best Cameras for Podcasting and How to Choose the Right One - Castos, accessed October 16, 2025, https://castos.com/best-cameras-for-podcasting/
Best Cameras for Video Podcasting: From Consumer Gear to Professional Gear, accessed October 16, 2025, https://pss.media/blog/best-cameras-for-video-podcasting-from-consumer-gear-to-professional-gear
Cameras For Podcasting - Best Buy, accessed October 16, 2025, https://www.bestbuy.com/site/shop/cameras-for-podcasting
Best Mirrorless Cameras for Podcasting 2025 - YouTube, accessed October 16, 2025, https://www.youtube.com/watch?v=gYtgWMHz318
Podcast light: Three basics to know for better podcasts - COLBOR, accessed October 16, 2025, https://www.colborlight.com/blogs/articles/podcast-light-basics
Lighting Recommendations : r/podcasting - Reddit, accessed October 16, 2025, https://www.reddit.com/r/podcasting/comments/170s7xy/lighting_recommendations/
Lighting for Podcasts: Elevate Your Podcast with Professional Lighting Setup - Hypop, accessed October 16, 2025, https://www.hypop.com.au/blogs/blogs/lighting-for-podcasts-elevate-your-podcast-with-professional-lighting-setup
LED Lights for Podcasting | B&H Photo Video, accessed October 16, 2025, https://www.bhphotovideo.com/c/buy/led-lights-for-podcasting/ci/59166
Best LED Lights For Podcast Studios & Video Production - Lume Cube, accessed October 16, 2025, https://lumecube.com/collections/podcast-lighting
A+ Video Podcast Lighting Setup for Beginners (Complete Tour of my Studio) - YouTube, accessed October 16, 2025, https://www.youtube.com/watch?v=LrnyOrWhIsA
Open Broadcaster Software | OBS, accessed October 16, 2025, https://obsproject.com/
Switcher | Your Live Streaming Platform, accessed October 16, 2025, https://www.switcherstudio.com/
vMix: Live Video Streaming Software, accessed October 16, 2025, https://www.vmix.com/
How to Start a Video Podcast: Step-by-Step Guide & Checklist - Riverside, accessed October 16, 2025, https://riverside.com/blog/how-to-start-a-video-podcast
Best Podcasting Equipment Package (on A Budget), accessed October 16, 2025, https://podcastinghacks.com/best-podcasting-equipment-package-on-a-budget/